After discussing with our client about what they wanted the website to show, we came up with key features that the website to have:
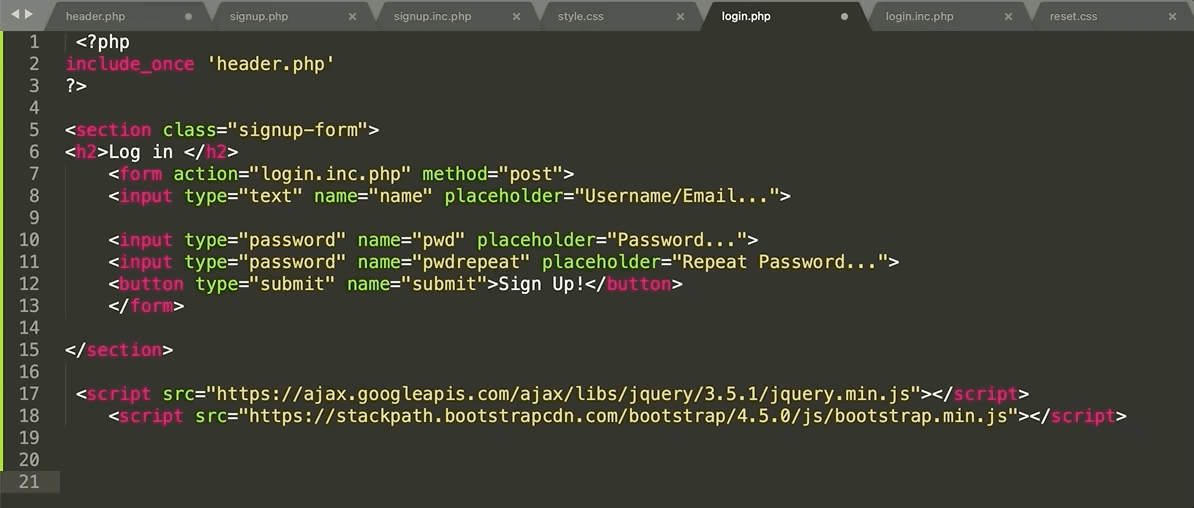
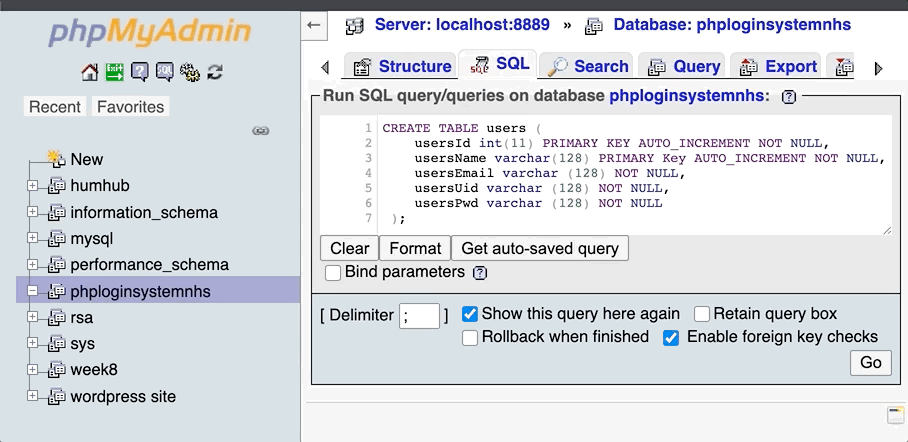
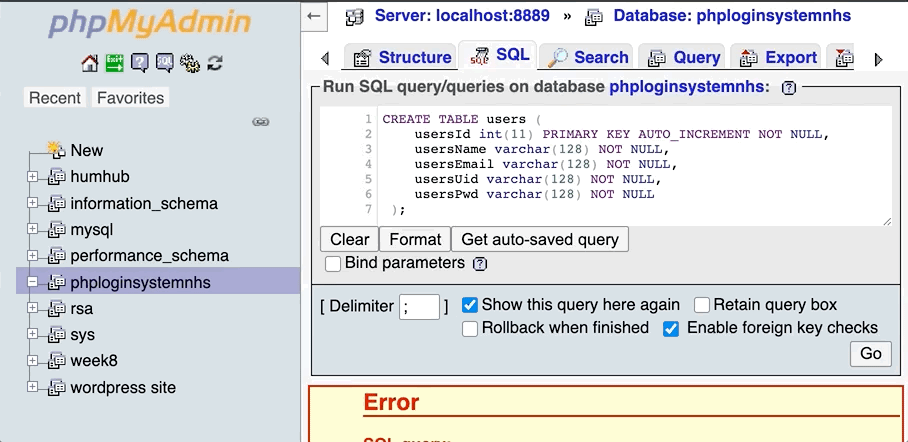
In order to get the signup functions working, i have to create the actual functions that i have referenced to in the signup.inc.php.
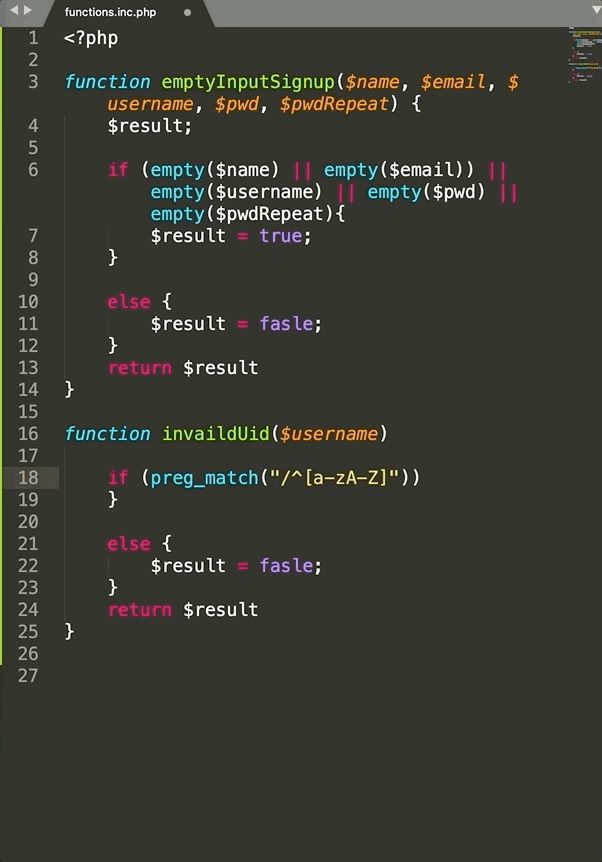
$result returns the true or false statment.
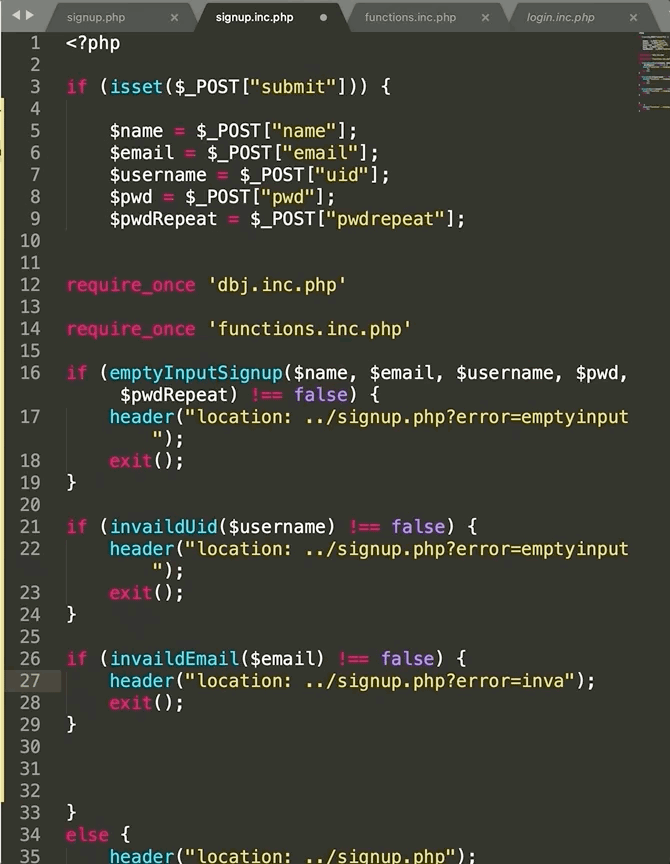
Inside the 'if' statment on line 6, using 'empty' which is built inside the php language which checks if there is or is not data inside the varible function that you can see with $name.
|| -are two pipe symbols that mean if this varilbe is empty OR the next set of varibles are empty and the user didnt submit anything then it will run whatever code is inside the if statment.
If there are any empty inputs, then the varible result is going to be eqaul to true (line 7) because there is a mistake.
If there are no empty fields, meaning that the user has correctly filled in their infomation, then the results will be equal to false, meaning that the varible result will be equal false.
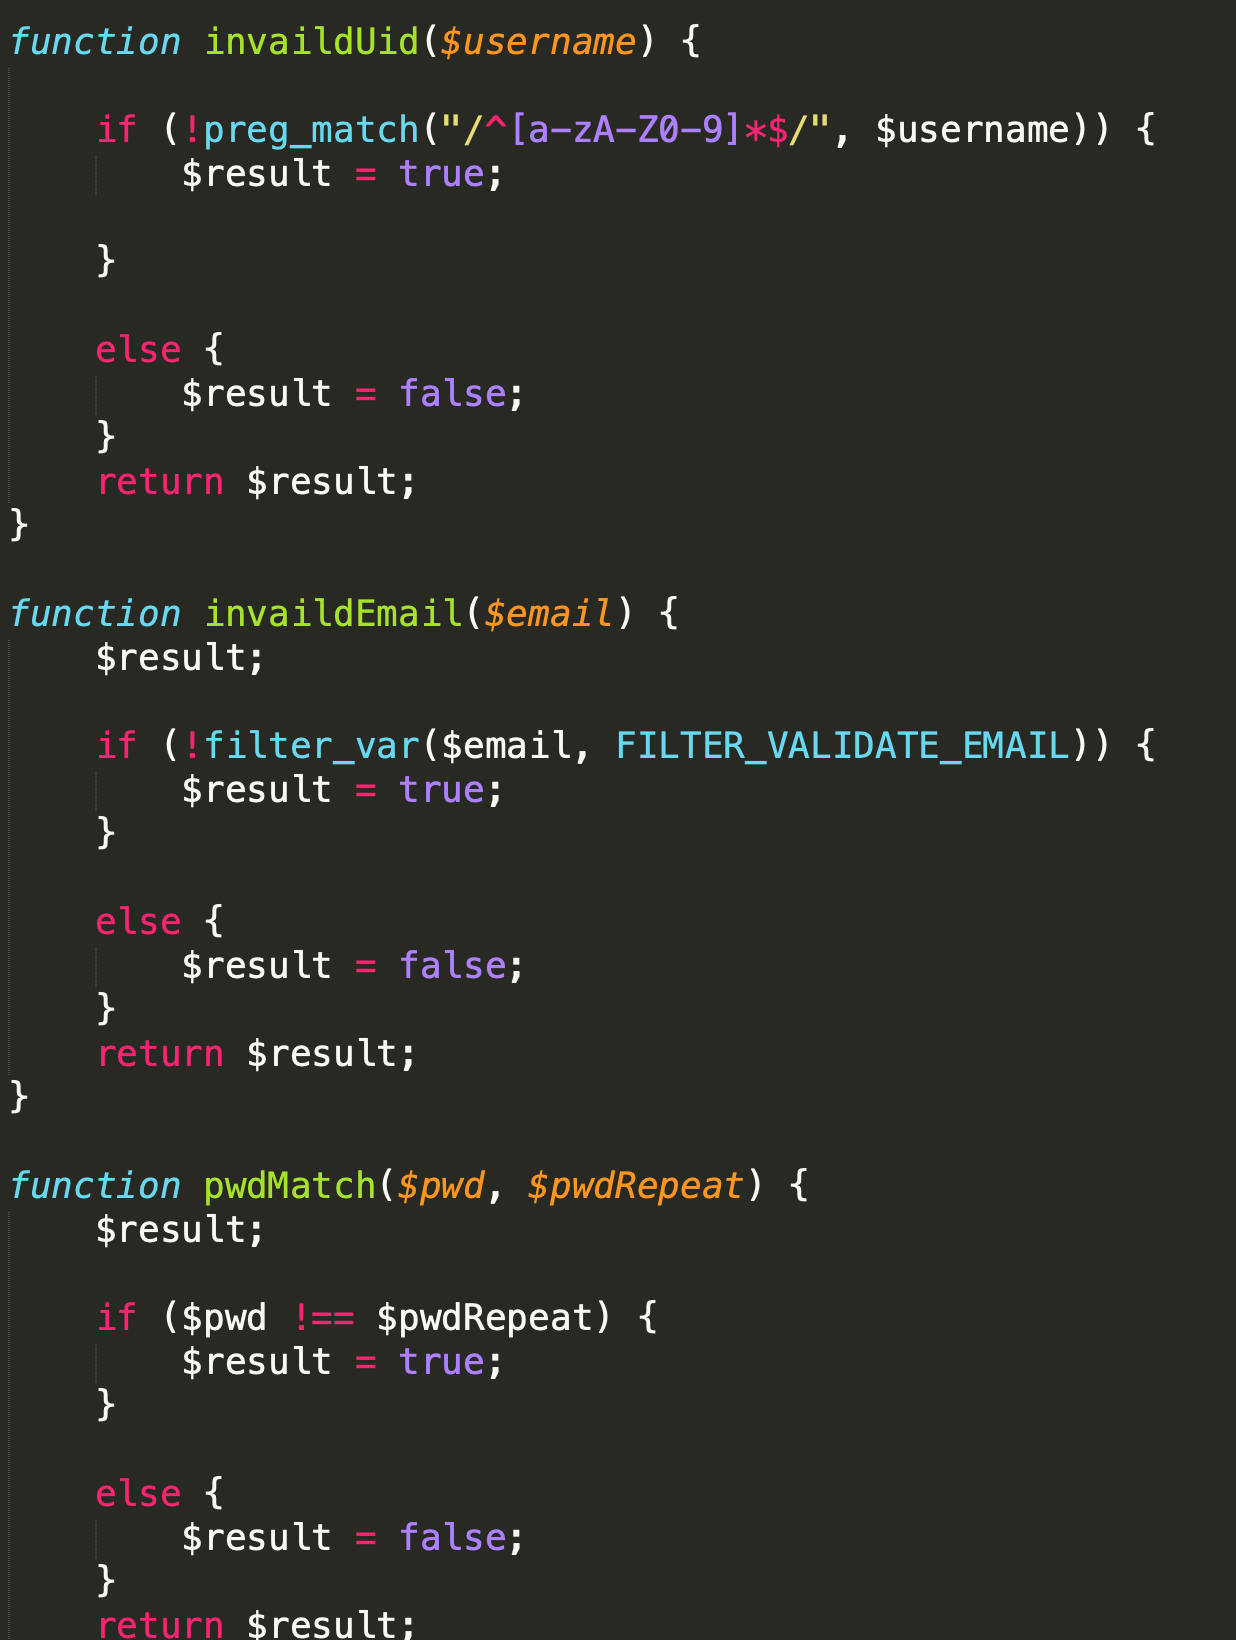
Using the same princaples as the empty input, I wrote out the function for an invaild username. Pregmatch function is built into the php language, where a search parameter is written and if the string doesn't match up to the search paramater then an error will show. I entered the search algorithum inside the brackets to test if the username is properly formatted, with capital/ lowercase letters and numbers (line 18). *$/ is the search algorithm that will be matching up with the username that was typed in.

I continued to add the functions from signup.inc.php into functions.inc.php with all of the error handles being added to functioning errors.
!Filter_var and FILTER_VALIDATE_EMAIL determines whether the first varible does not return as true. Inturn it can then establish if this an a valid email.
if ($pwd !== $pwdRepeat) {
$result = true; is determining if they are not eqaul to each other. If they aren't equal to each other then the value is determinded as true and the user is sent back to the start of the signup page.
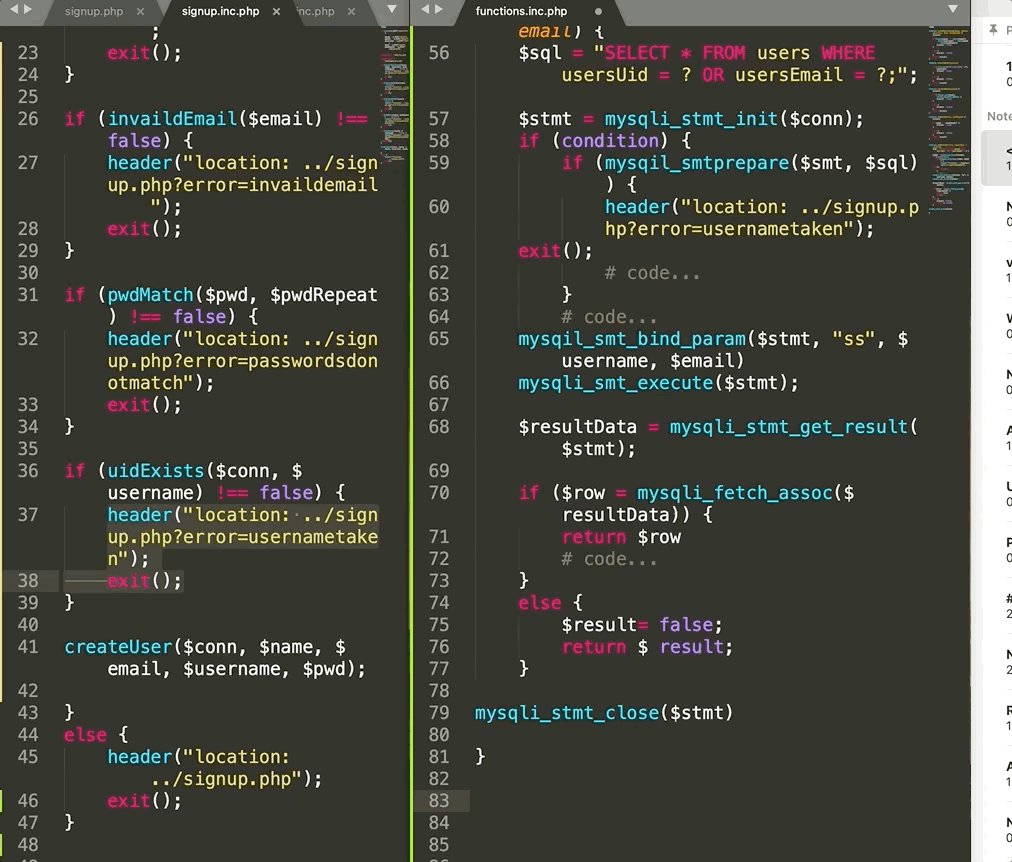
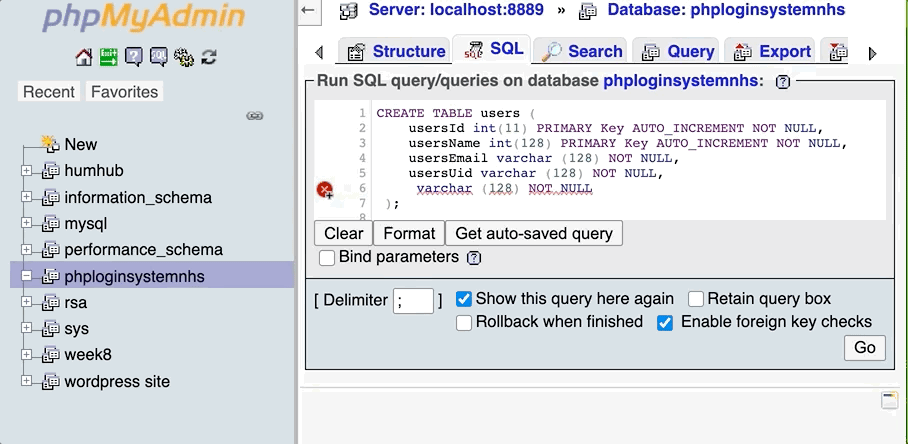
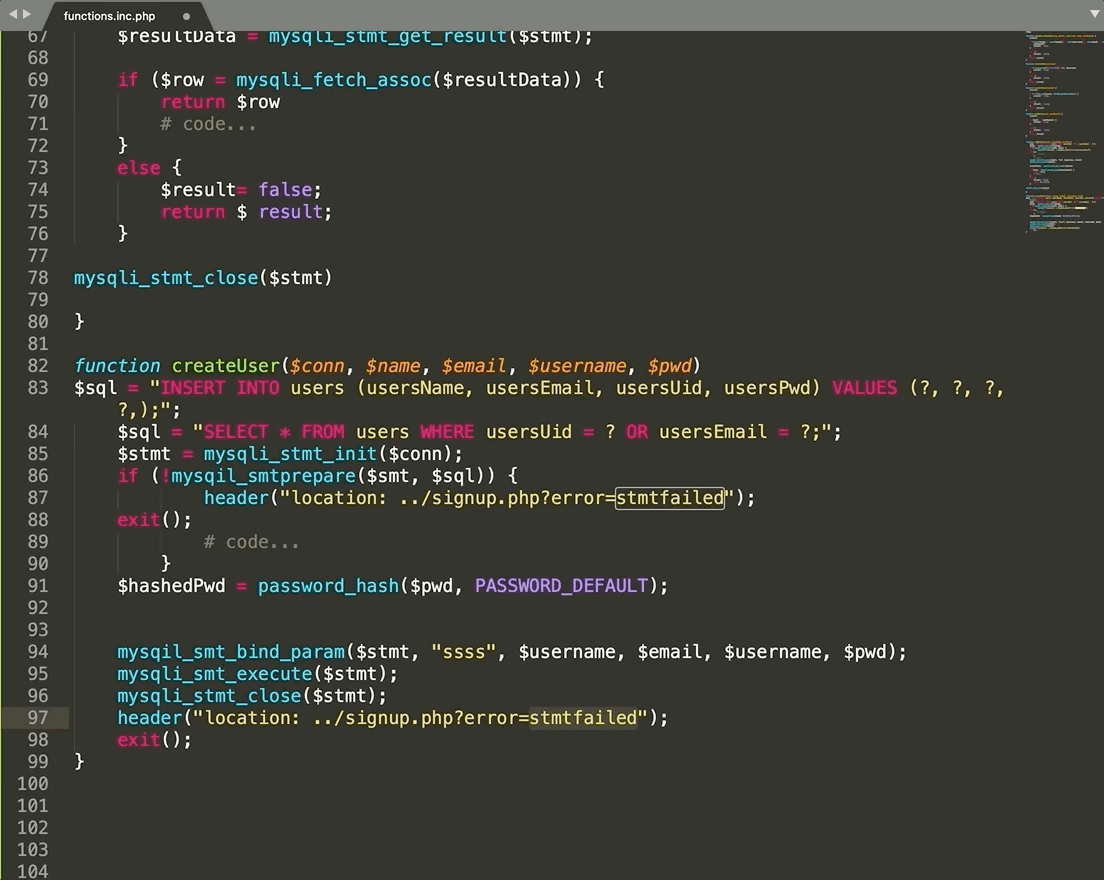
Next on line 55 i pasted over the uidExists function and began by adding it to the functions page.
Next i created a basic SQL statment that selects all from the users table, where the user's uid is equal to the ? (line 56).
I also added the user's email to be used to validate if the email is valid.
On line 57 i wrote out a preapared statment ($stmt) that that is equal to a fucntion to mysqli_stmt_init where the statment is initialised. ($conn) is the connection to the database. Prepared statments prevents the user from writing code into the signup inputs, that could destroy the database. This makes the signup form more secure.
Next on line 60, the code will check for any errors that the user may have left from the Sql statment above.
The error will be 'stmt failed', with the user sent back to the sign up page.
If it does not fail then the data is then passed in from the user, using !mysqli_stmt_prepare, "ss" as it's two types of basic text known as strings as paramaters on line 65.
Next on line 68 the users data is grabbed and put forward with (stmt) into the database.
Next on line 98 i created a varible row, which grabs the data using the username, creating a varible whilst checking for true or false inside the mysqli_fetch_assoc($resultData).
Return row has multiple purposes as it returns all the data from the database, only if the user exisits inside the database, which will be used to log in the user. Both used for the sign up and login form.
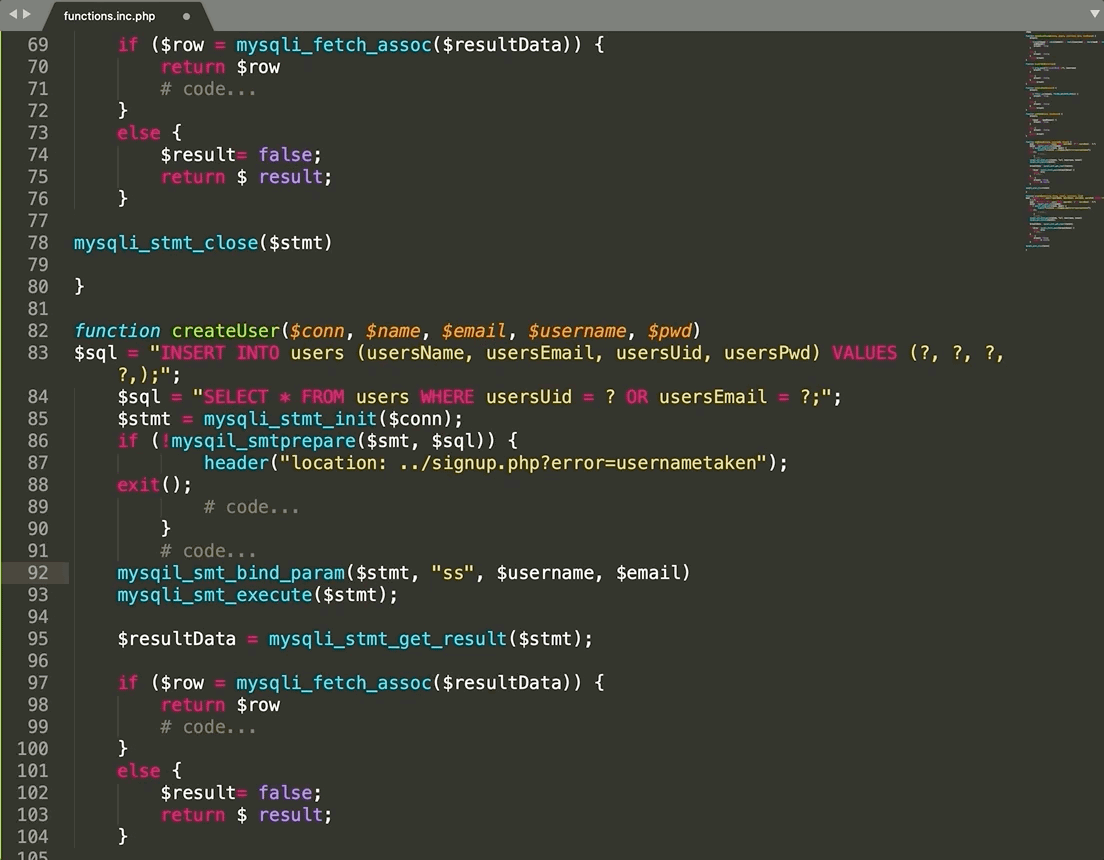
Next i copied and pasted the Uidexists function and pasted it below, changing the name to createUser.
In order to create the user, this time i changed from SELECT ALL FROM USERS (selecting data from the database) i changed it to INSERT data (inserting data to the database) on line 82.
Next i added the appropiate data into the database by adding the exact values and order of those values of the database, into the parentheses as seen on line 83. I started with usersName instead of Uid as the data is auto incremented into the database as mentioned earlier. The four ?'s on line .. are placeholders as i'm using prepared statments for the four pieces of data.
Next i added four paramaters due to the four pieces of data being added, username, email, password and Uid.
Next it was time to hash the password for the database, preventing it from being viewed in the database, stopping a potential hacker or indivdual from viewing all of the secure passwords.
On line 91 i began by writing the hashing password script. The password_hash method is automatically updating the to the lastest security, preventing hackers from accessing the user's data.
($pwd, PASSWORD_DEFAULT); takes the user's password ($pwd) and hashes it.
Then the statment is executed and closed.
Finally the user is sent back to the signup page, if there is no errors present during the signup stage on line 97.

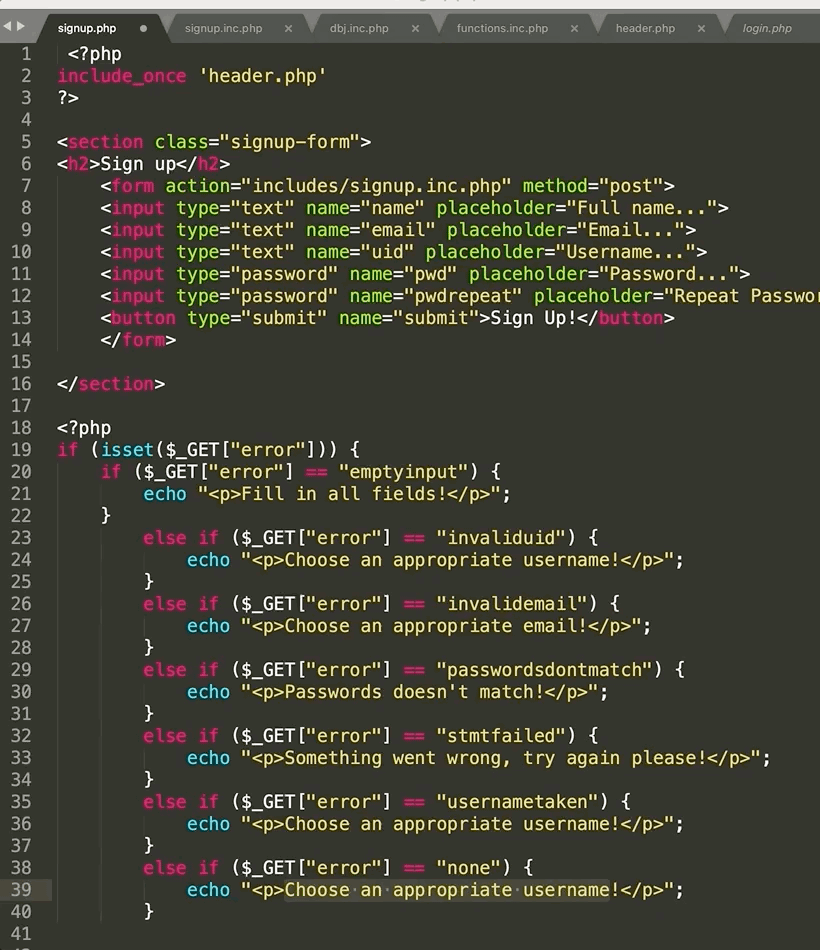
Underscore Get method, is checking for data inside the URL, whereas underscore Post method, is when there is not direct infomation inside the URL.
Next i wrote out all of the potential error messages that the user may create whilst filling out the form, such as "emptyinput" or "usernametaken".
These errors would arrive when the user would make a mistake in one of the certain fields. Once the error has alerted the user, the smaller text will be echoed in the form.
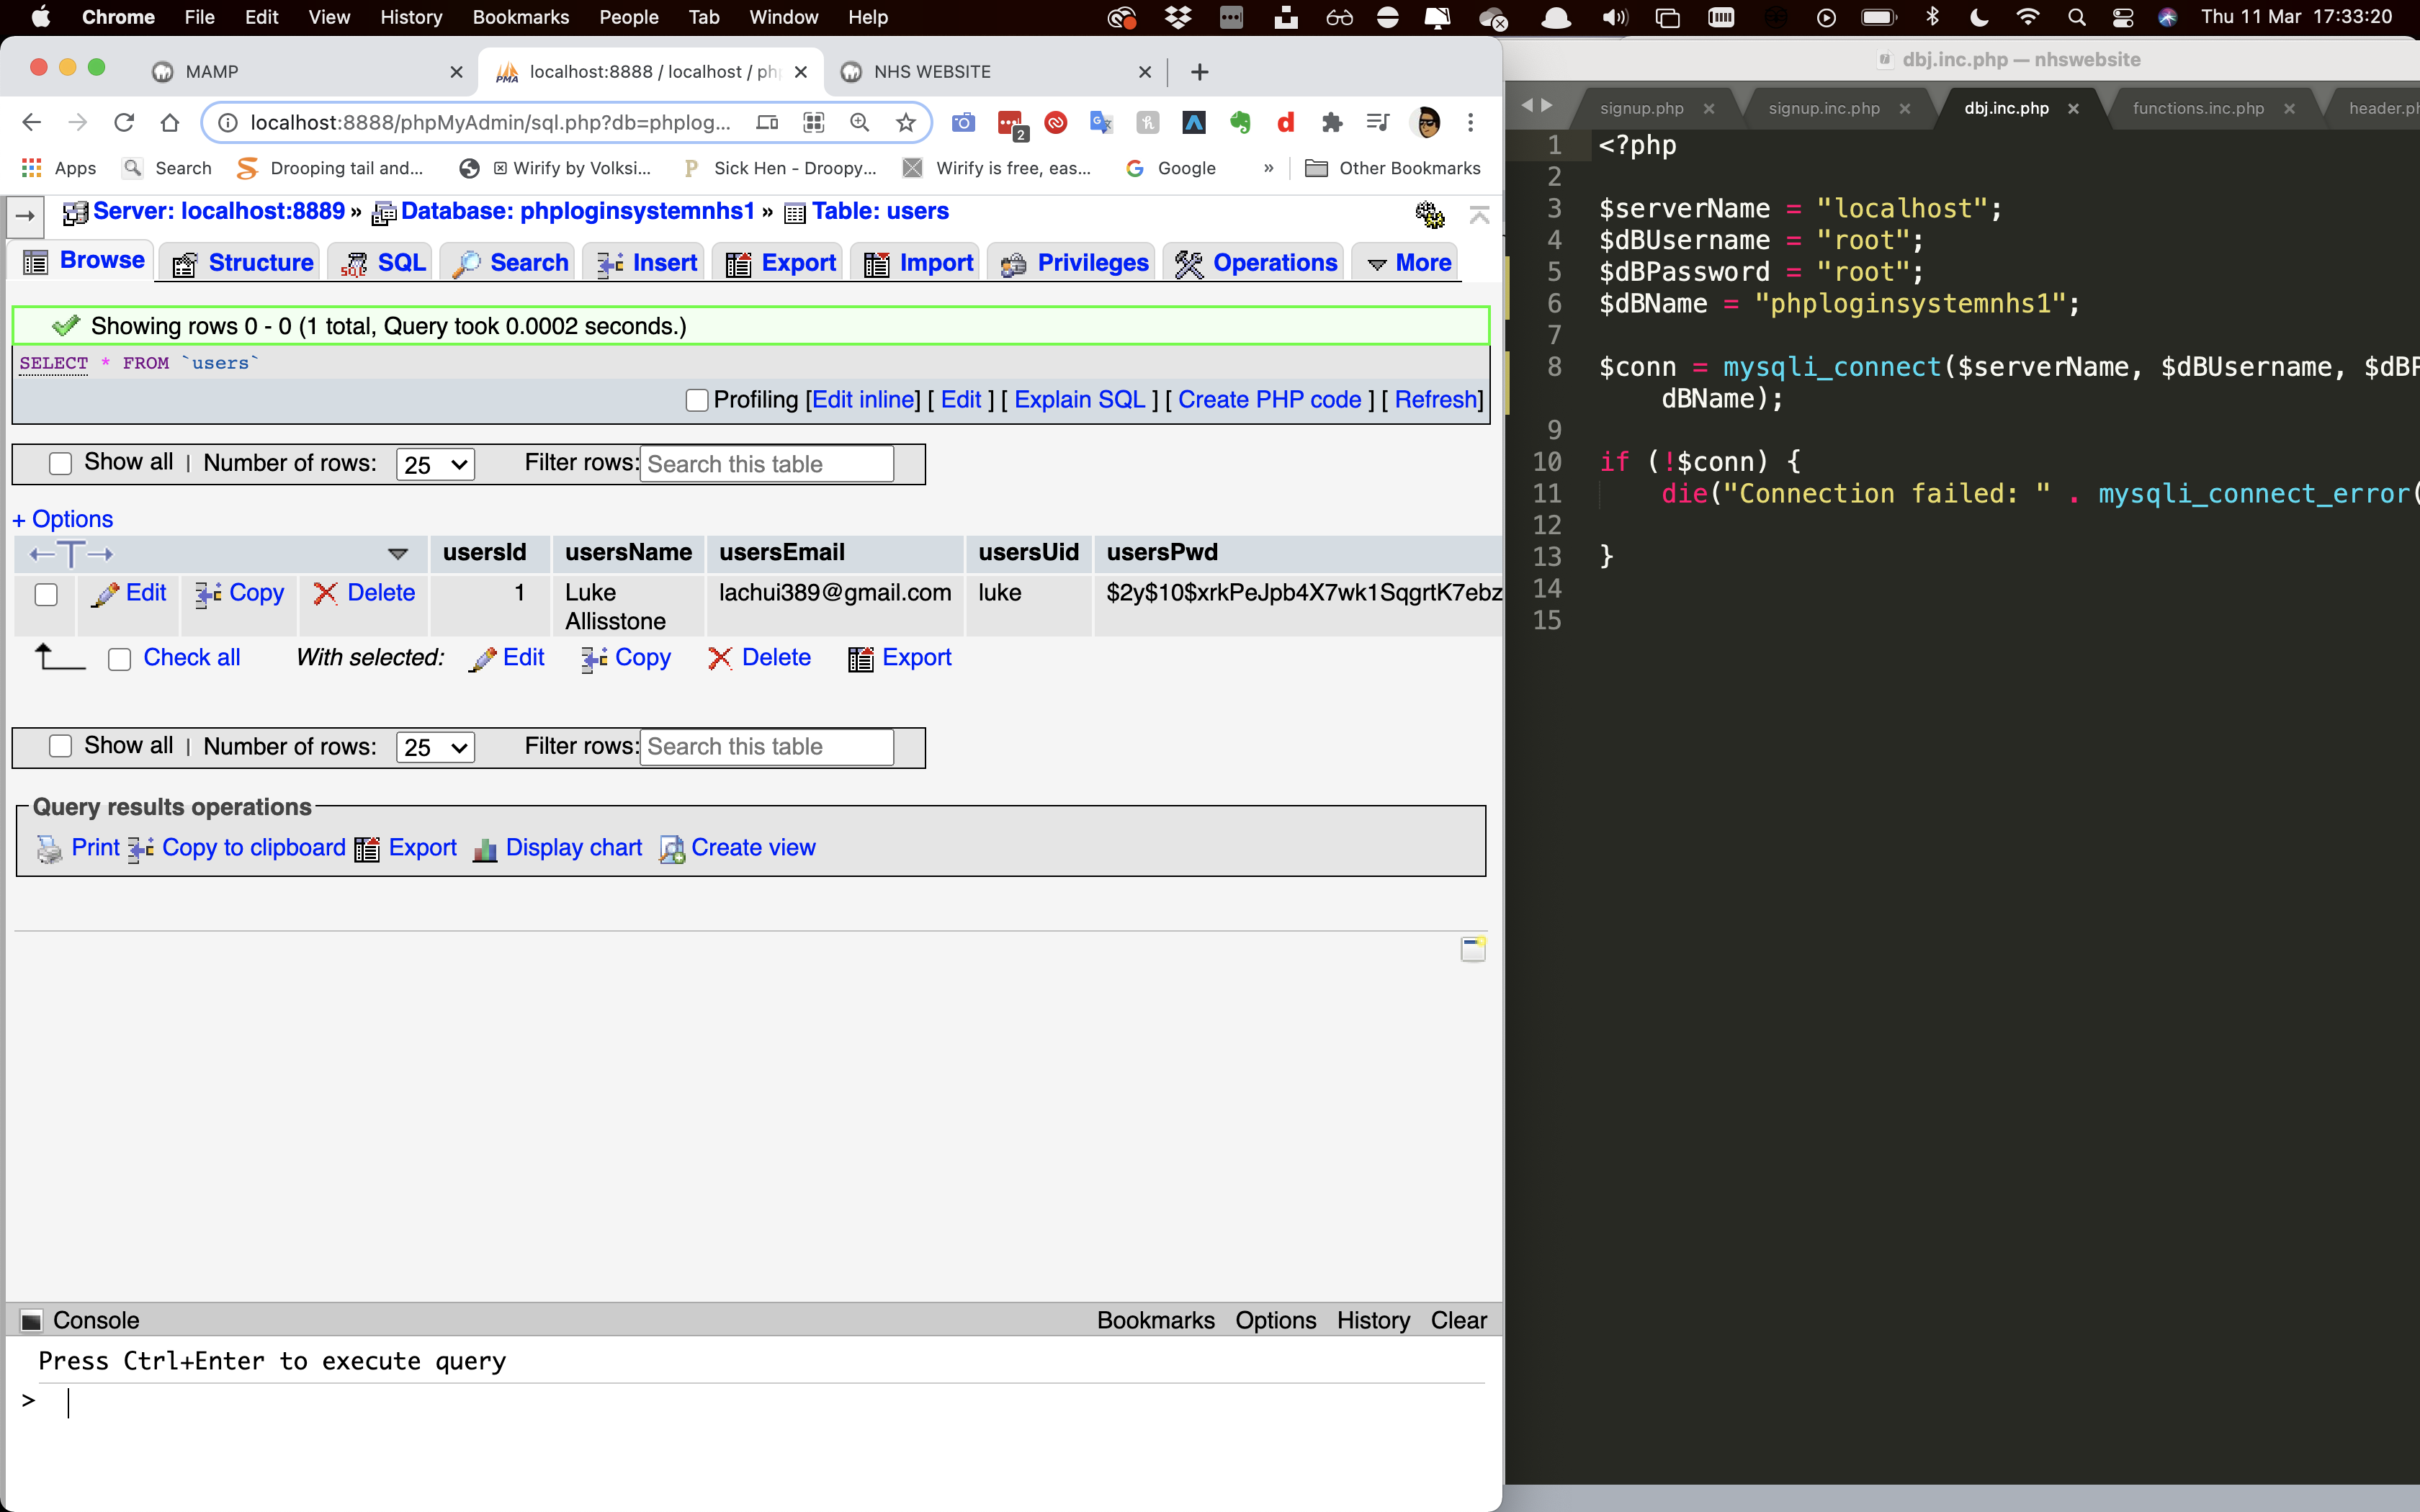
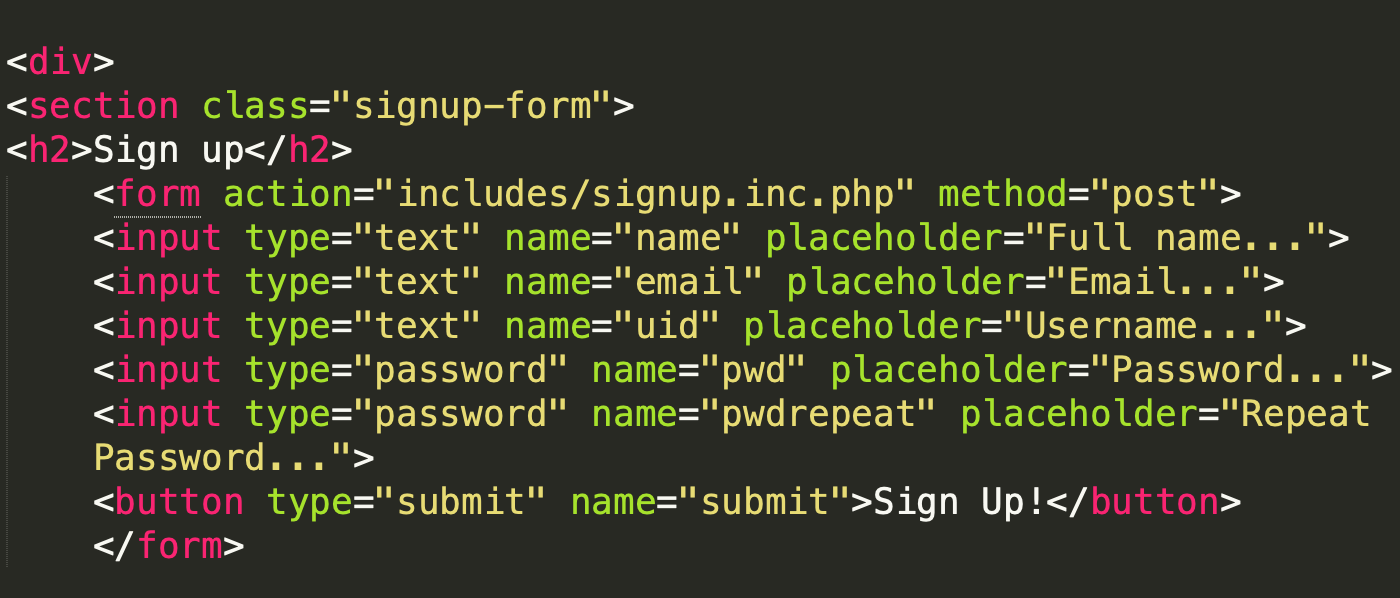
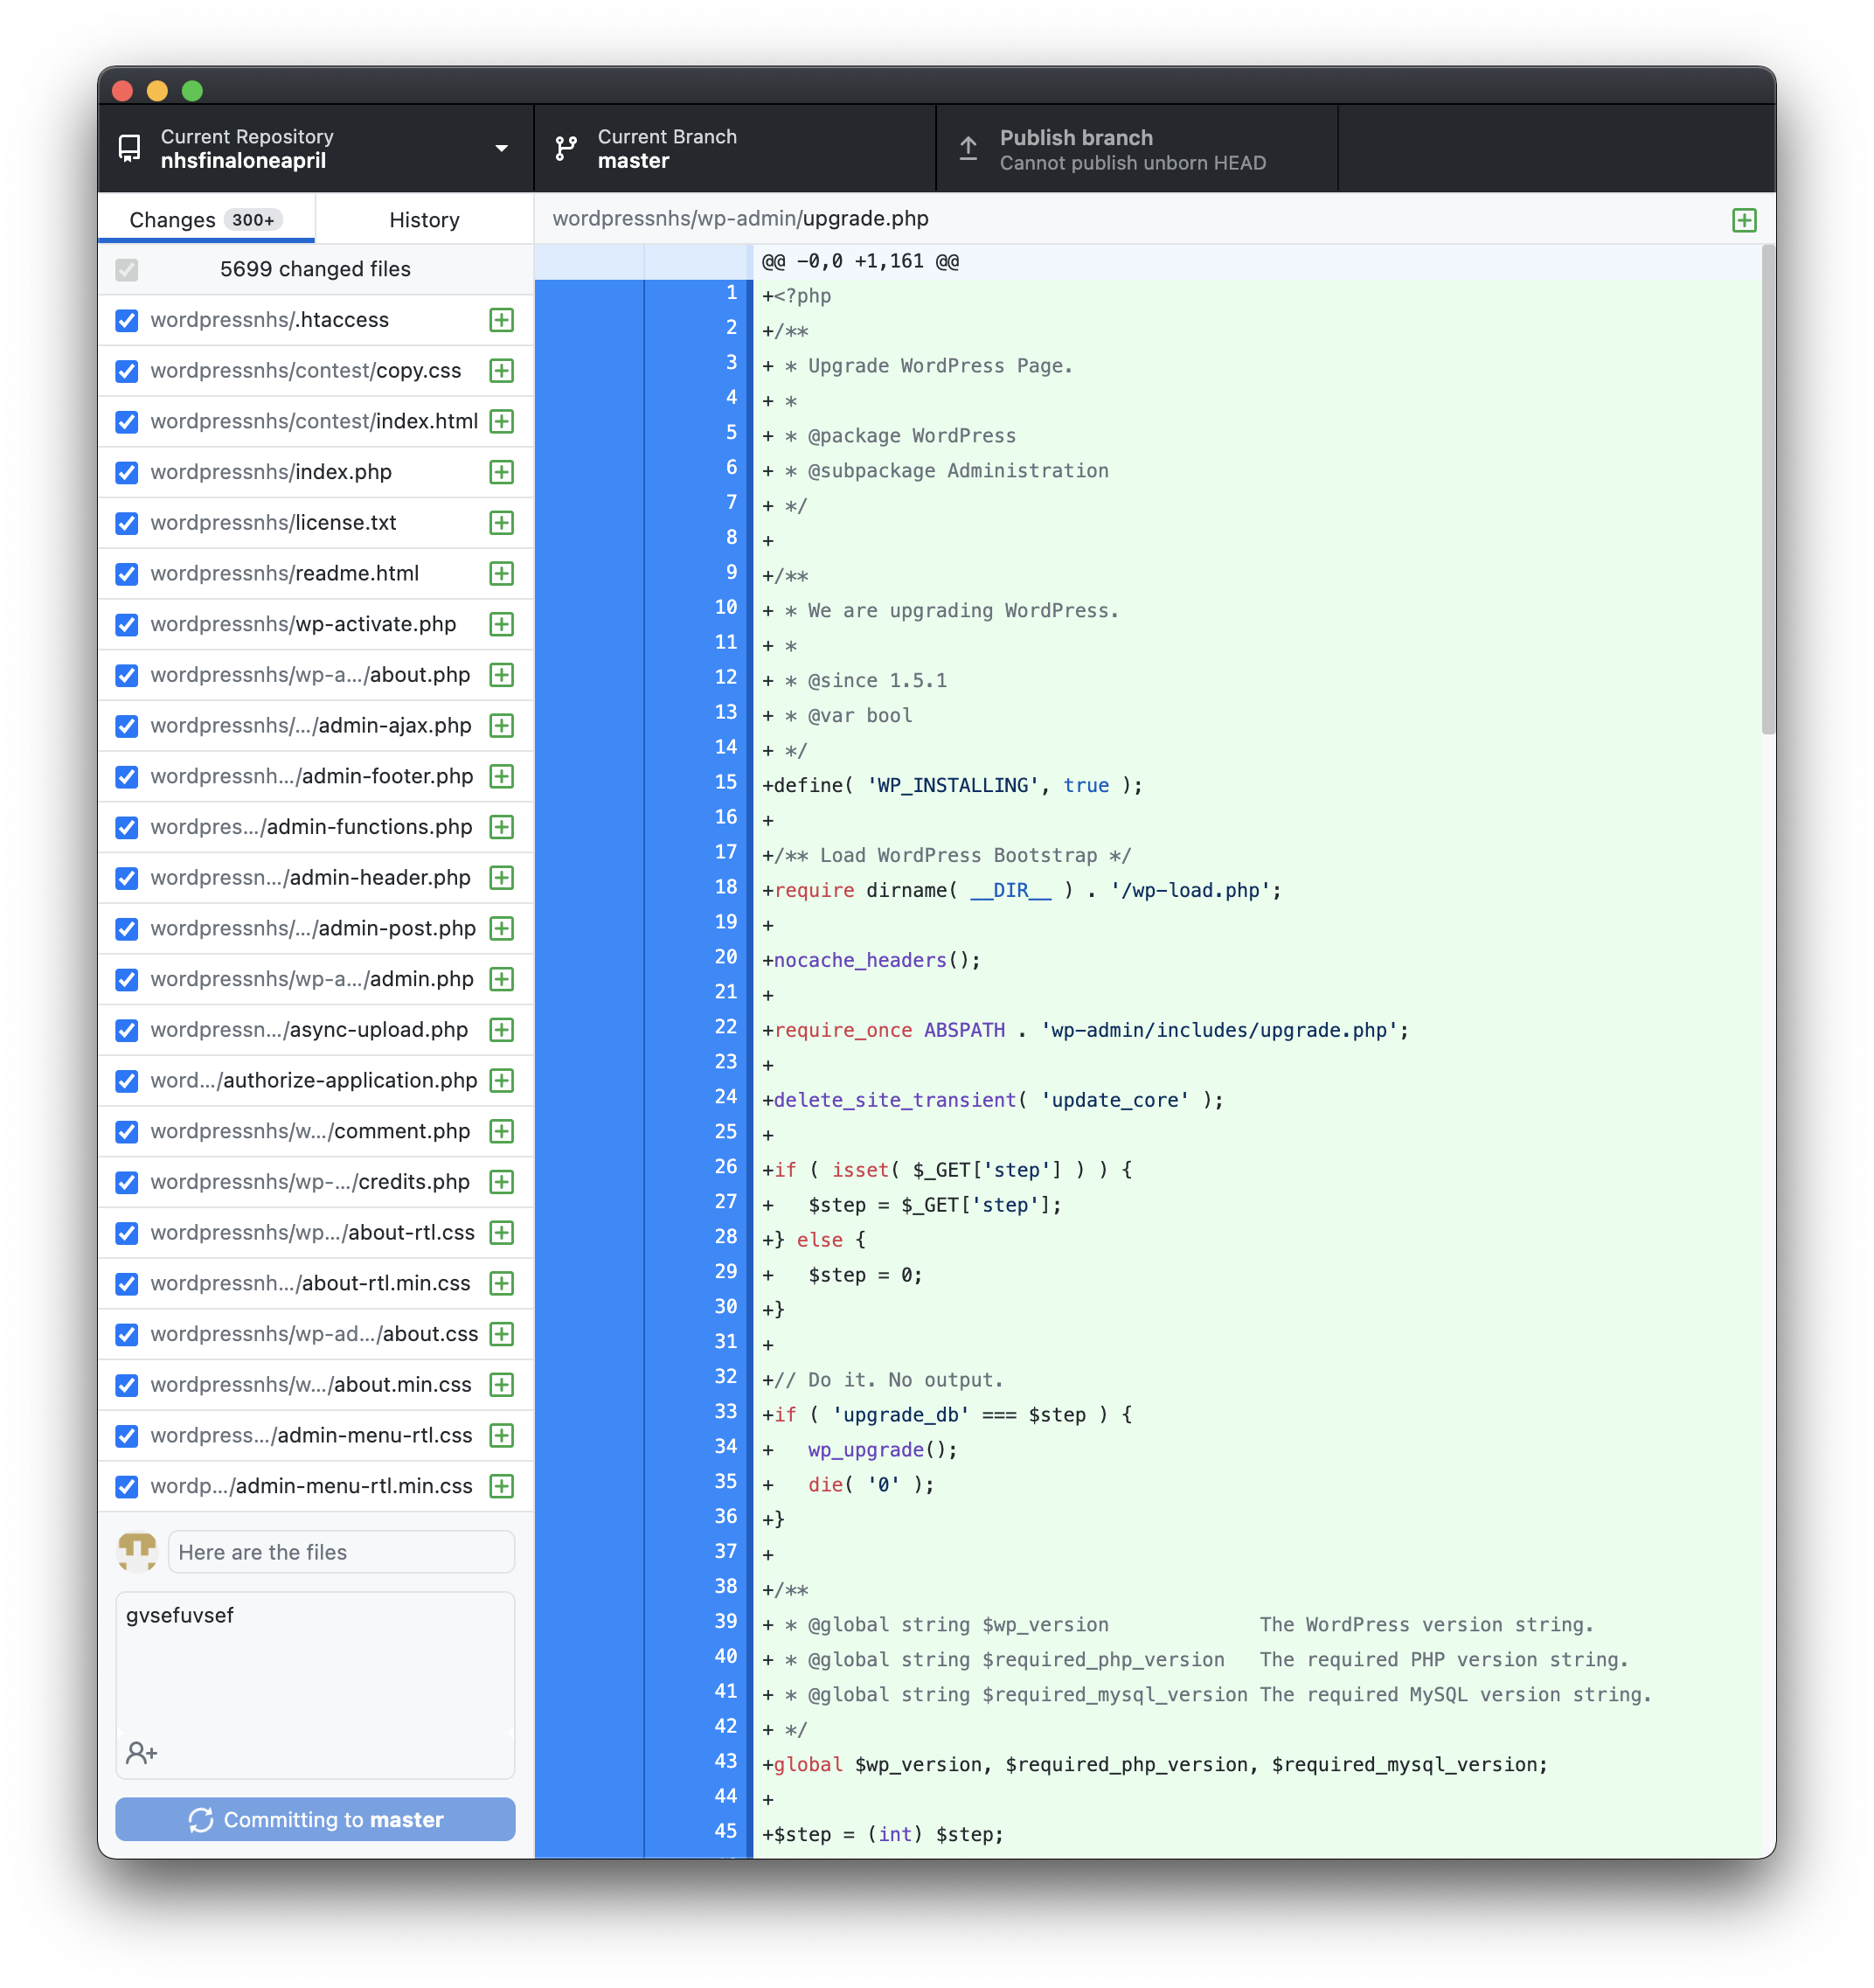
Finally I demonstrated the signup function in full operation. As you can see when entering all of the relevent infomation in about 'Mark', his infomation is inputted into the form and submitted, where his infomation is inputted into the database, with his password being hashed.
This demonstrates that the database is connected and the relevent infomation is inputted into the database with the UId auto incremting by one per user.
Debugging using Apache
In order to effectivly debug the code, i learnt a key skill in being able to debug using apache.

As you can see on the error log, on line 32 it highlights an error with the php, noting the exact time that error commenced. This infomation allowed me to locate the error and debug the code.
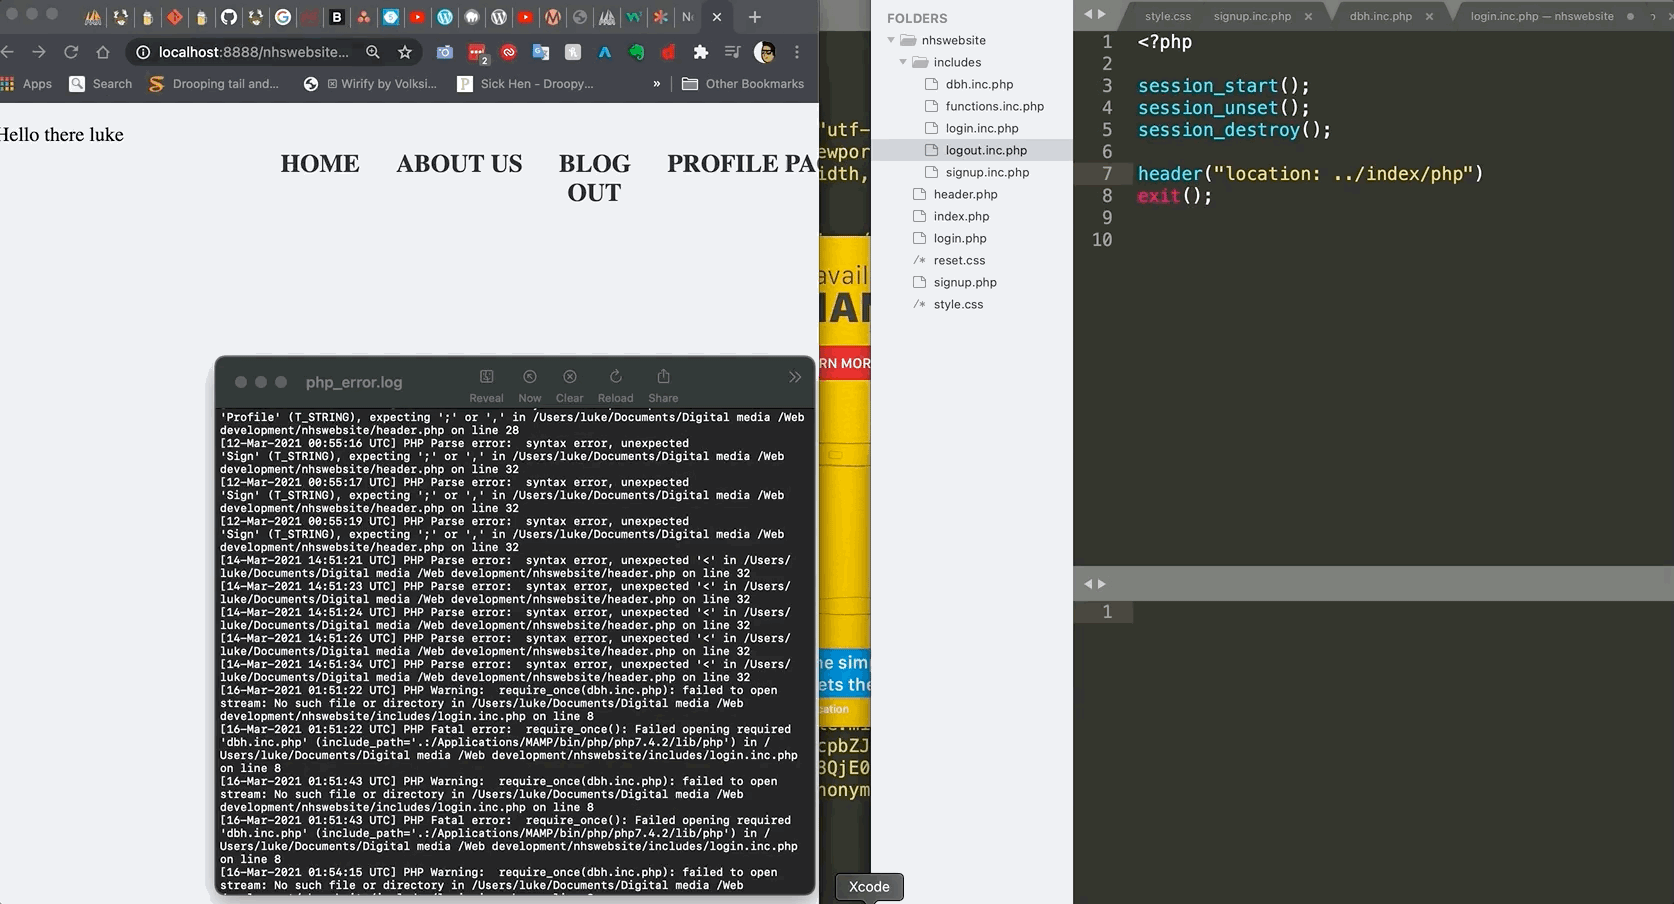
One errorr i encountered whislt editing the site together, was that i hadn't added a . to the index.php, crashing the page. Once i identified the problem, i quickly resurrected the problem and added a fullstop.
This shows that these little errors can happen all the time!
Section 4- Login Scripts
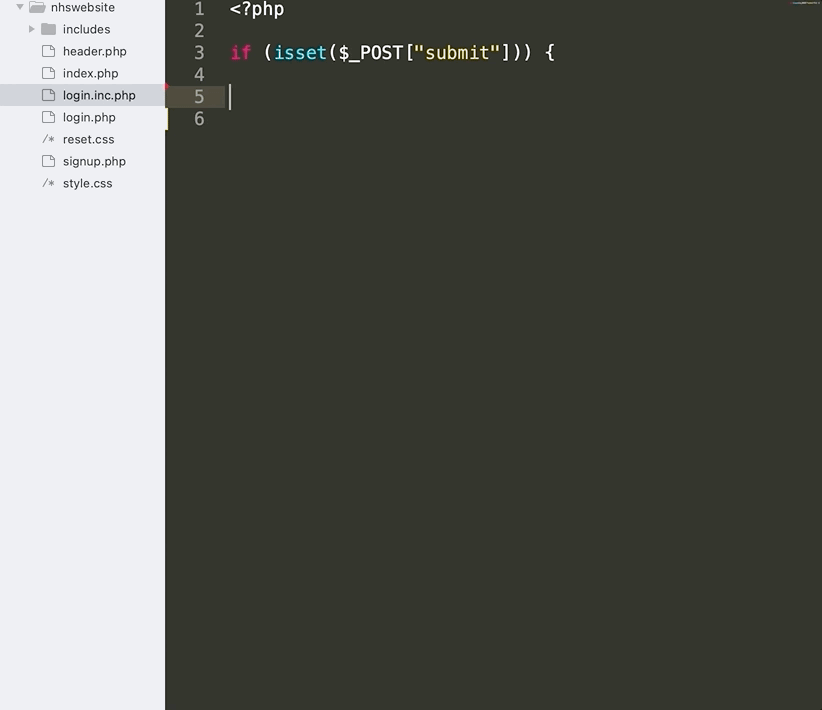
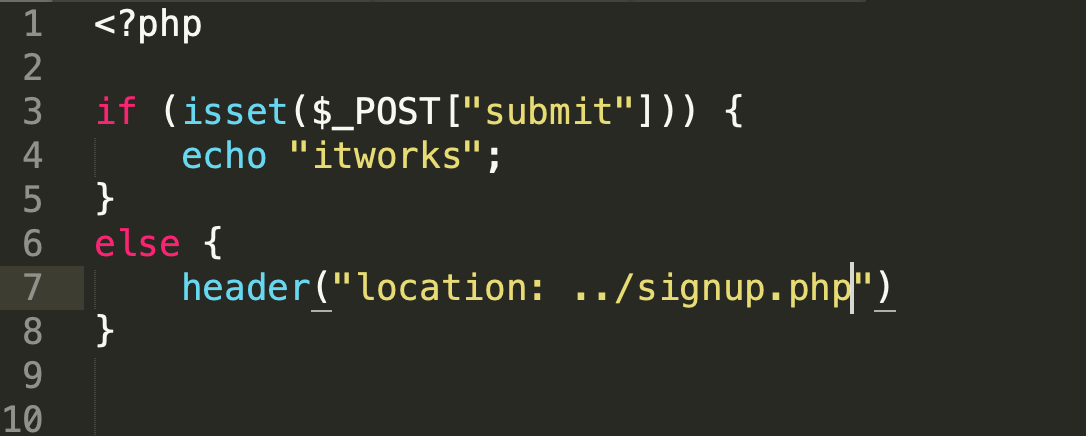
Next i began writing the login scripts inside the login.inc.php. To check whether the user had accessed the page in the proper way by submitting the form, i wrote if (isset($_POST["submit"])) which is checking for a superglobal called submit.
Next i wrote $username = $_POST["uid"]; which means that the data is grabbed from within the URL, with the varible username is equal to the 'uid' where it takes the email or username as the username.
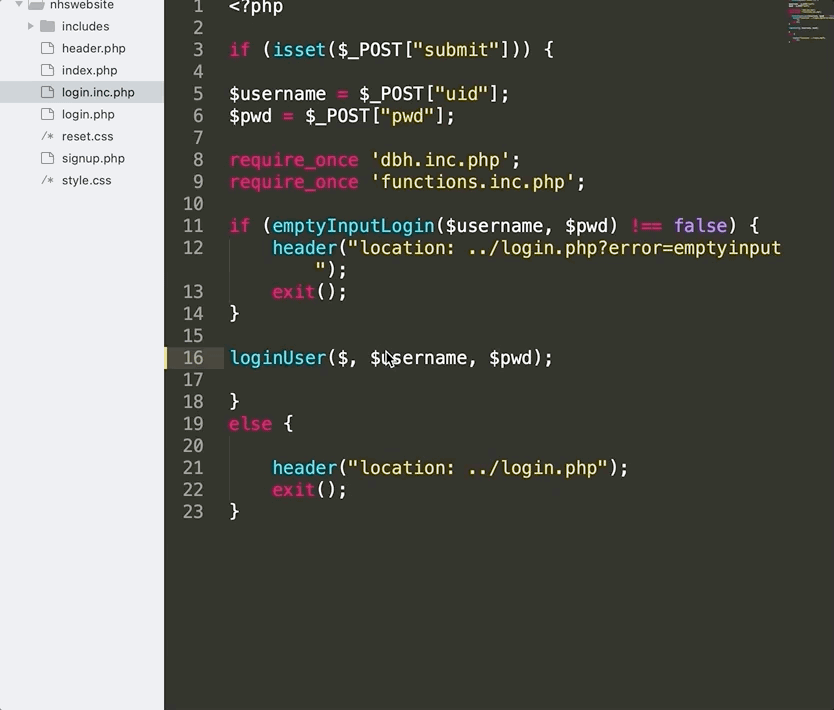
Then i grabbed the password from the database from the user line 6. Afterwards i referenced to the database file and the functions file on line 8 and 9. Next it was time to add in the error handler function and wrote 'emptyInputLogin' to show if either the username or password had been left blank when the user would be writing out the login form.
I then wrote on line 12 "location: ../login.php?error=emptyinput", which would be the location that the user would be sent back to the login.php page.
I then created a premade function called "loginUser" with three paramaters added with $conn (connection to the database to access the infomation) $username and $pwd (password). If the user accesses the page incorrectly to the login form, with the user being sent back to the login page and the script is immediately exited.
Login functions
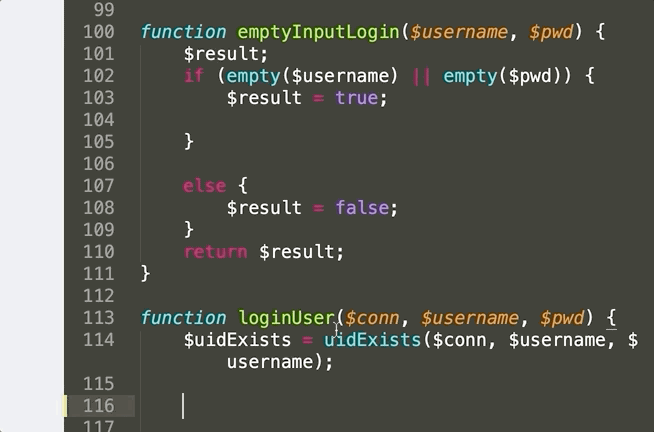
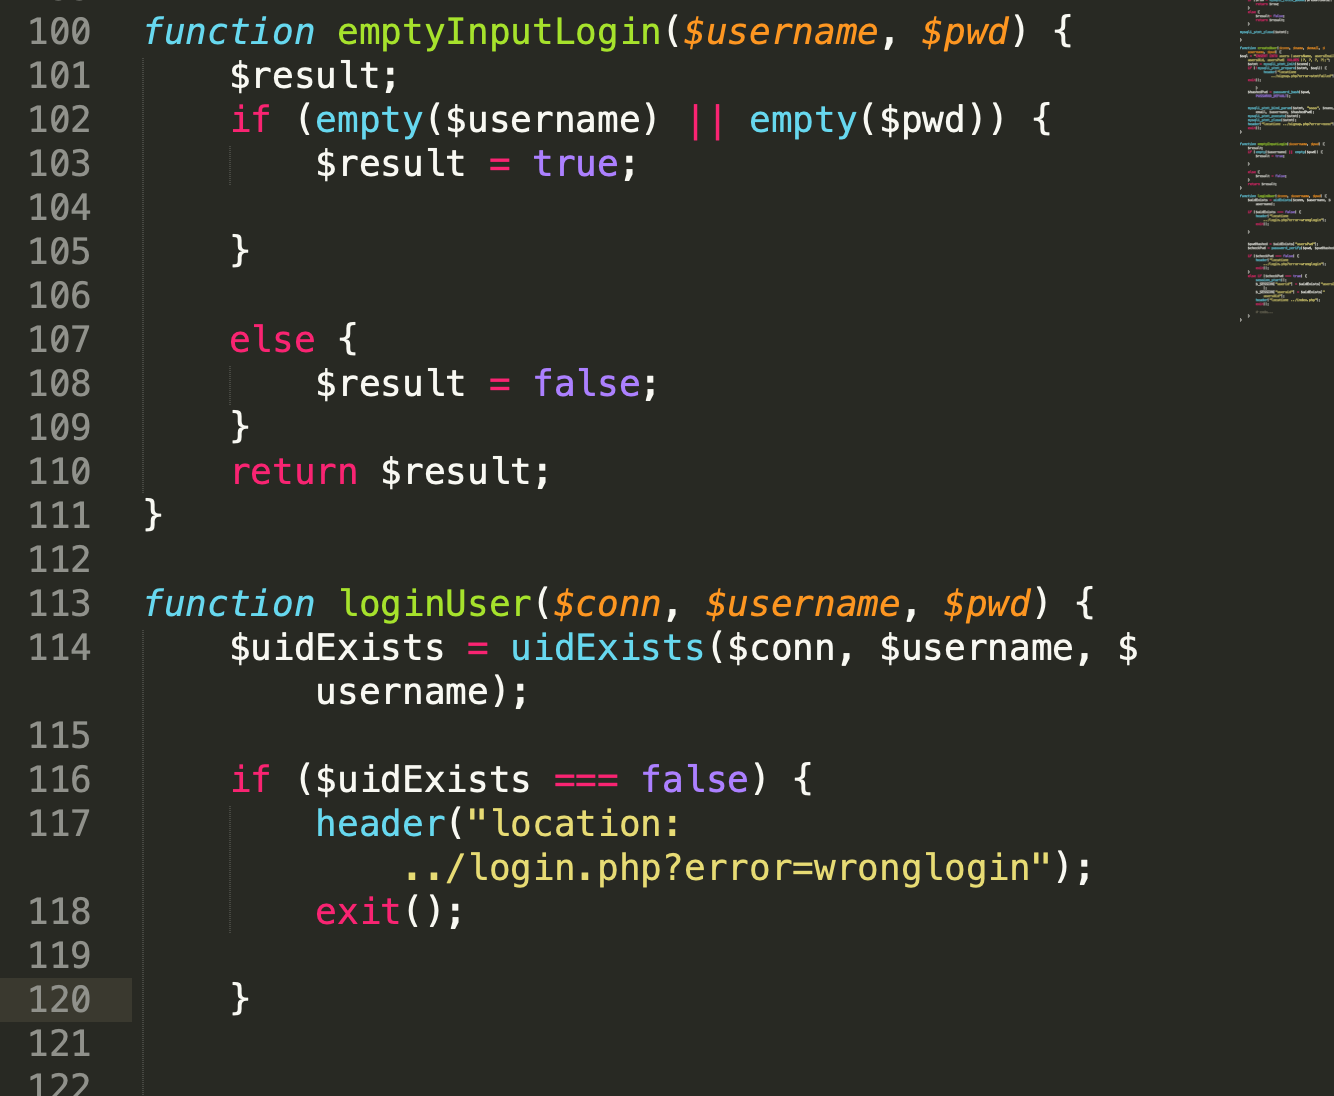
Next on line 100 i added the function emptyinputlogin, where i added the username and password paramater.
.
Next on line 100 i added the function emptyinputlogin, where i added the username and password paramater.
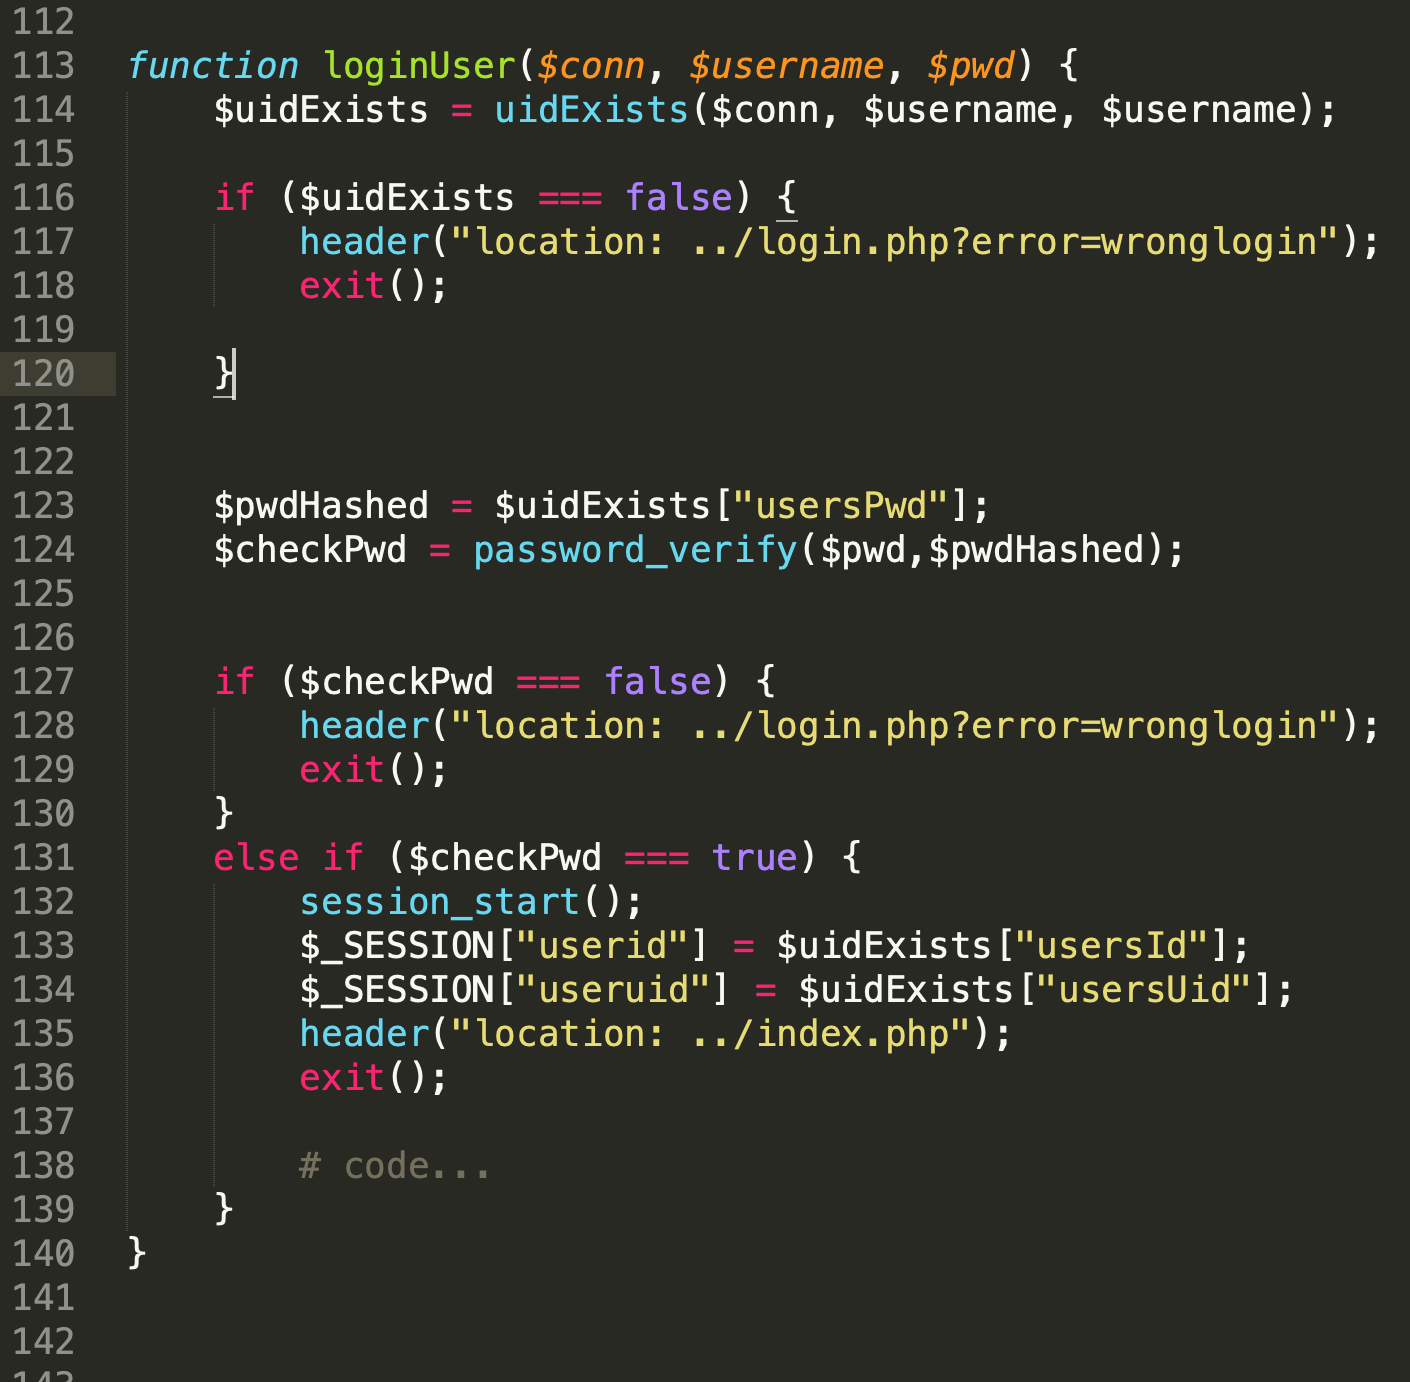
Then i added the next function called LoginUser. Earlier i mentioned how the previous function i created had two purposes on line 98 in the functions document, with that function i started to create a varible called UId exists on line 113 and 114. I then wrote $uidExists (checks if the username and database exists inside the database), = uidExists($conn, $username, $username). Insdie Uidexists function (line 56) it asks for either the username or email for it to be correct, so i then passed in varible username into both of the parameters, where when it returns, it will automatically fit into one if these statments.
If the user decides to use username as their log in, it will make the username statment true and the email statment false which will still grab the data from the database, it will work visa versa if they were to use their email instead. Only one of the staments needs to be true.
Finally i added an error handler that will say "wrong login" if ($uidExists === false) then the user hasn't entered their infomation correclty, as it will not match the info with what the database has got on that user and will be sent back to the login page, presenting that error.
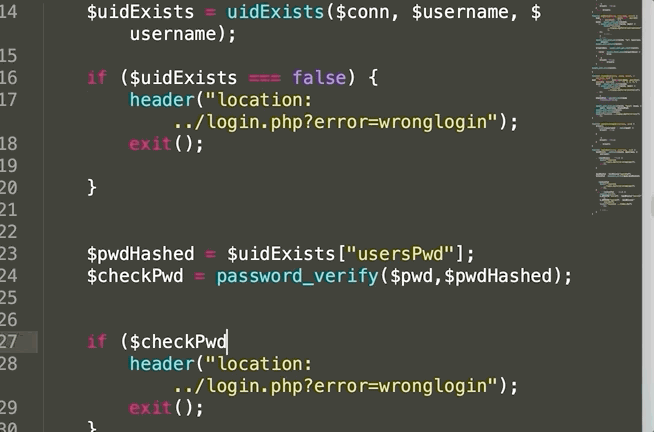
Next i began intergrating the hashed password into the login form, as it compares the hashed password from the database to the hashed password that the user had just submitted.
Therefore i wrote: $pwdHashed = $uidExists["usersPwd"];. This shows that the pwdHashed is equal to the password that is already inside the database (["usersPwd"]). Then i instructed the code to find the usersPwd collum (known as an array) which uses index names inside the array and are the collums inside the database. Now the database data is being used inside the code.
$checkPwd = password_verify($pwd,$pwdHashed) compares the password that the user inputted to the password that is already in the database. I then wrote an if statment that highlights if the two passwords are the same or not (line 27). If they are false then the user is then sent alerted with an error message "wrong login", and is sent back to the login.php page.
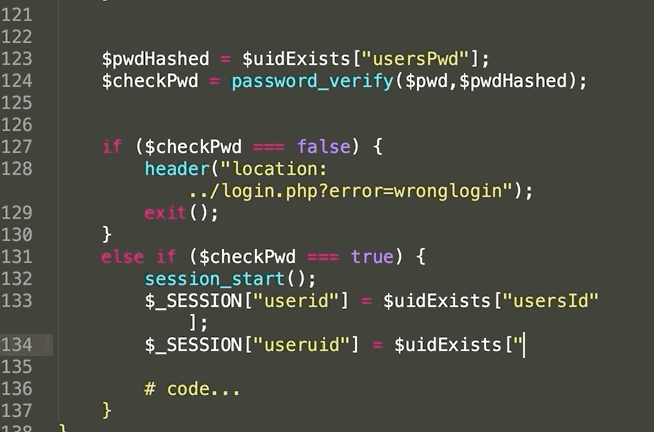
The next step was to create a session, which enables the user to stay logged in whislt on the website and upon loging onto the wesbite, a new session starts. Upon the pwd password returning as true, the a new session can start.
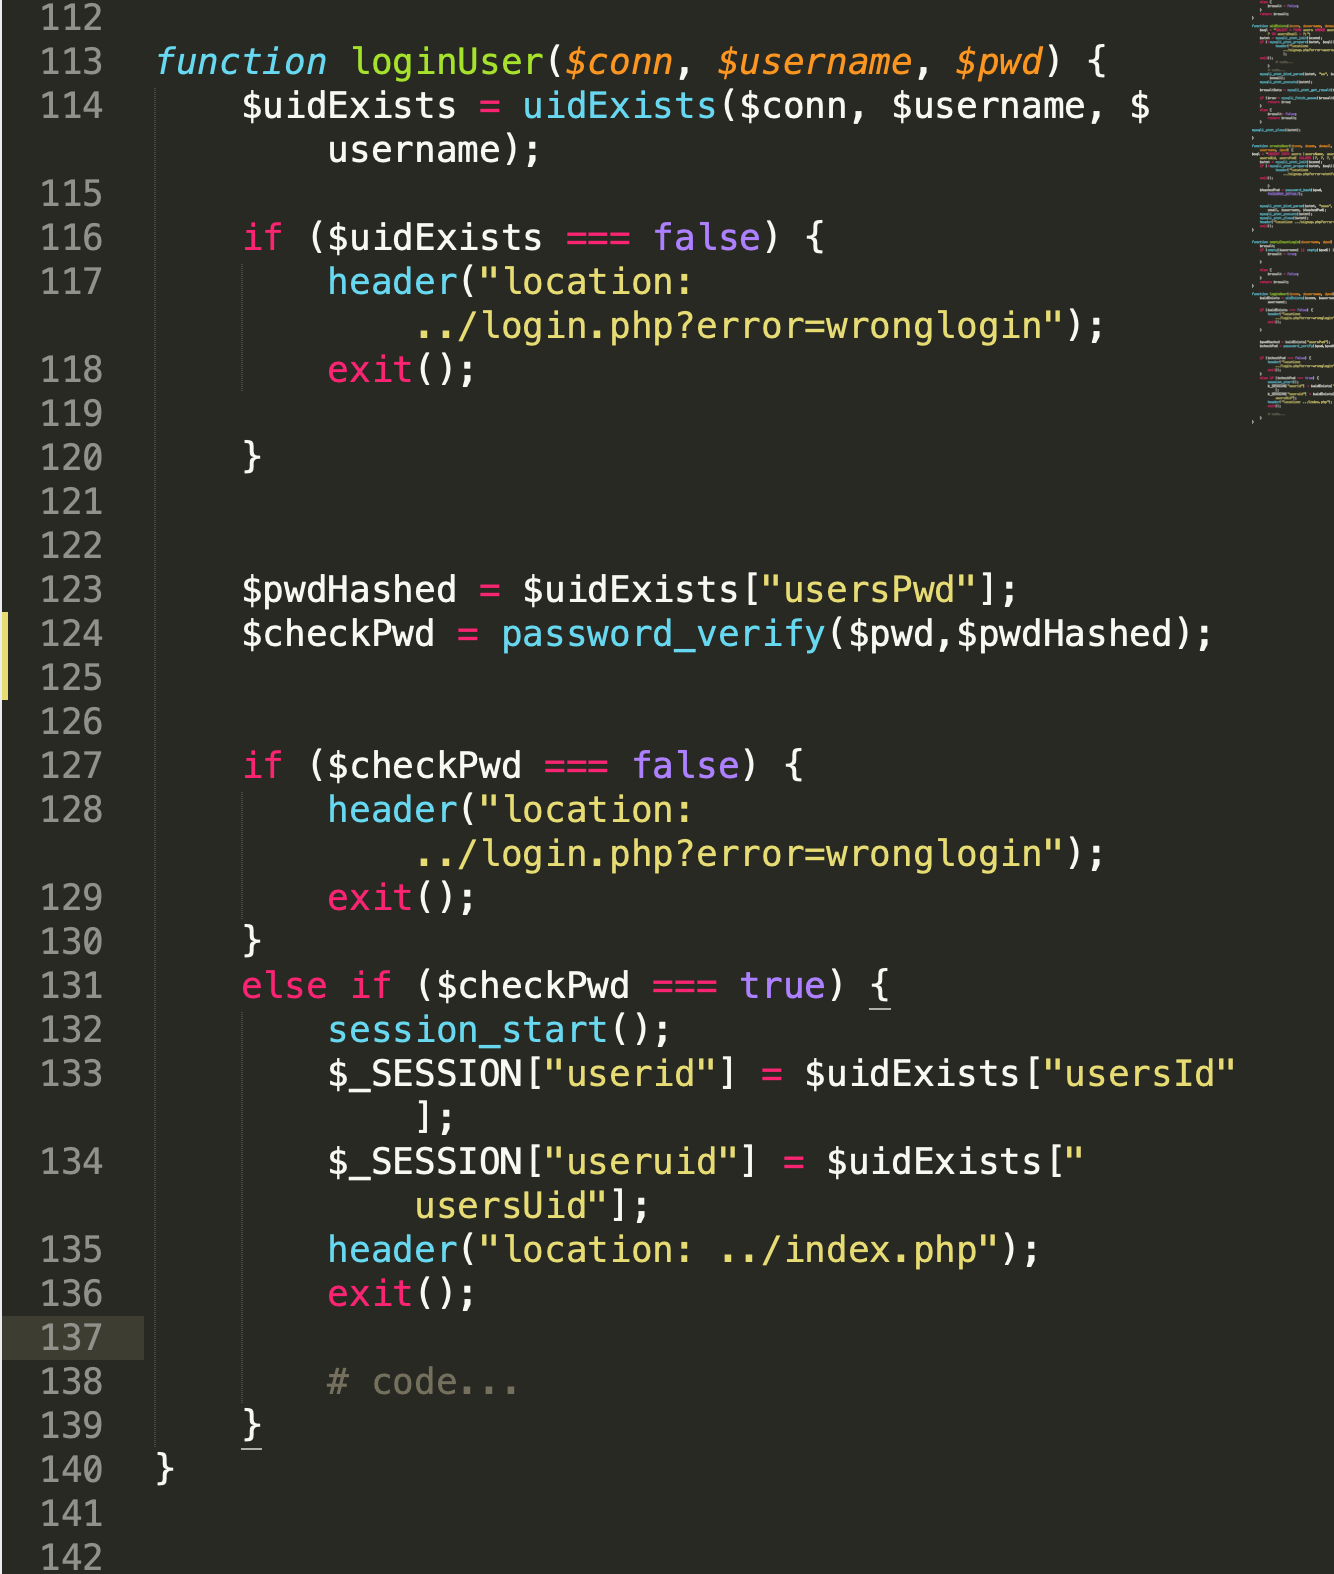
So I wrote two sesson varibles, which is also a superglobal, where i referenced the Uid and password (Pwd) from the databse. Upon completion, the user is then sent back to the homepage as seen on line 135.
And as you can see the login function is completly operational and when the user is logged in, the user is directed to the front page. Included with a Welcoming message, that i'll talk about later on.
Login error functions
Next I coded the error messeges as functions, with "wrong login" being one of those, displayed on line 117 and 128 and "empty input" being another.
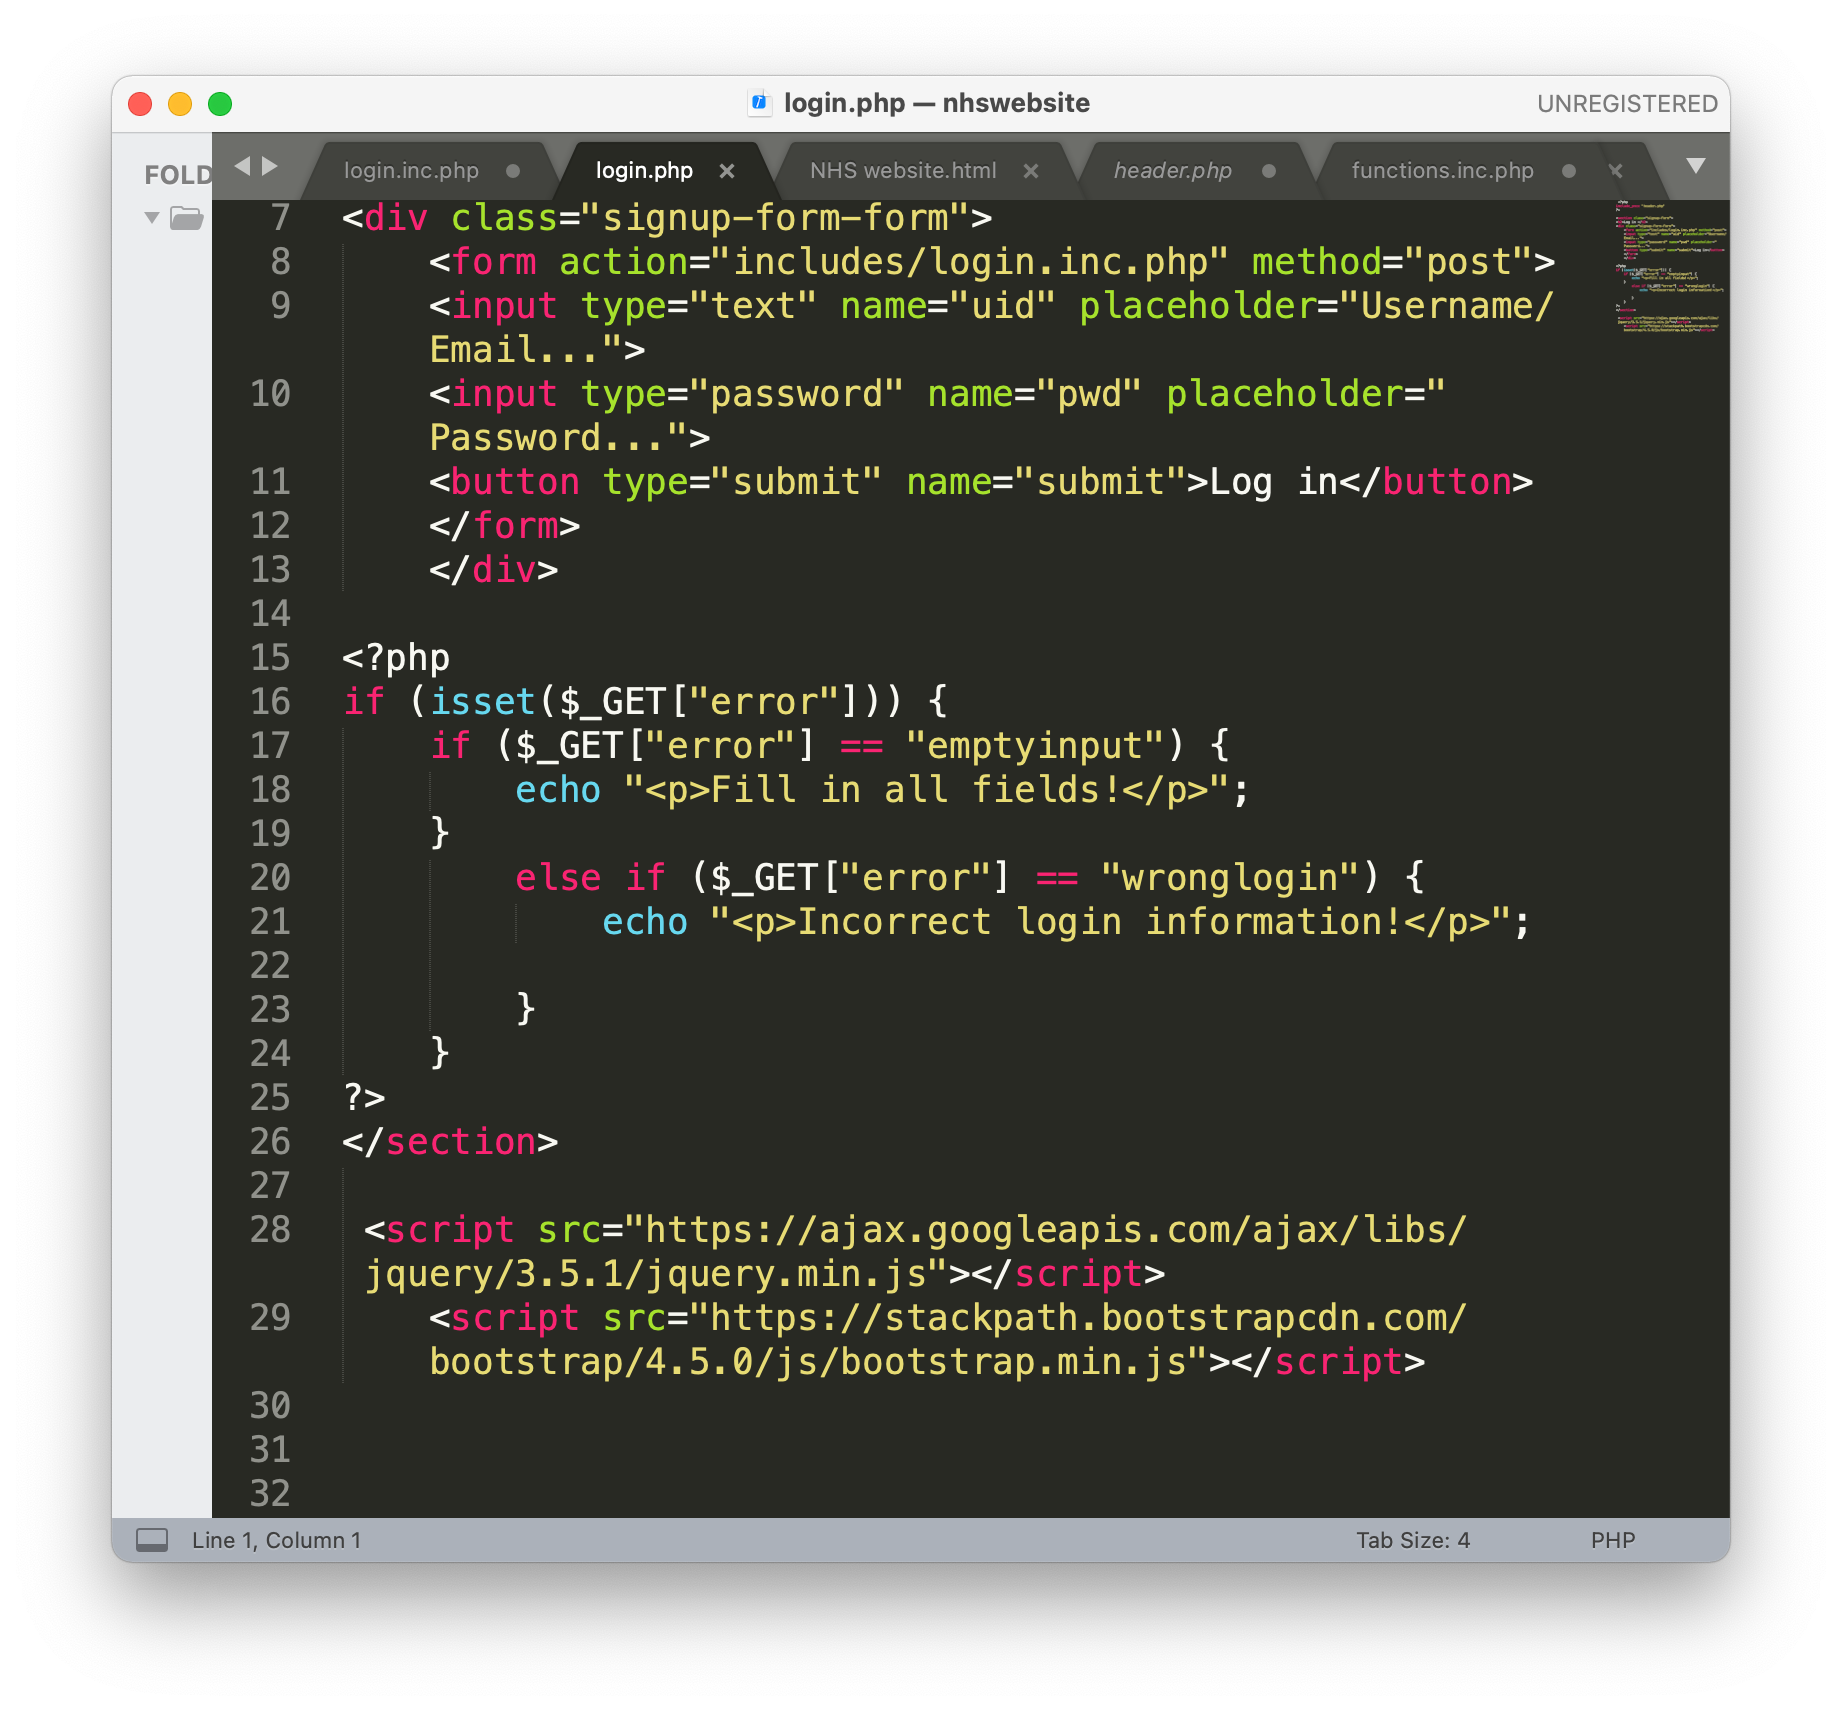
I therefore added the errors to the login.php page when the user makes one of those mistakes.
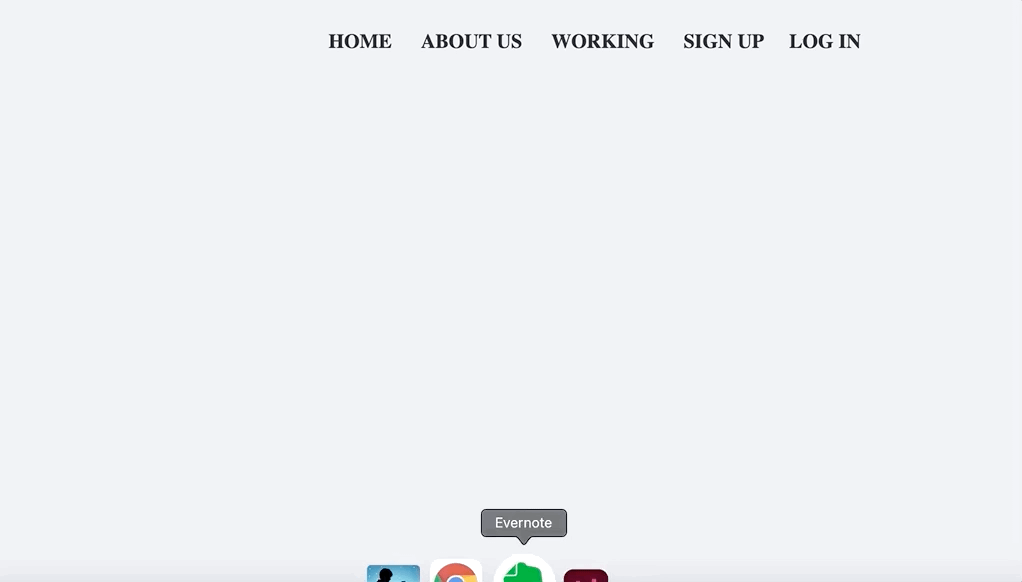
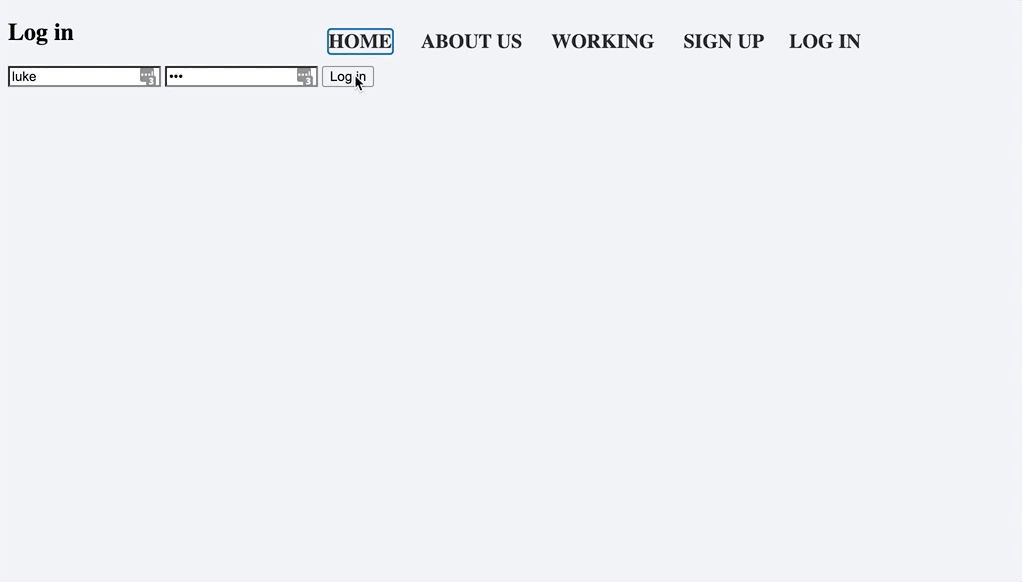
Here you can see the "Incorrect login information!" appearing when i haven't entered the login information properly.
Log out scripts
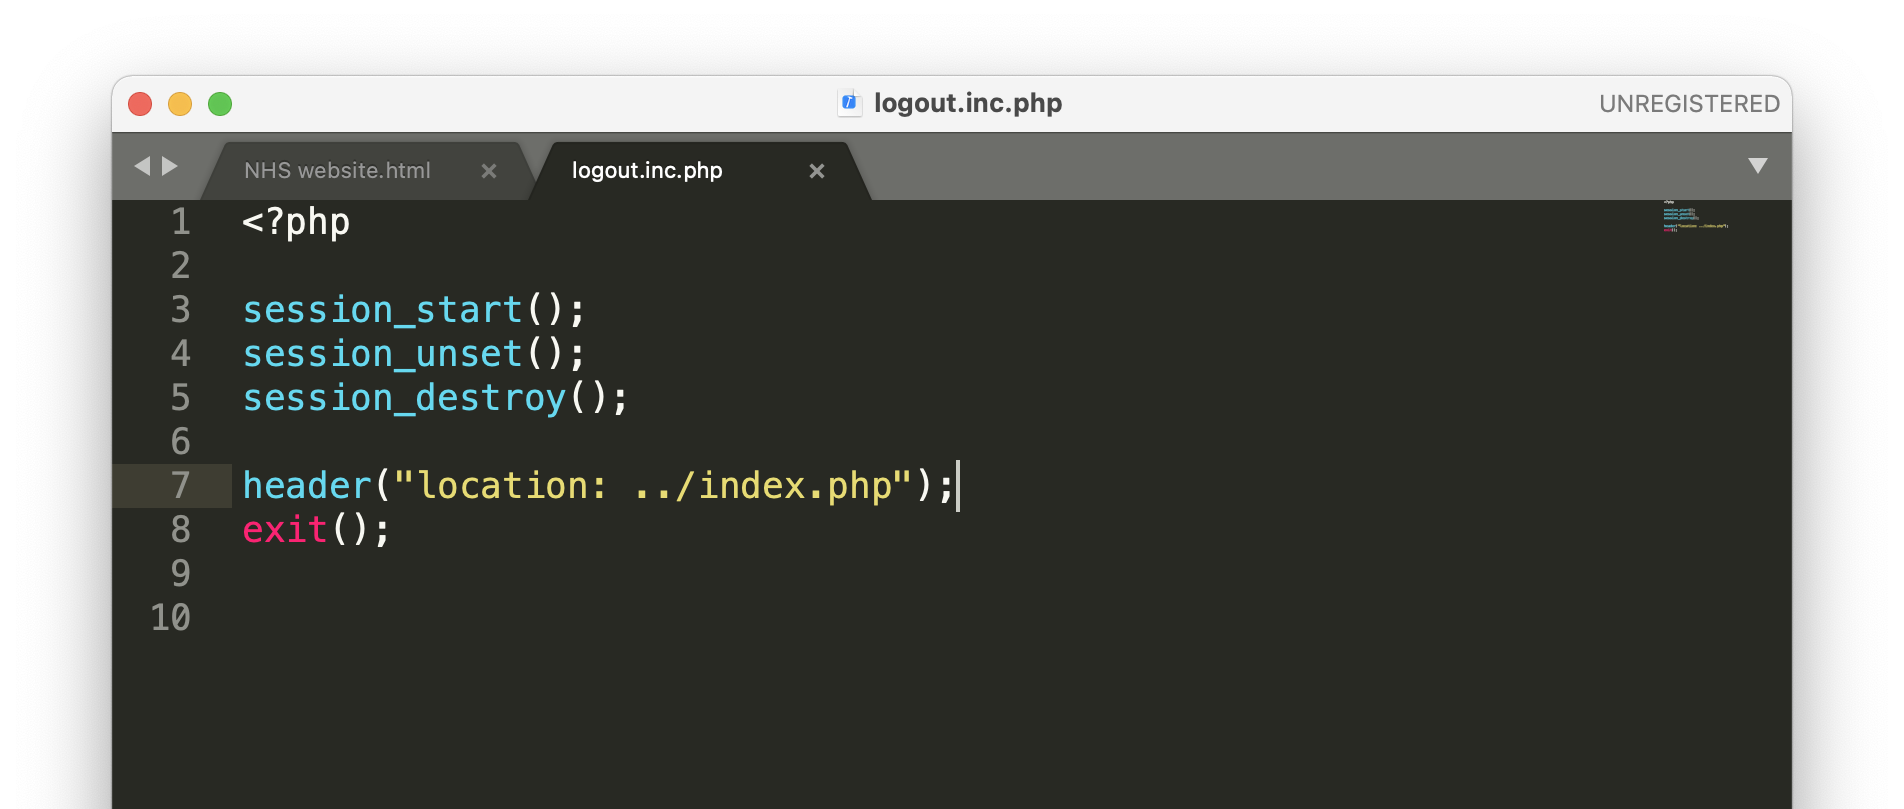
In order for the user to logout of the website, i had to add a logout script that would destroy the sessiomn as seen on the right. The user is then sent back to the index page.
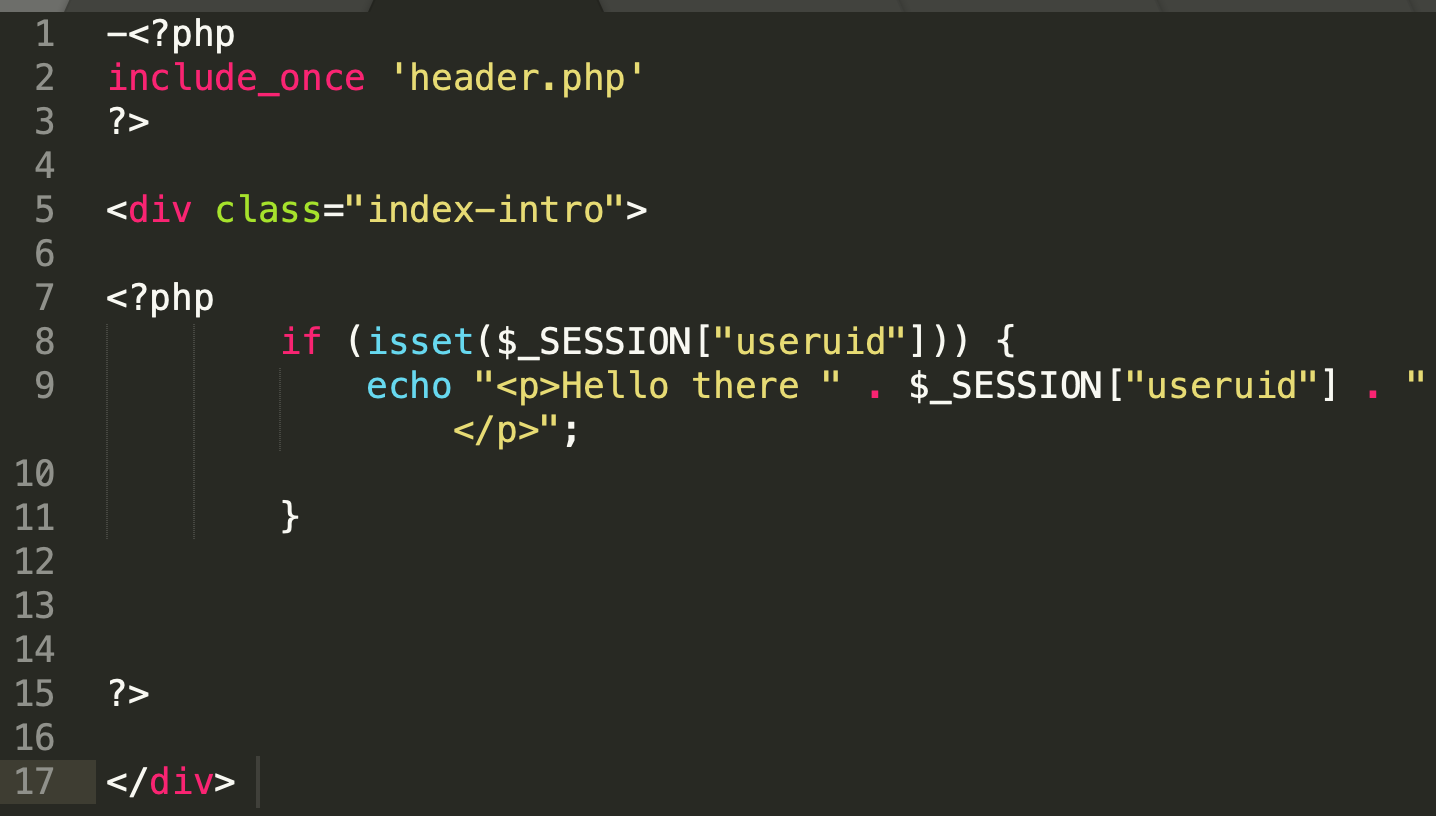
Next i echoed the welcoming message, where included the username " . $_SESSION["useruid"] . " (line 8) to make a personal message to the user's name logged into their account.
And finally you can see the login and logout is operational!
Section 5- Wordpress theme from Scratch
<--img class= "textwrap"src="creatingdatabase.png" style="width: 600px;">
Once the logout system was complete, it was time to create the basic wordpress theme from scratch with custom pages included for the site.
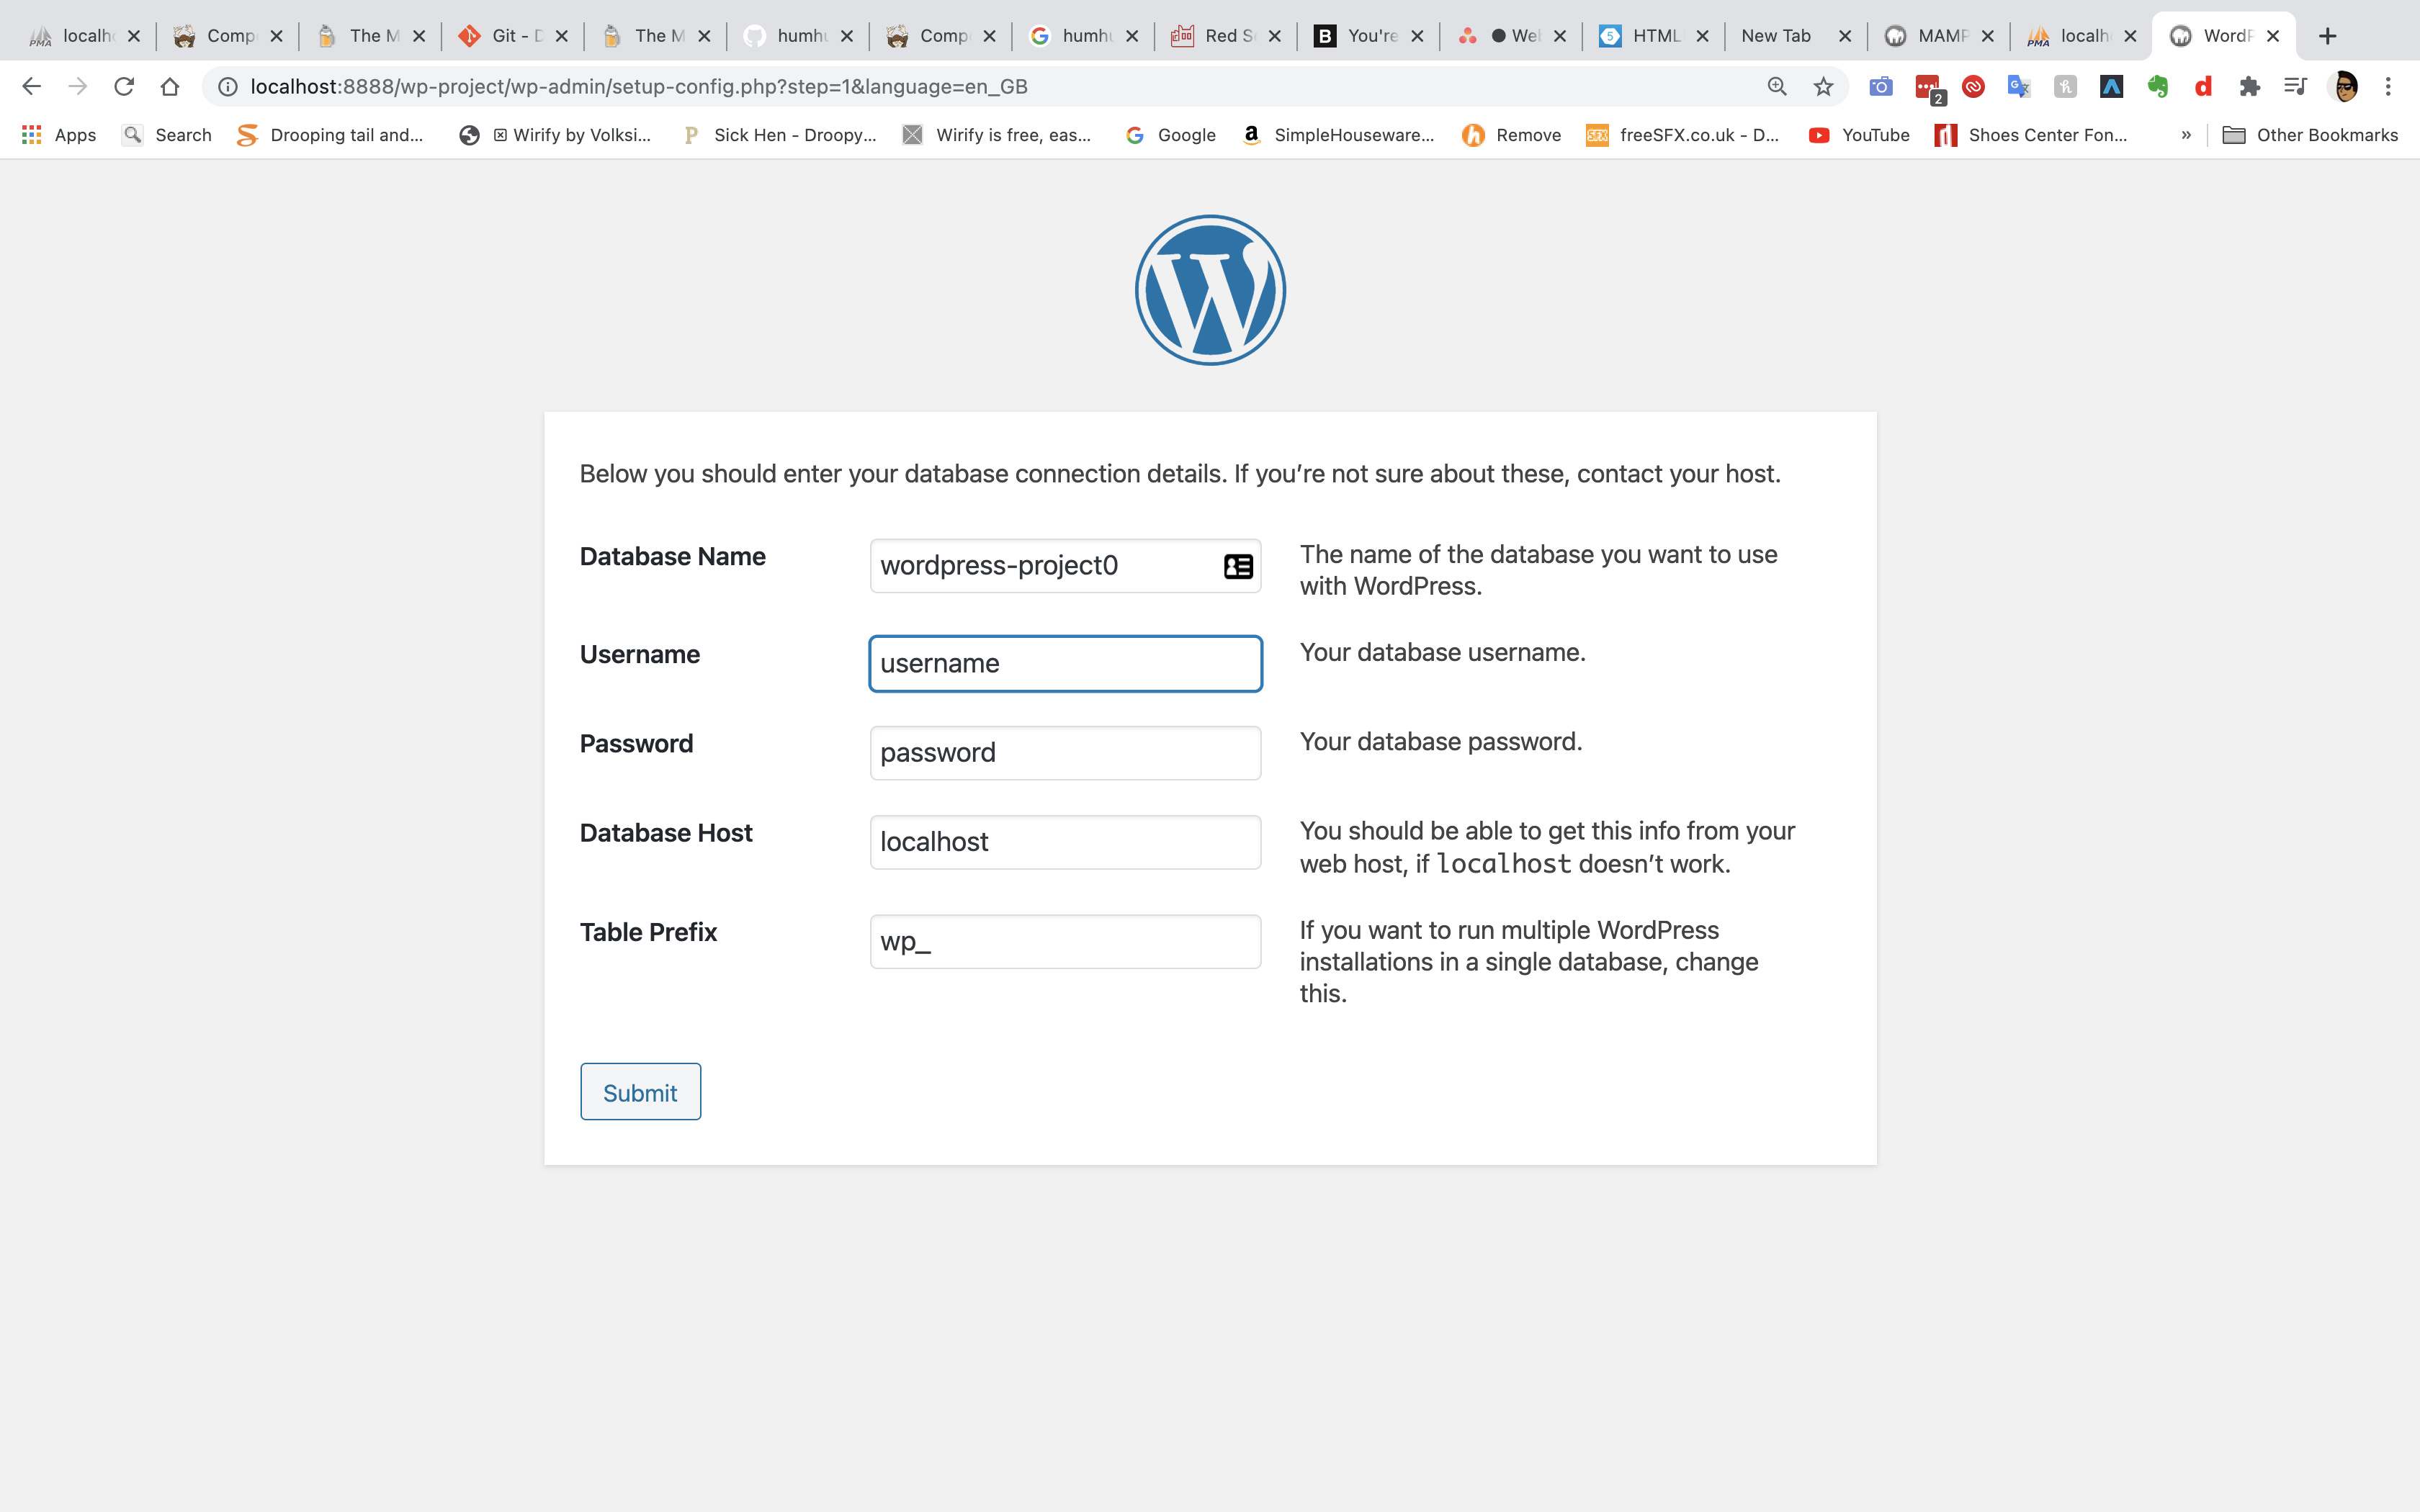
Next i downloaded wordpress for this installation , signed up to the site and connected the databse to the previous database i'd made earlier for the signup form.
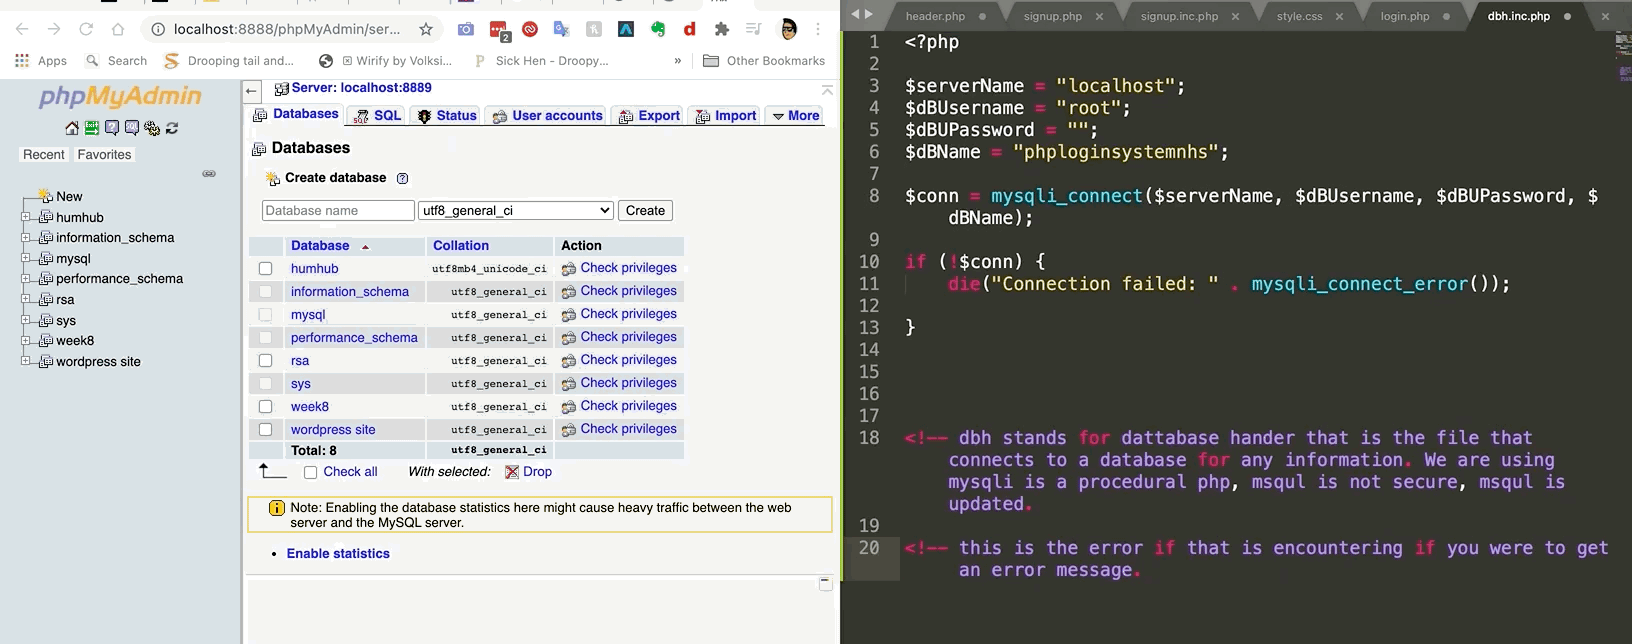
I do not have a screen shot for the installation of the wordpress for the NHS website, so here is a screenshot of the installation of the project O wordpress theme, where the name is instead phploginsystemnhs to match the database i made earlier.
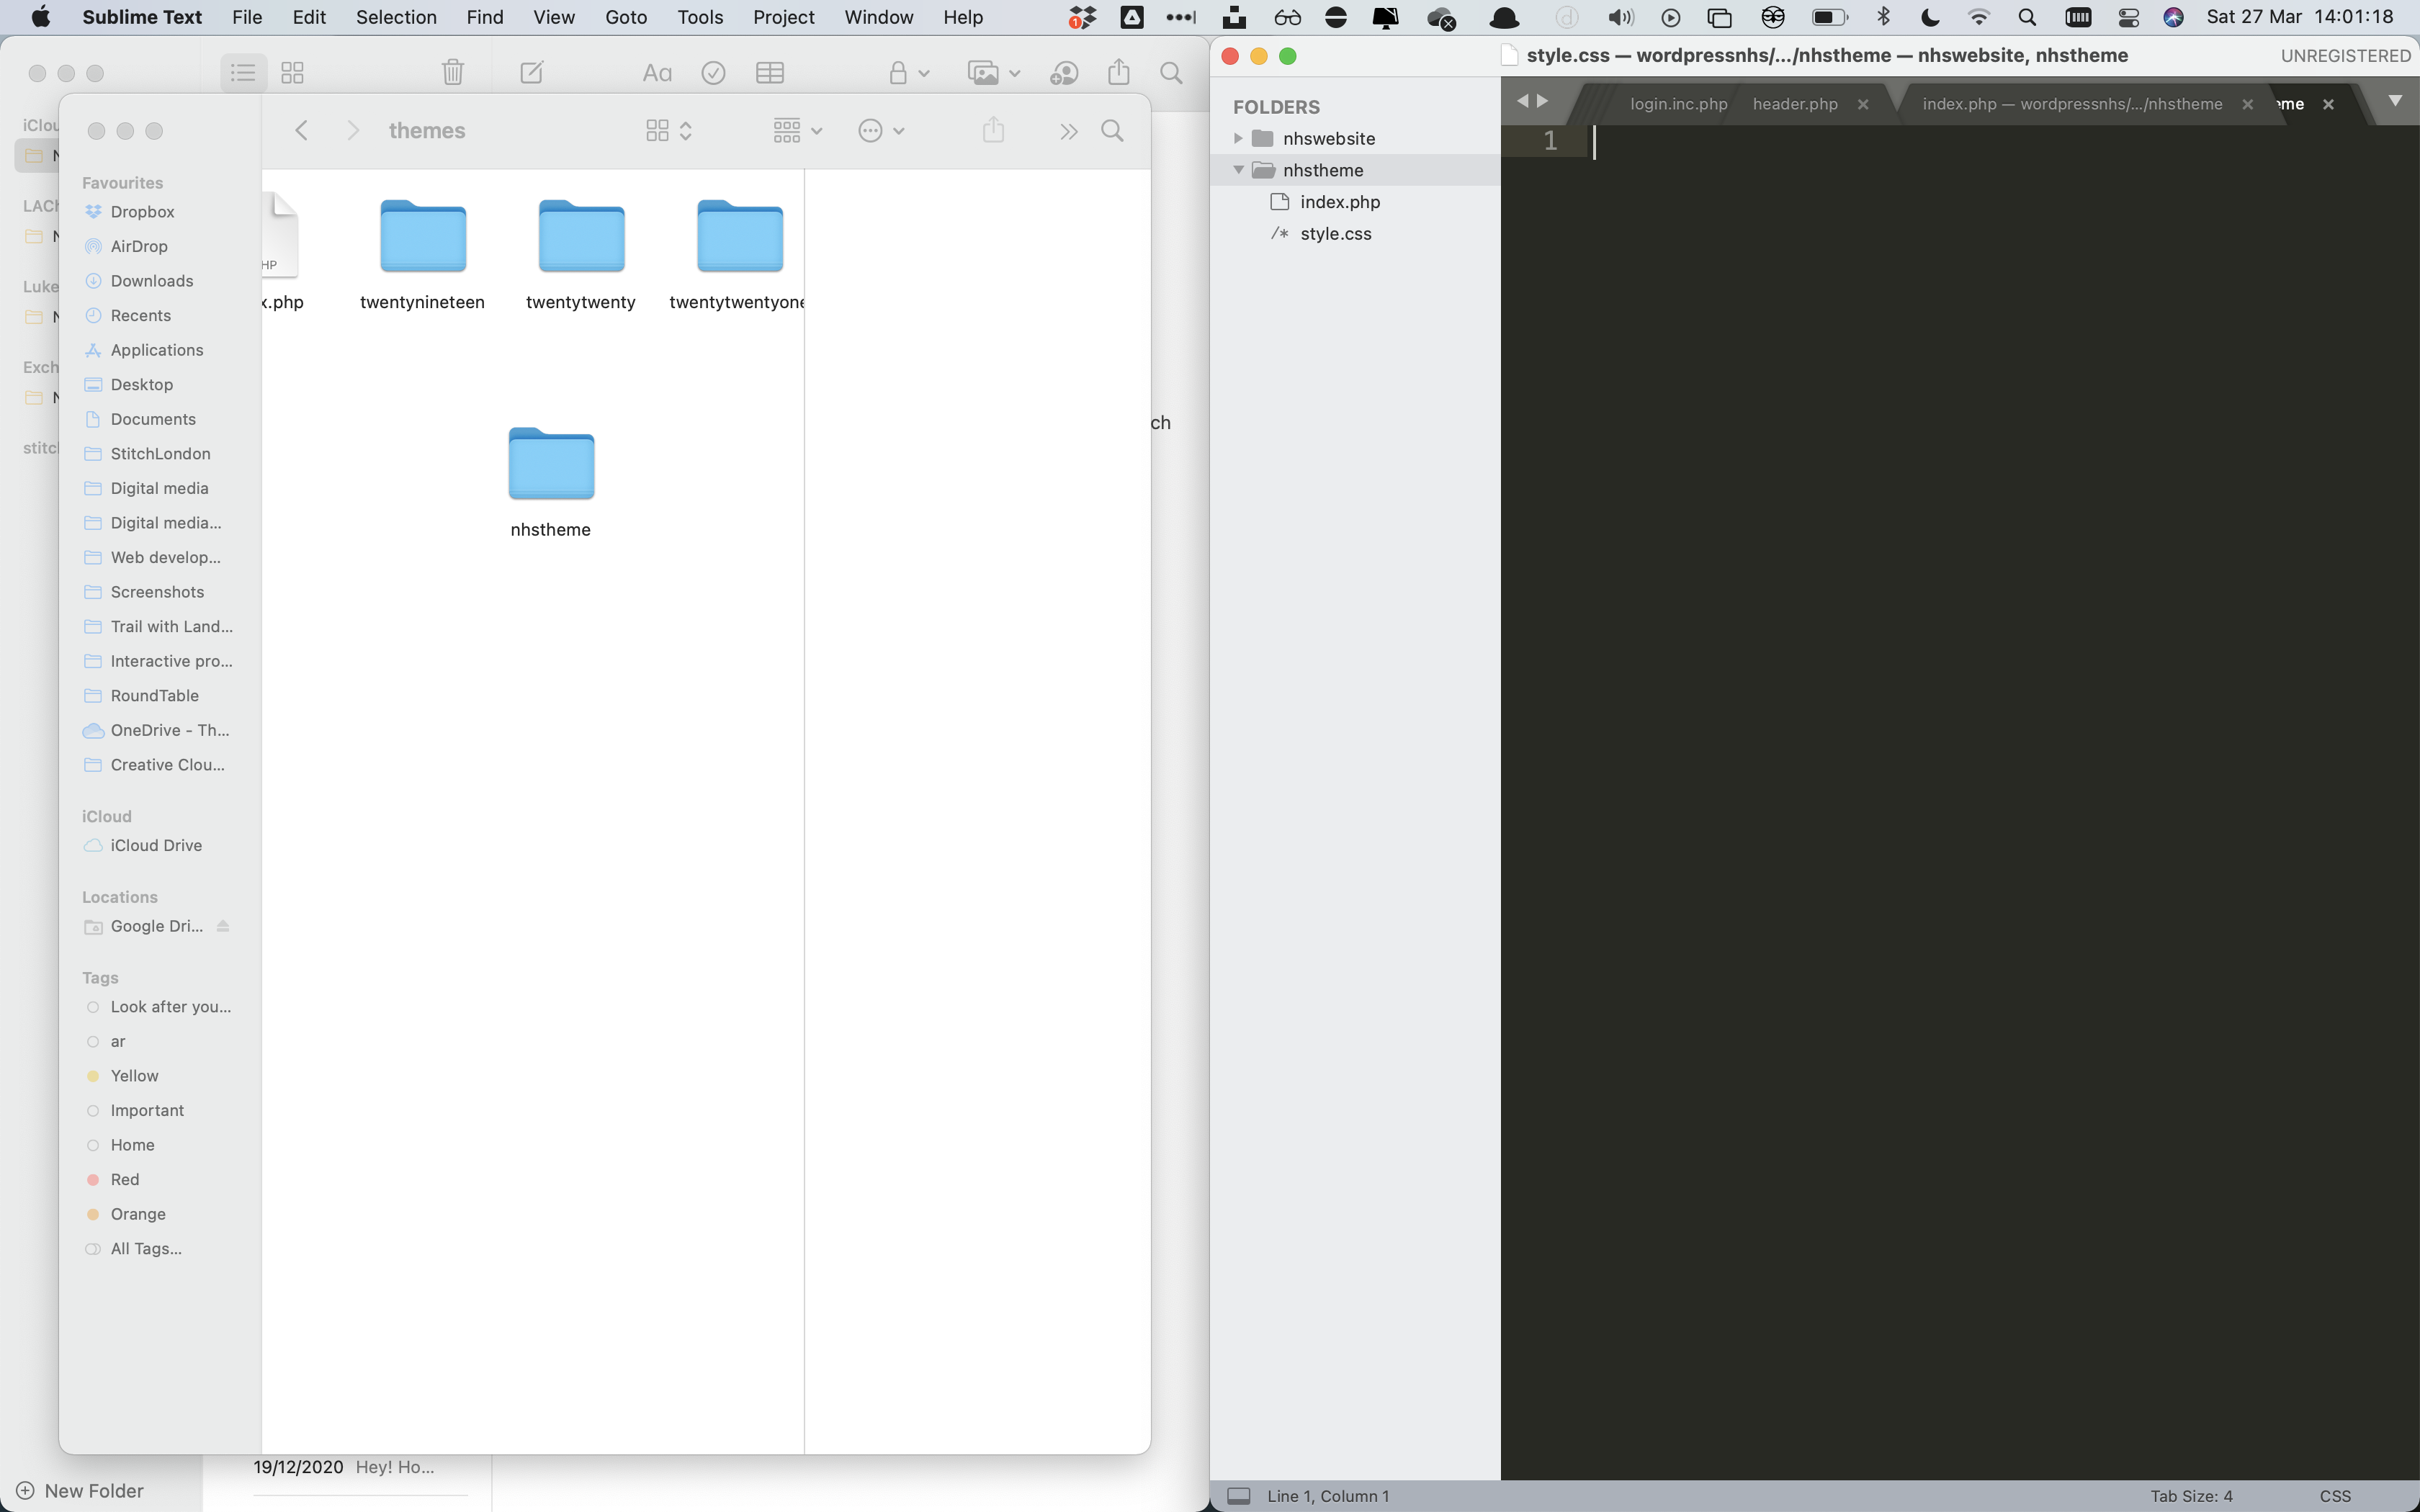
After the wordpress installation was a success i then created a theme folder from which the NHS theme and all of the files will be stored in. I made two key pages for the site, index.php and style.css to allow the theme to appear on the site in the theme selection module shown below.
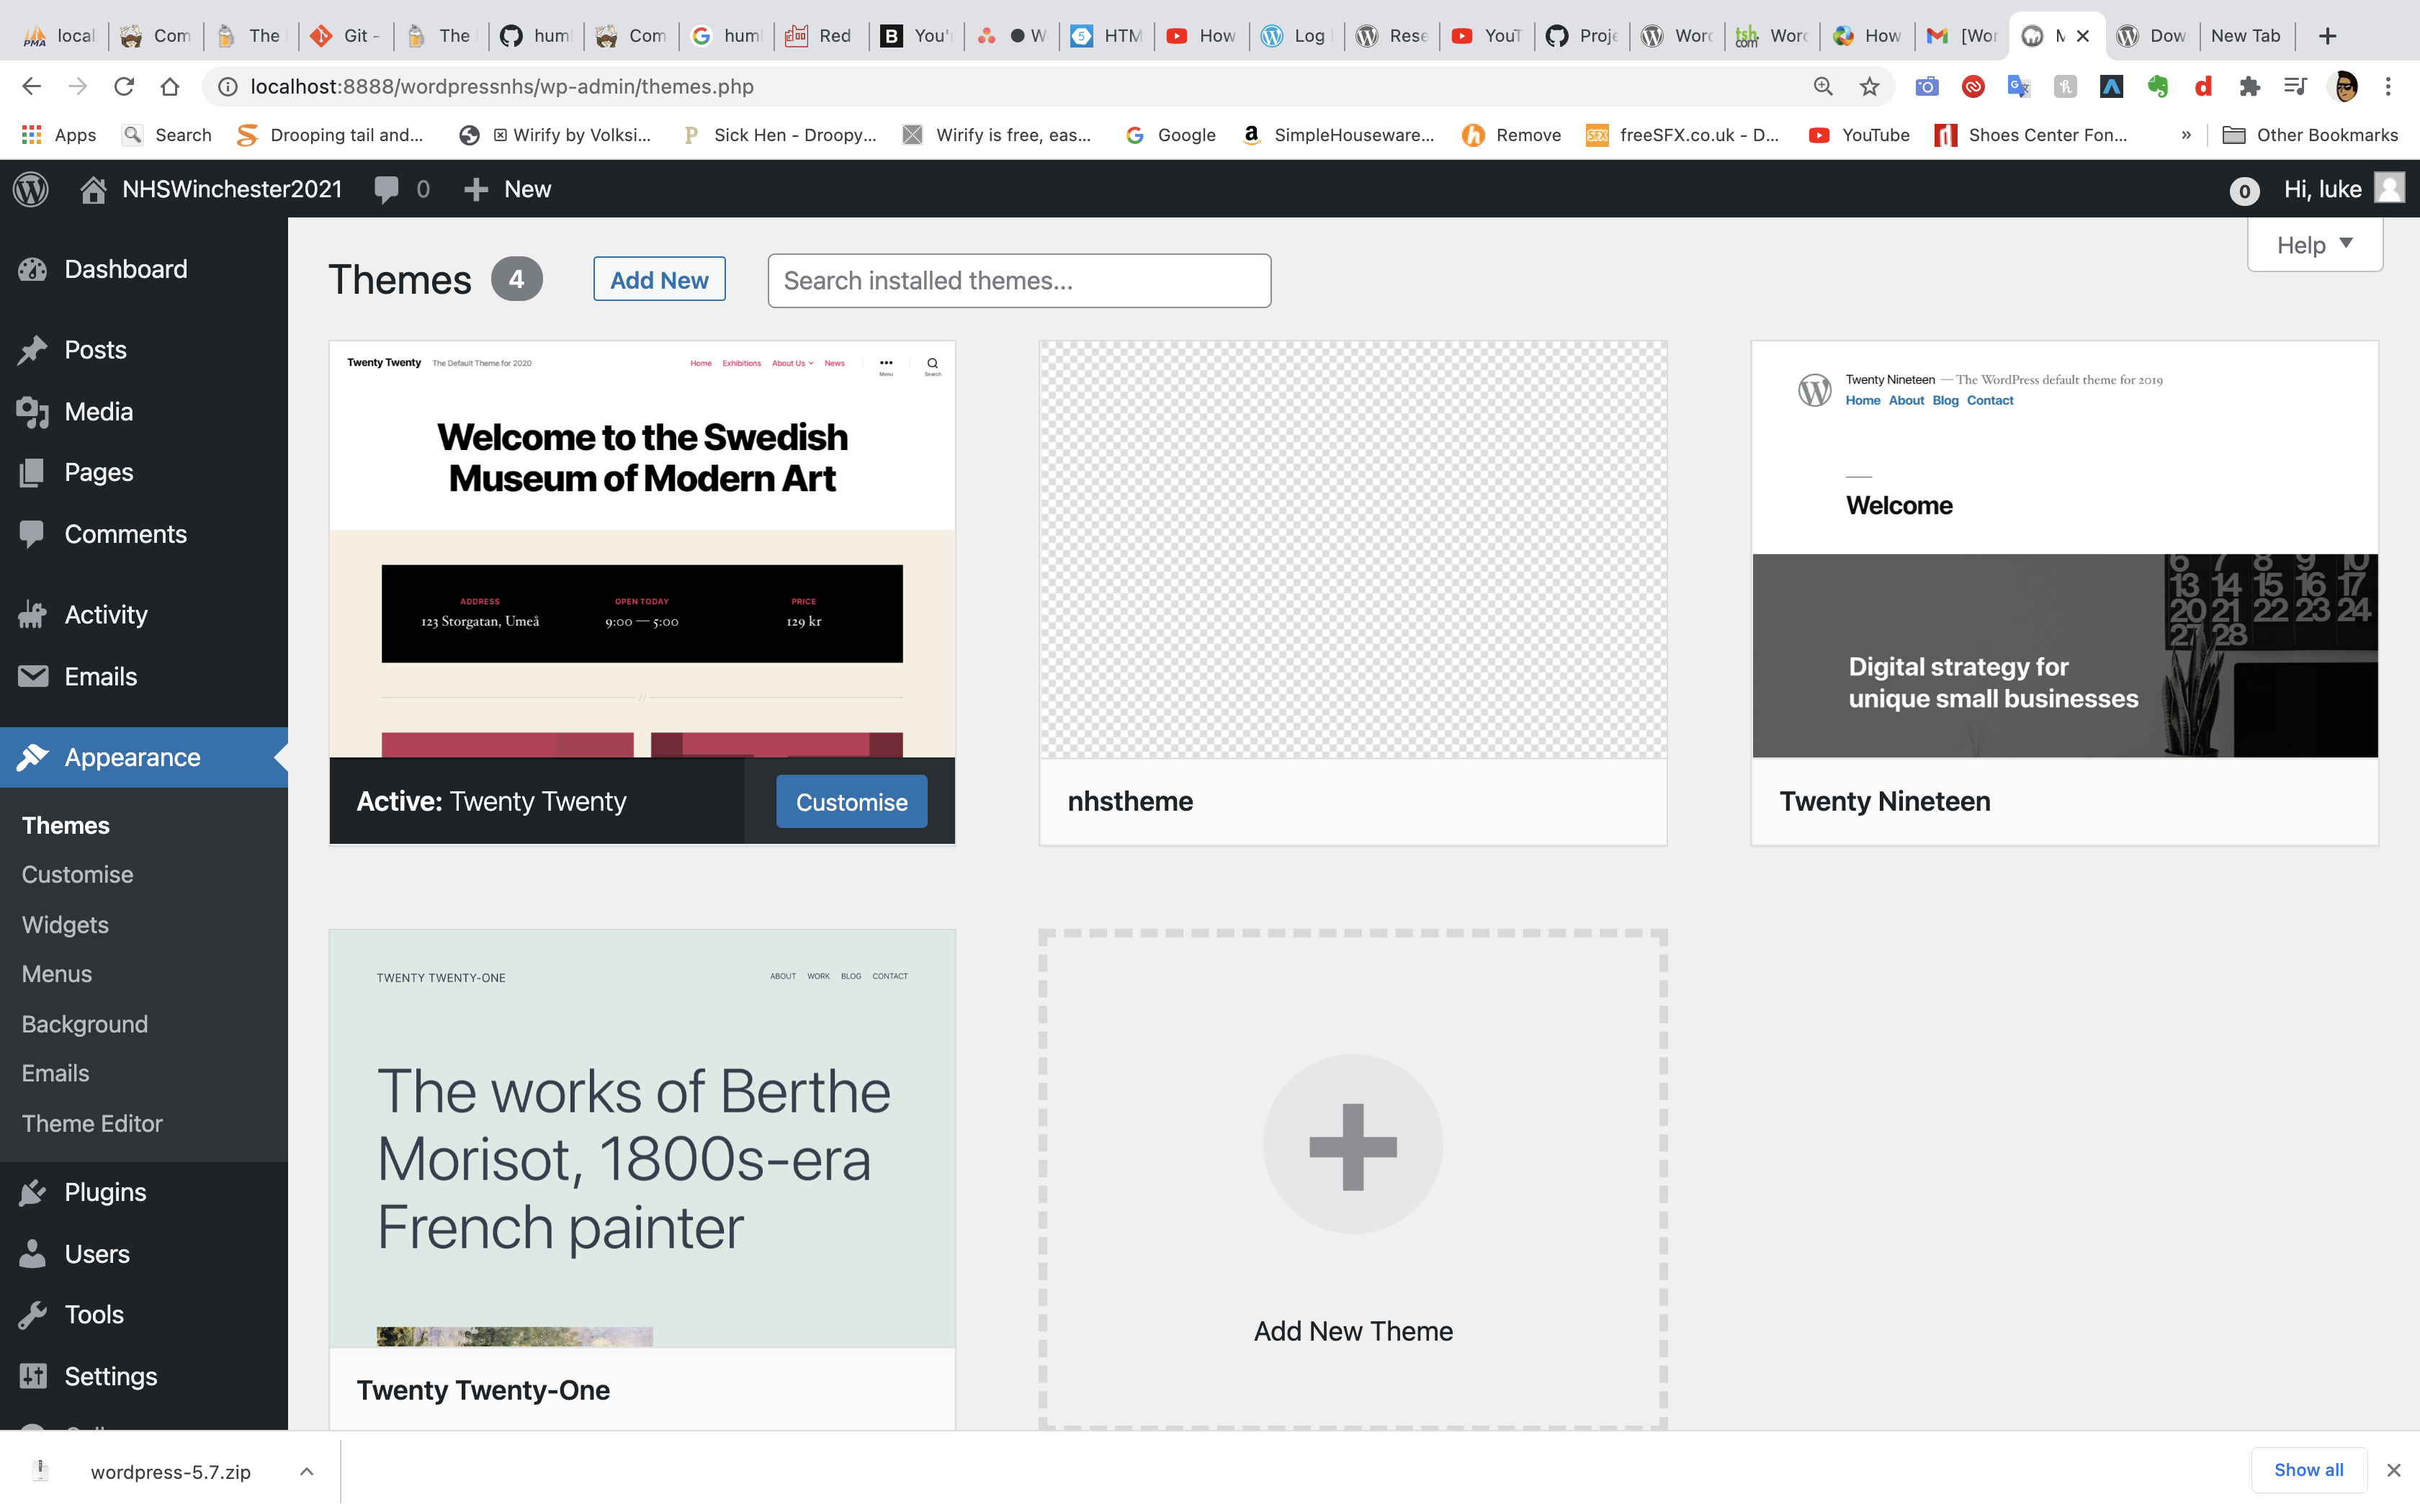
Once turning on Mamp and signing into wordpress, i was able to view the themes that the site (NHSWinchester2021) had contained in it. As you can see on the left, the blank Theme is the NHS Winchester theme that will be used for the site.
Section 6- Creating pages and adding Bootstrap
The next step was to create the pages that the site would need to function properly.
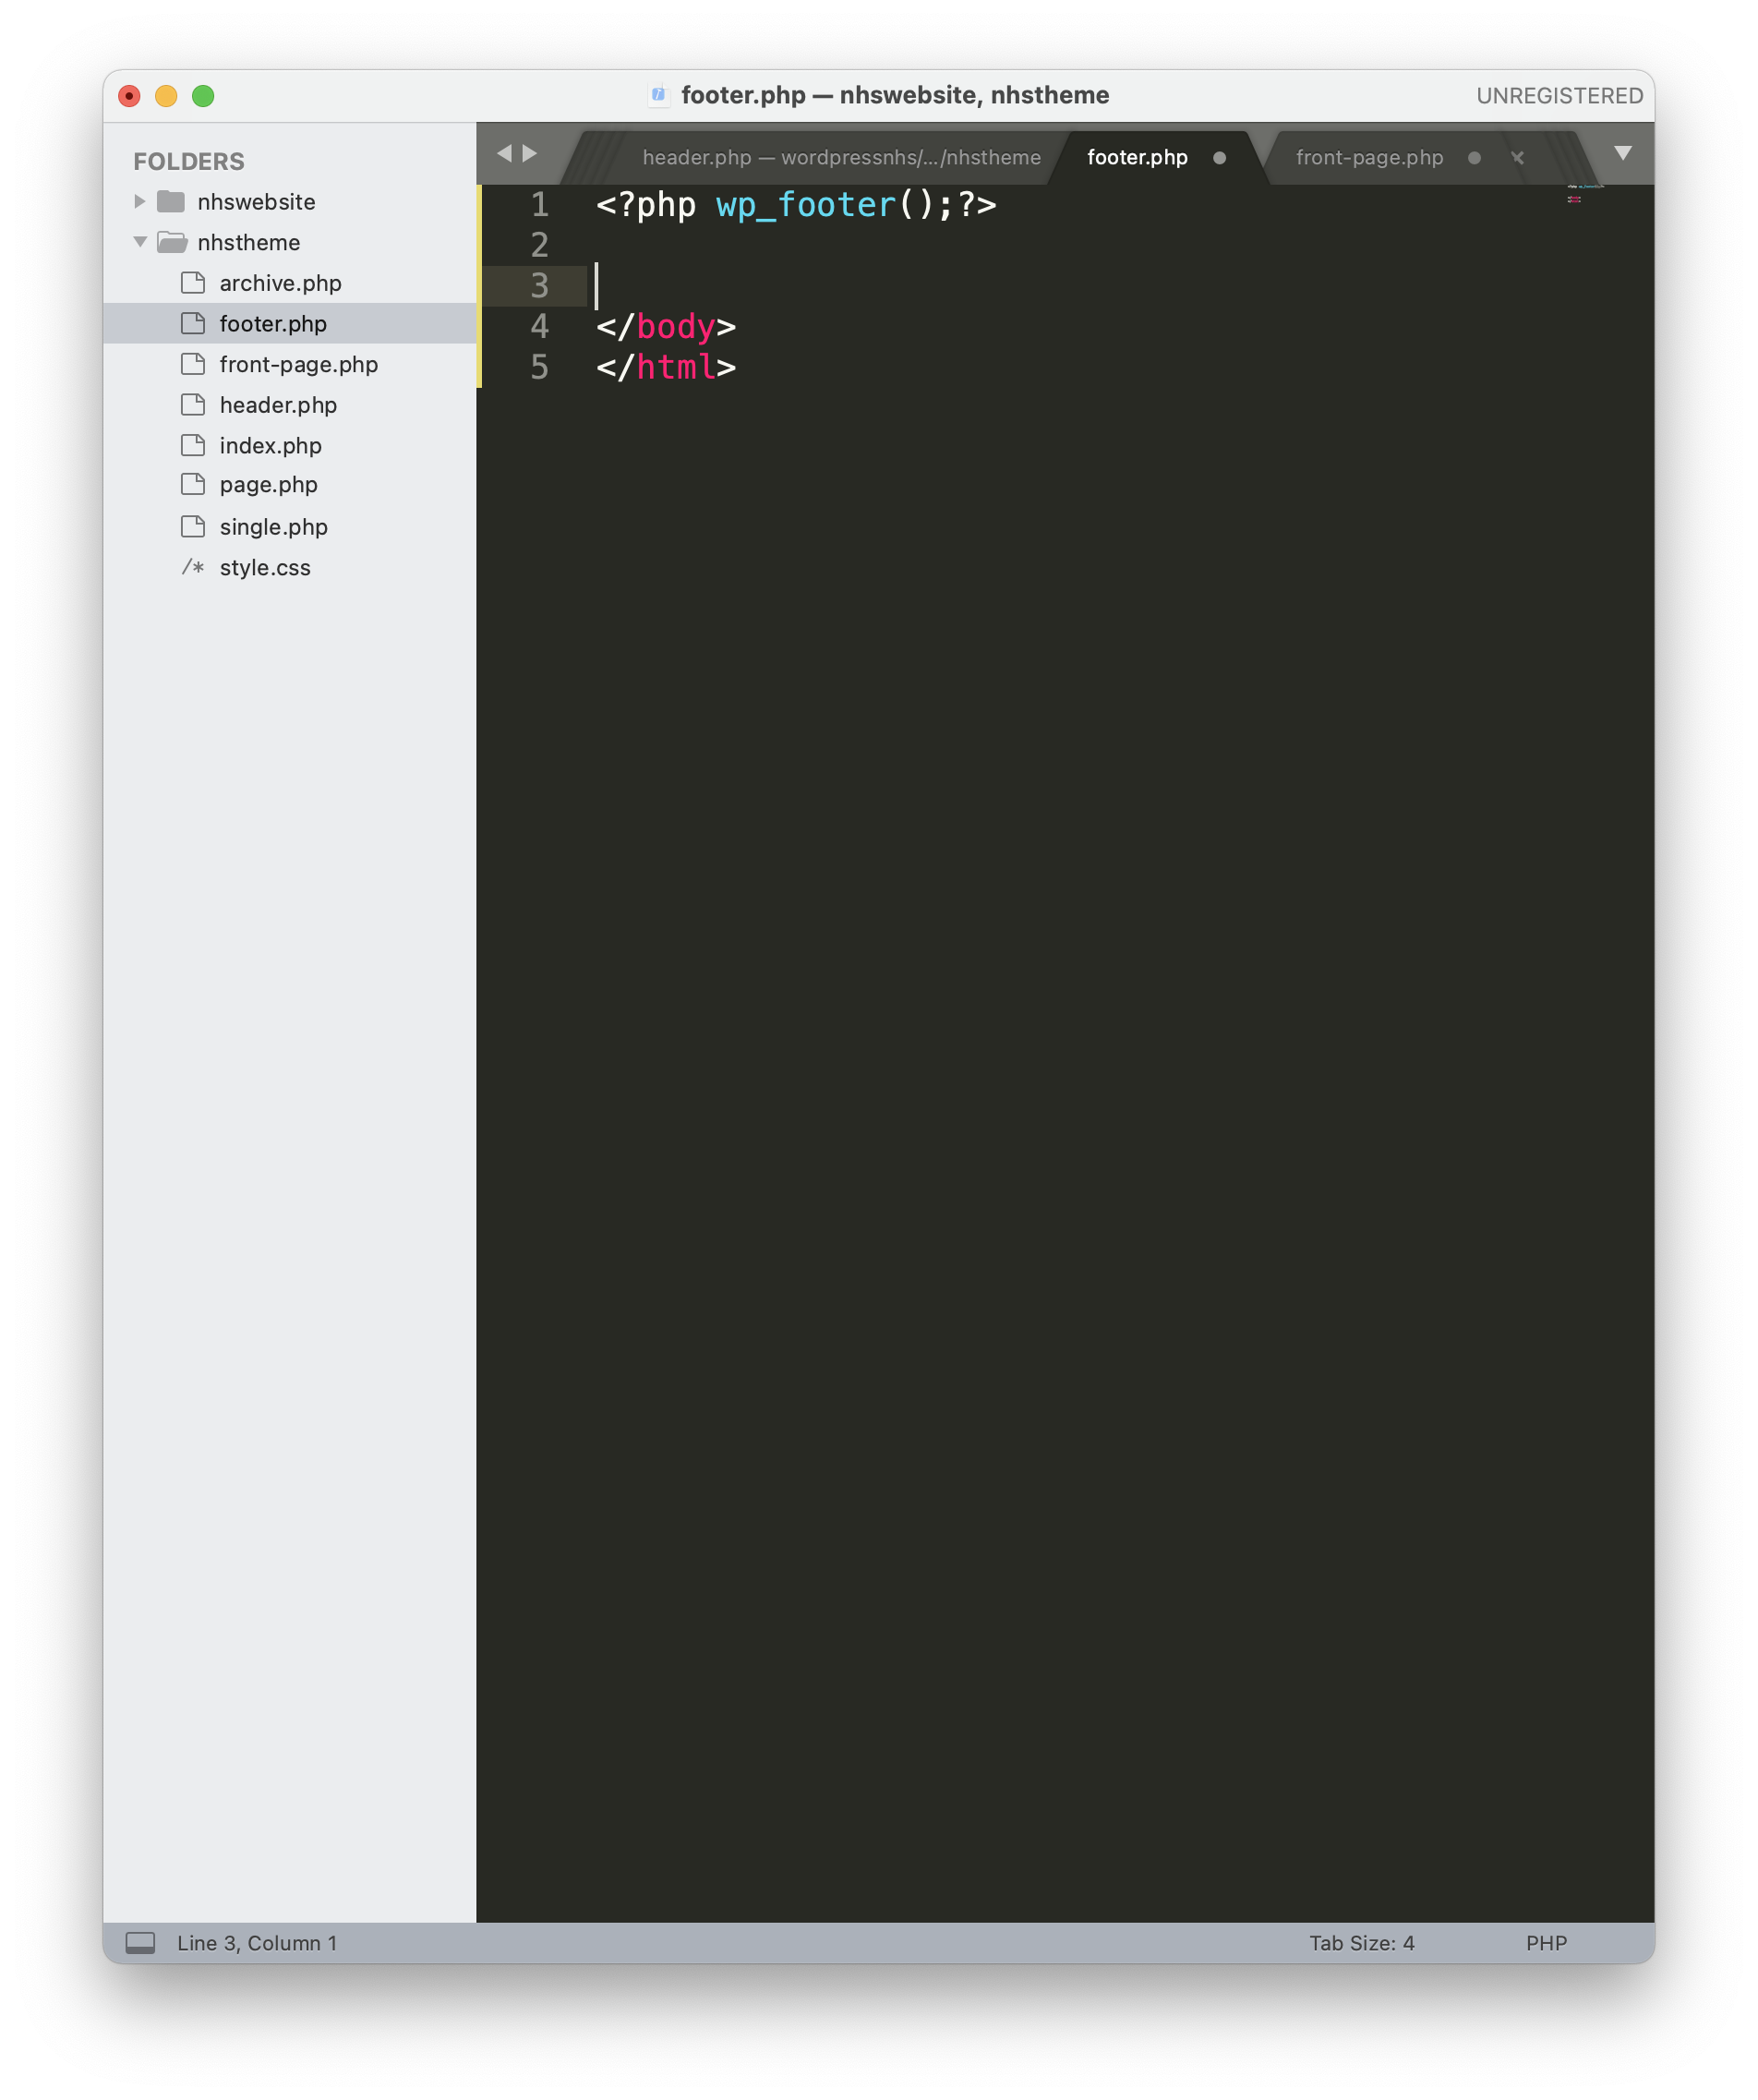
Key pages included, an Header.php, Frontpage.php, Footer.php, page.php (for added pages) and finally archive.php (for blog pages) .
Next i started to create basic html tags for the header page. I added a function called 'wp_head() inside the body tags, which is used for hooks and adding in standard wordpress scripts.
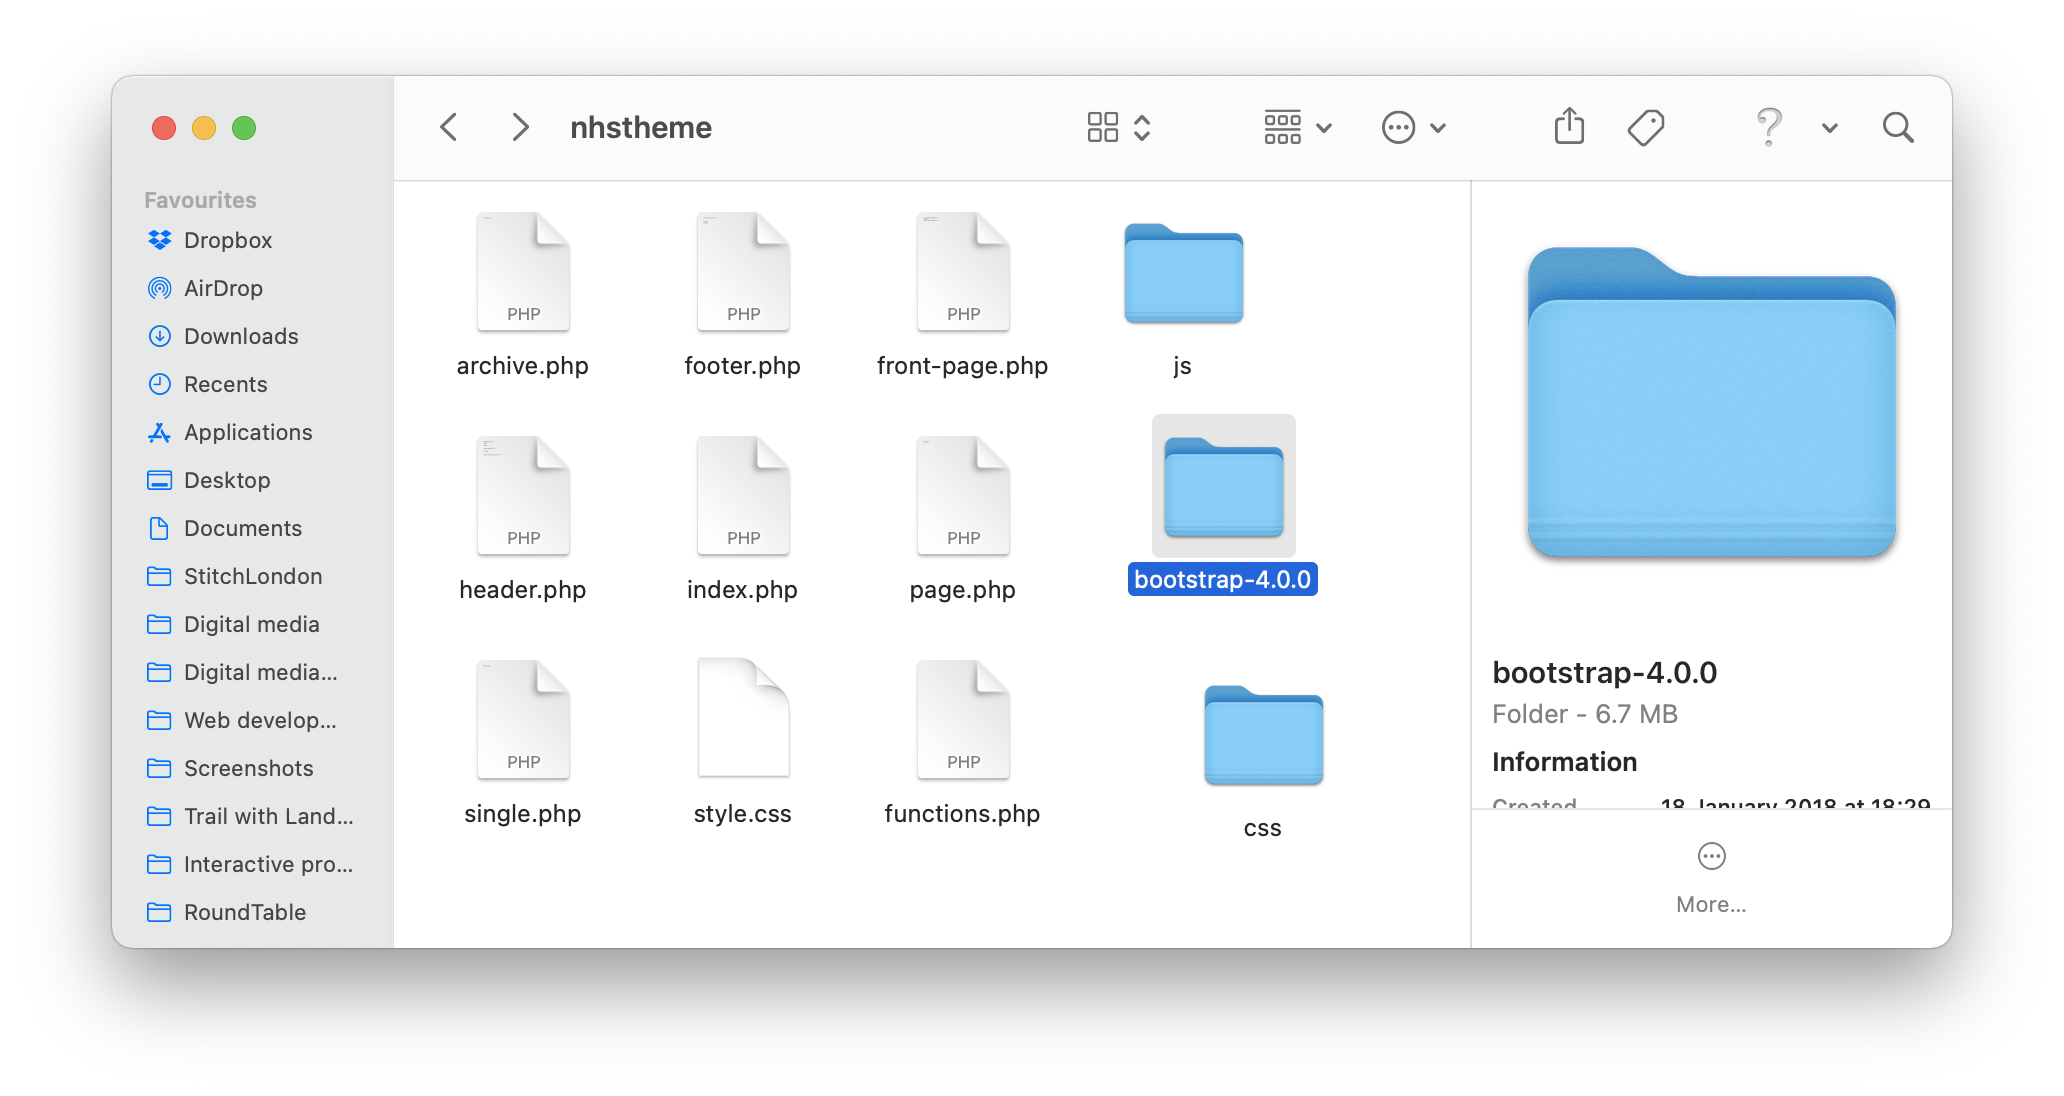
Next i downloaded bootstrap four into my theme folder and extracted the js and css files from the bootstrap folder called 'dist' that stands for distribution. Once i'd extracted those two key files, i then deleted the bootsrap 4 folder afterwards.
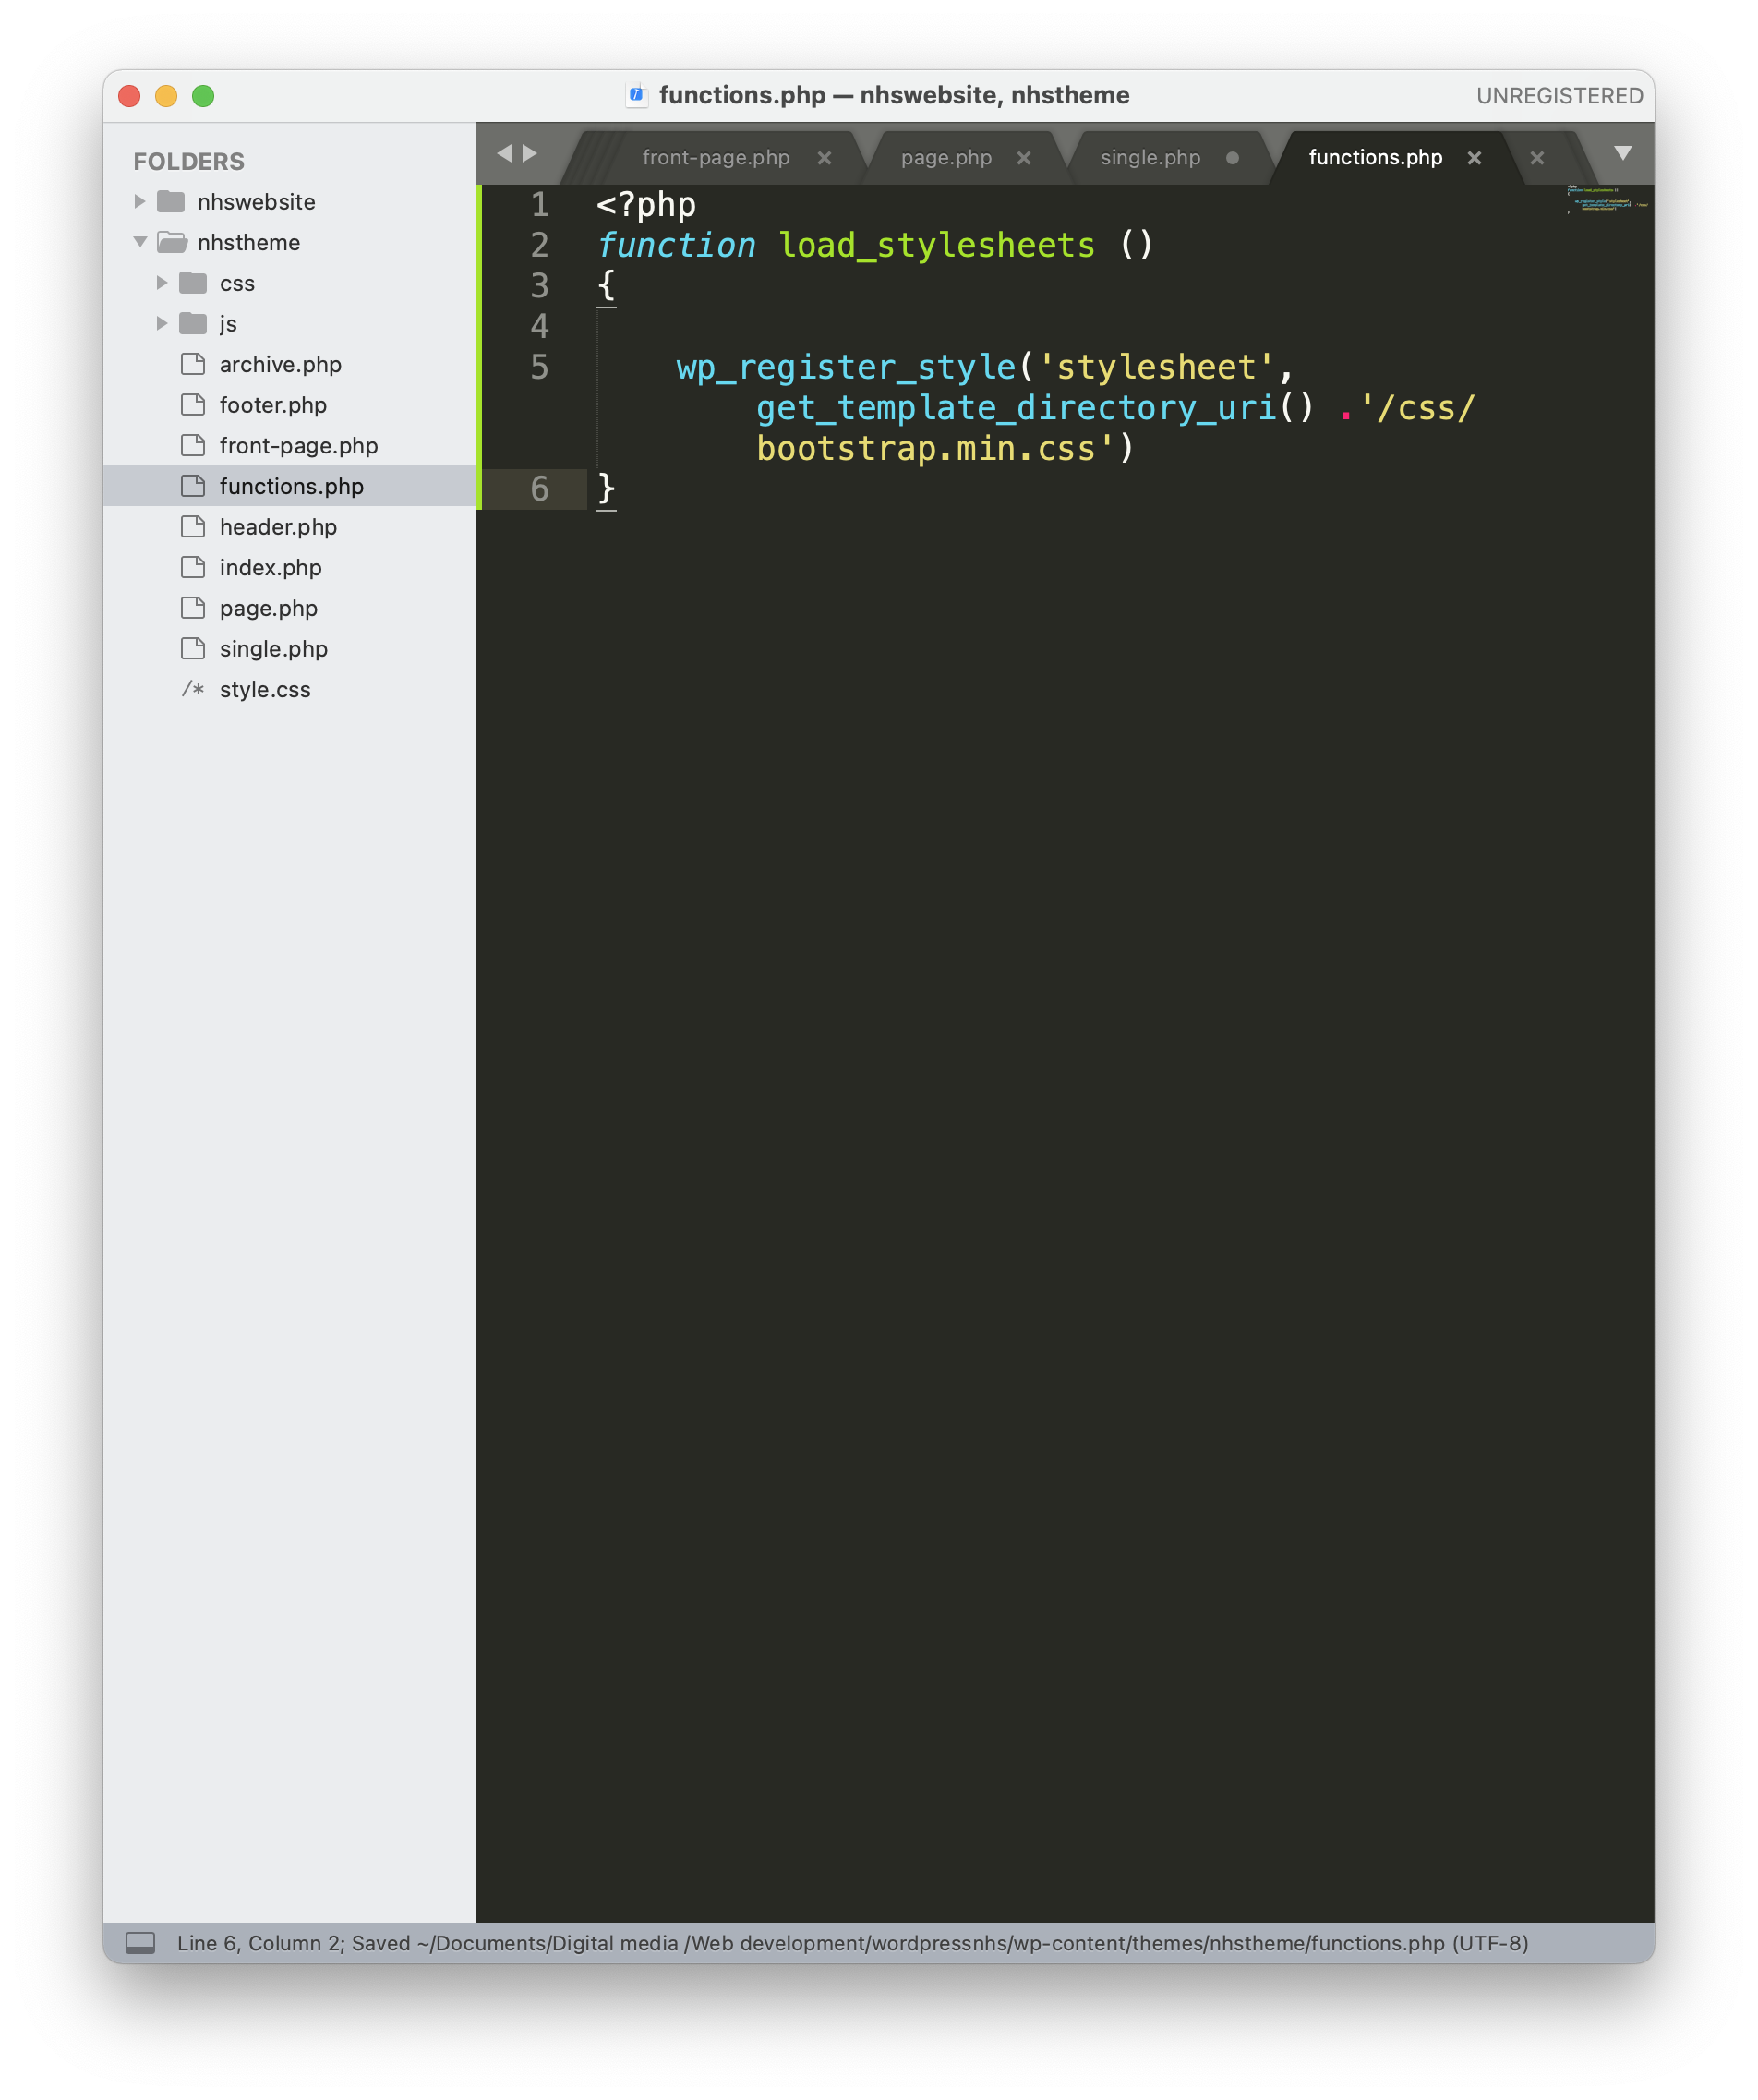
The next step was to enque the bootstrap into the folders, rather than href linking the files together making the layout much cleaner. This was done by loading the style sheets (line 2) and time to register a style (line 5). Next i directed the boostrap to the code, with get_template_directory_uri() . '/css/bootstrap.min.css'
I then told the template to default as 'array' as the stylesheet doesnt have another stylesheet to depend on, where i then set 'false' as there is no specific version, with 'all' for all types of media shown on this site.
Next i enqued the specific stylesheet on line 10 where I then added an action on line 16 which loads the stylesheet into the website, as well as registering the javascript and loading the javascript to be funcitonal on the website on line 19 and 22.
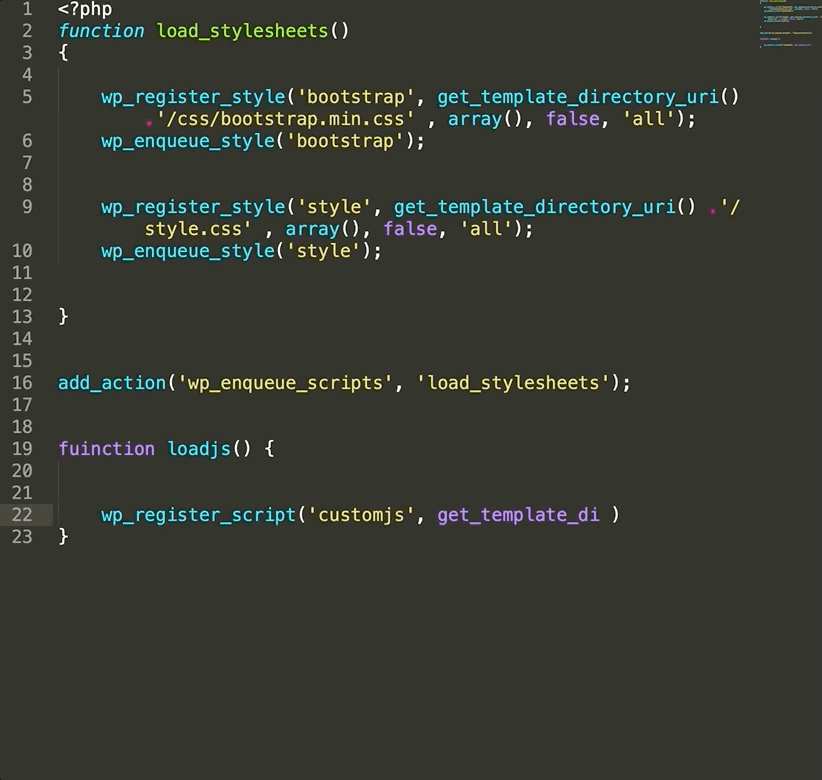
As you can see on line 33 the bootstrap has been intergrated into the site properly when the page's source is viewed as well as javascript successfully enqued into the page as seen on line 34 onwards.
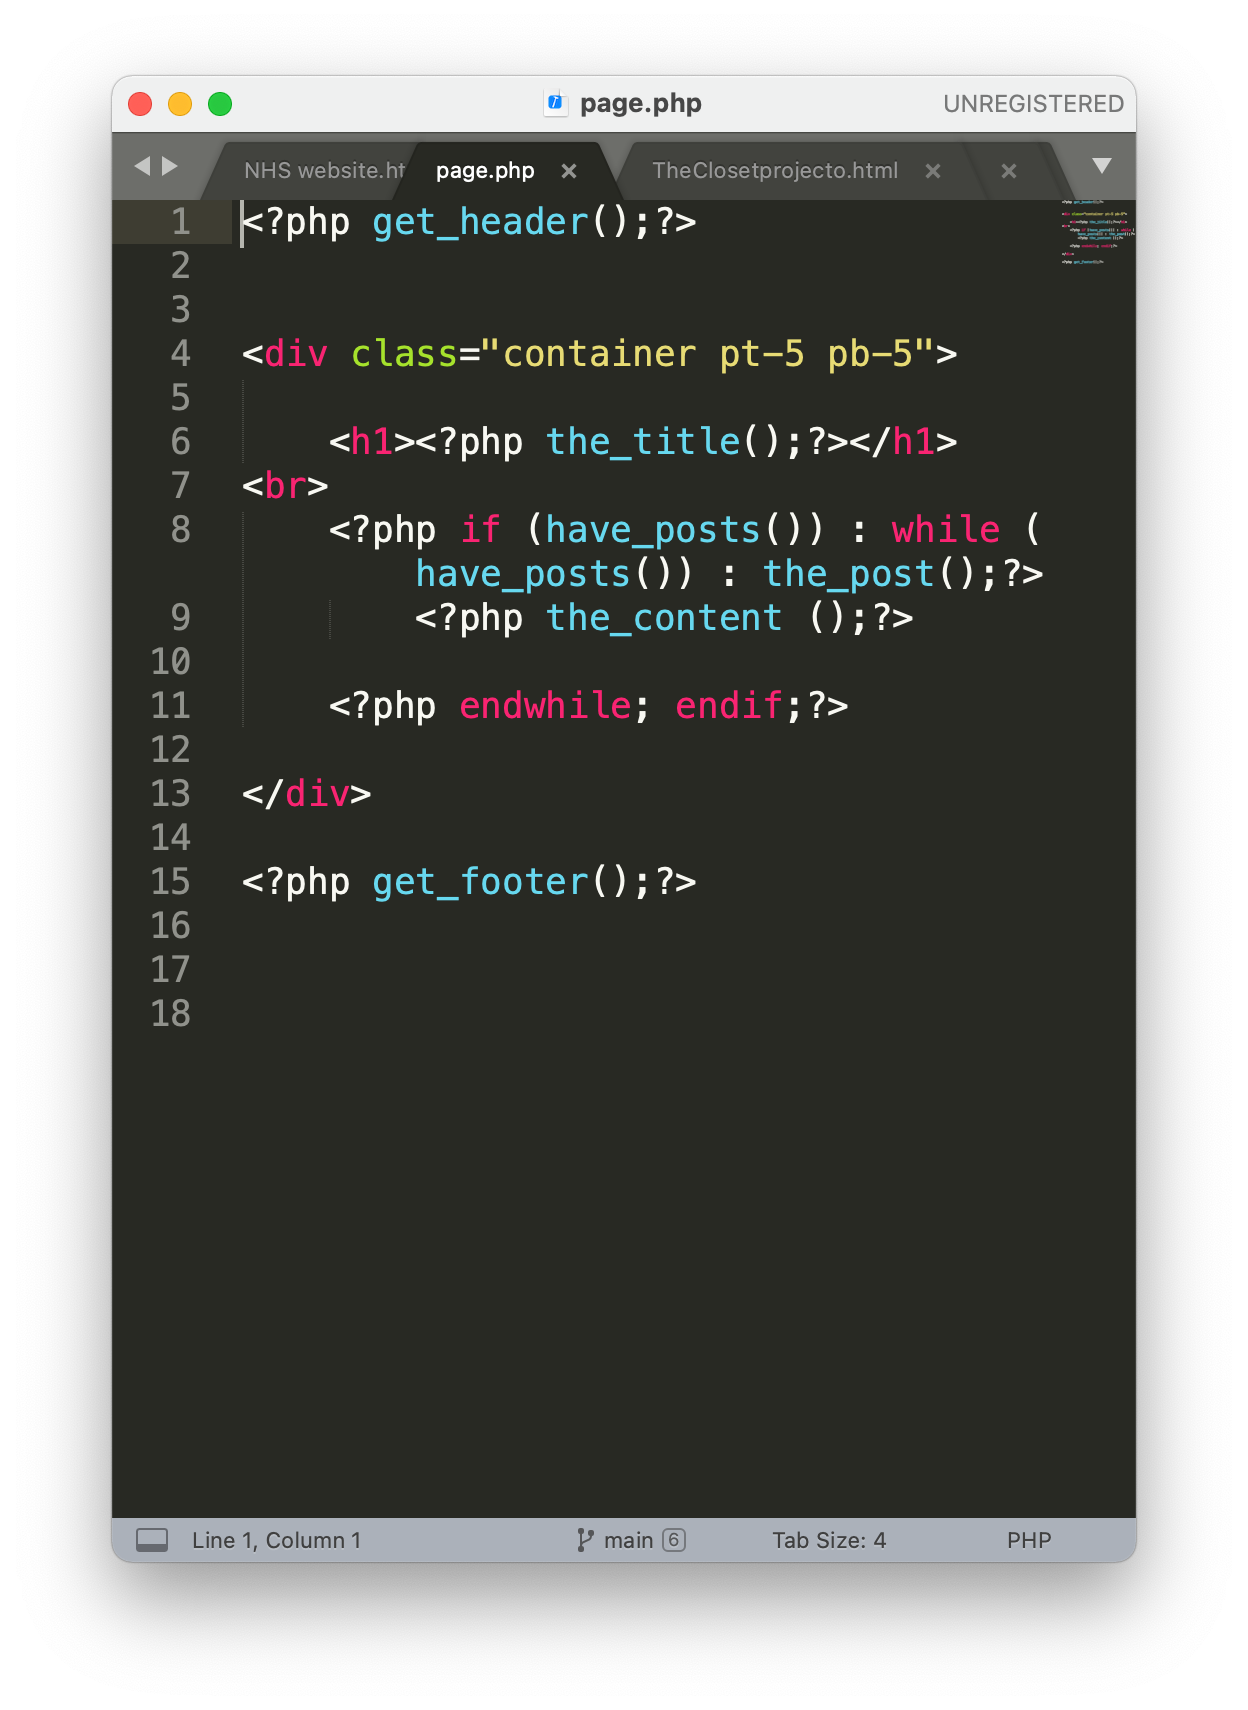
Next i began intergrating the wordpress content dynamically, where it uses php code to bring forward the title of a particular page and content, without the user having to alter direct html or php code to make that work such as altering the title (line 8). Next i wrote: "?php if (have_posts()) : while (have_posts()) : the_post();". This looks for any posts that may be written on the wordpress page to be displayed on this page.
I then wrote out "?php the_content ();?>" to display any content on the page from the wordpress site which could be inserted pictures or content in general.
Section 6.2- Minor Debugging
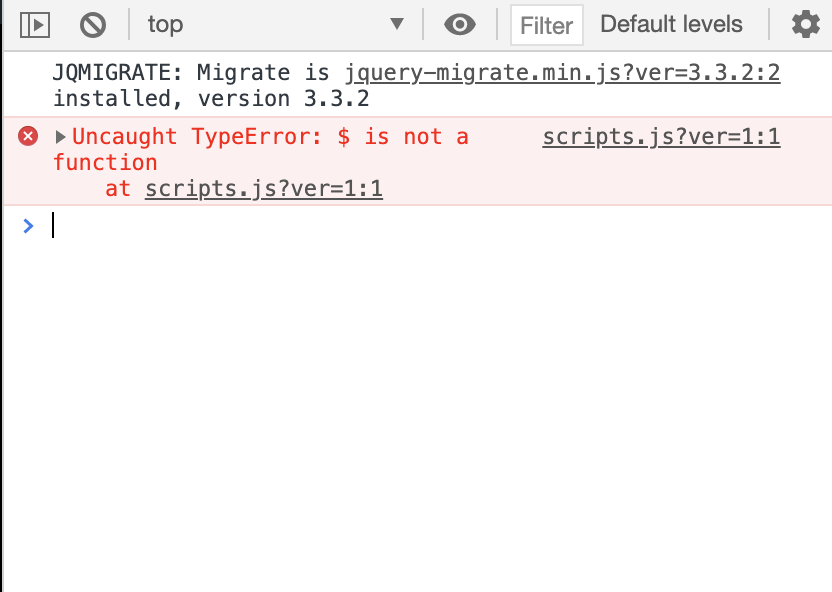
During the testing of the jquery i came across an error that prevented a JS alert script from functiong as shown below. This error was talking about how Jquery was not working on this theme.
One soloution i came up with was to update jquery to the lastest version as of now (3.6.0) where i then copied all of the text and placed it into a jquery file saved in my js file.
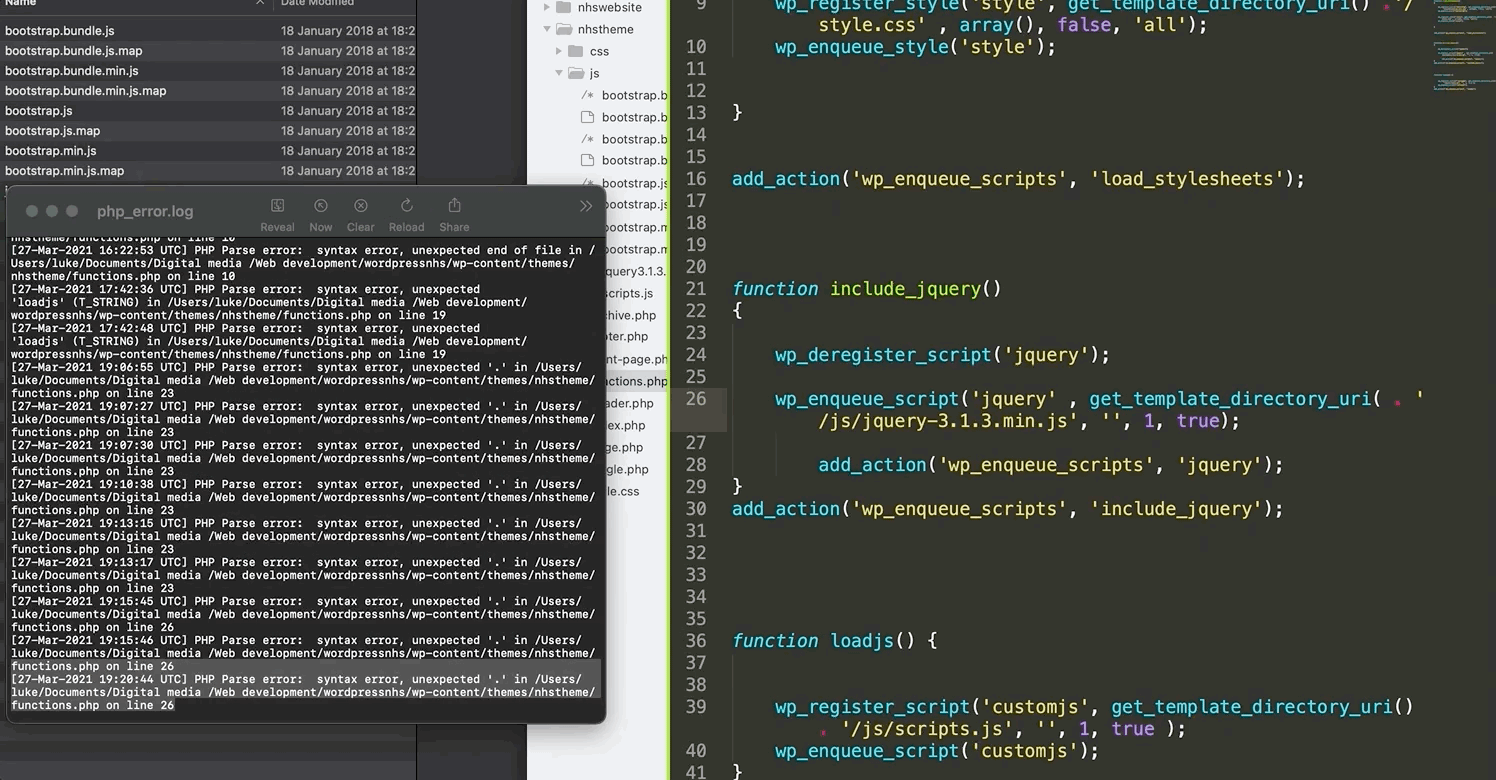
Next i deregeistered any current jquery that may be in the project from wordpress on line 24 to prevent it from conflcting with the new updated jquery i just saved. I then enqued the jquery file into the project, with the direct directory added. On line 30 i then added the action to allow jquery to run.
Despite adding this new version of jquery, I decided to debug the code, using apache with phperrorlog that was able to identify the problem area for me, which turned out to be on line 26, where i didn't add another bracket to the end of the uri link. This then enabled me to progress with the project and showcase the alert downbelow.
Section 6.5- Functions and signup page

Before the debugging above, i wrote out a small script to run when the page loads to show that the JS scripts are functional. This was done using a custom alert to loads when the page is refreshed.
As you can see the page loads and the alert is present, show casing that the js and jquery are properly installed and functional.
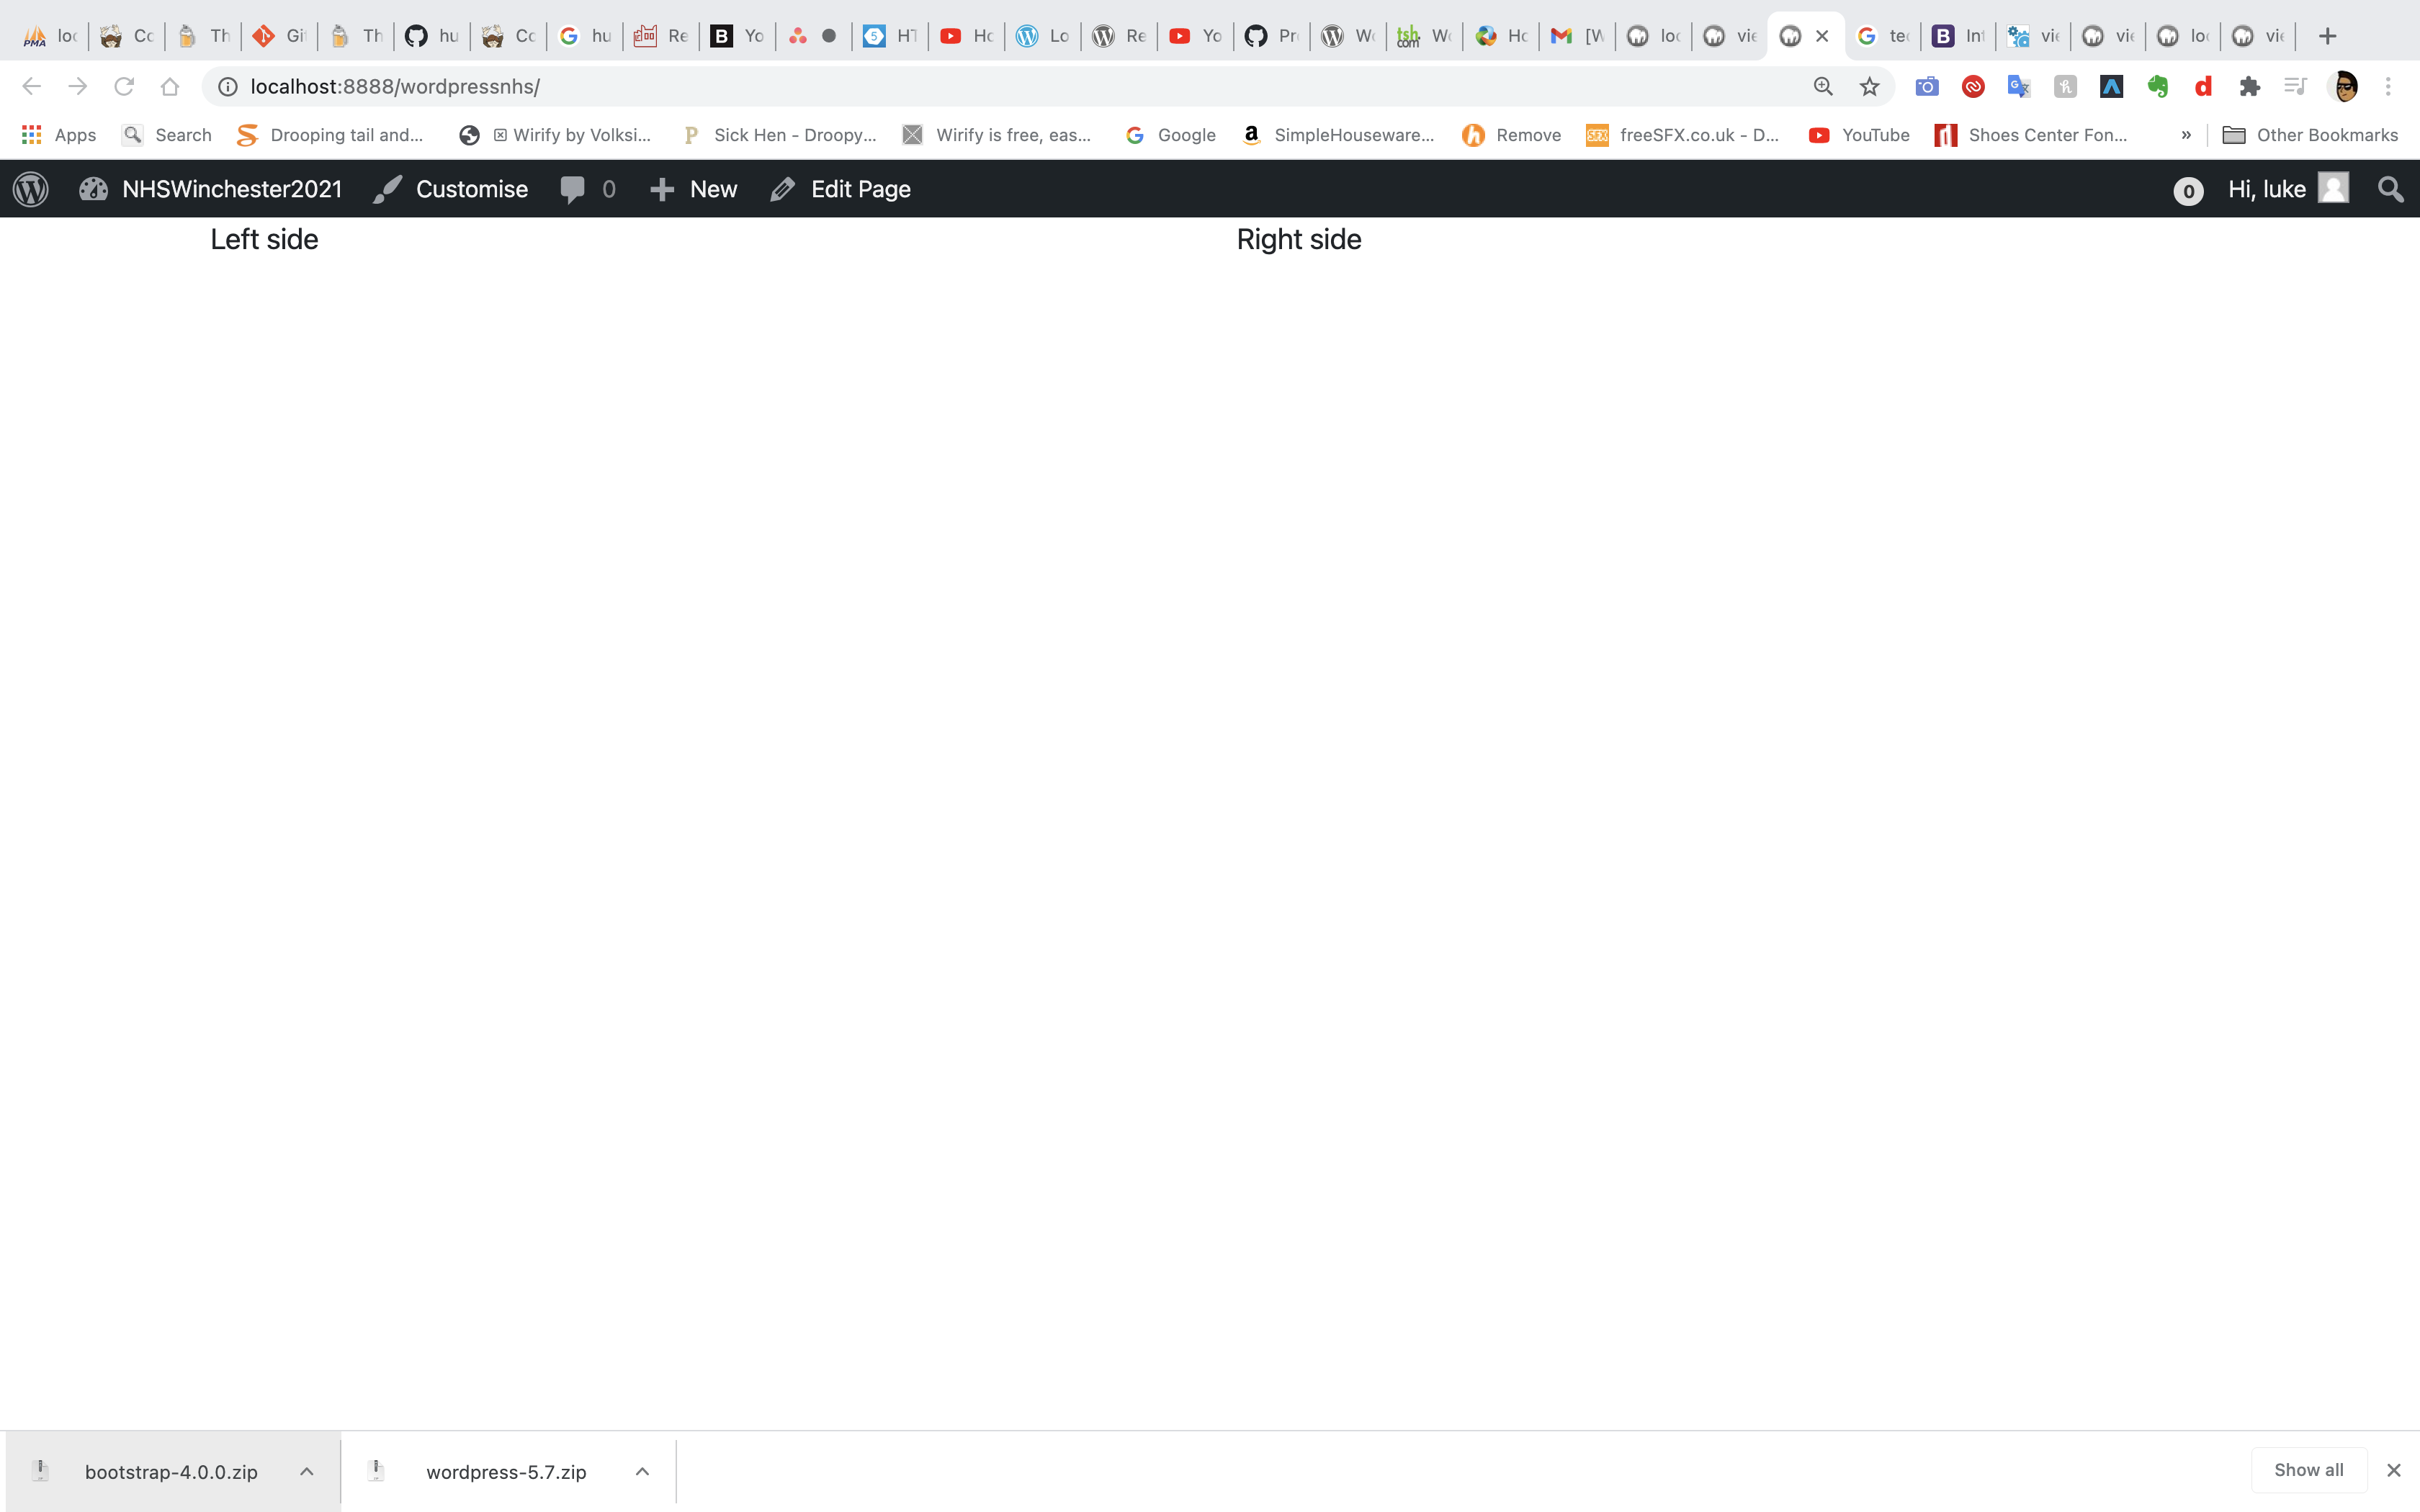
I then demonstrated the bootsrap functioning properly, where i instructed the page to be split in two halfs with the left side and the righthand side.
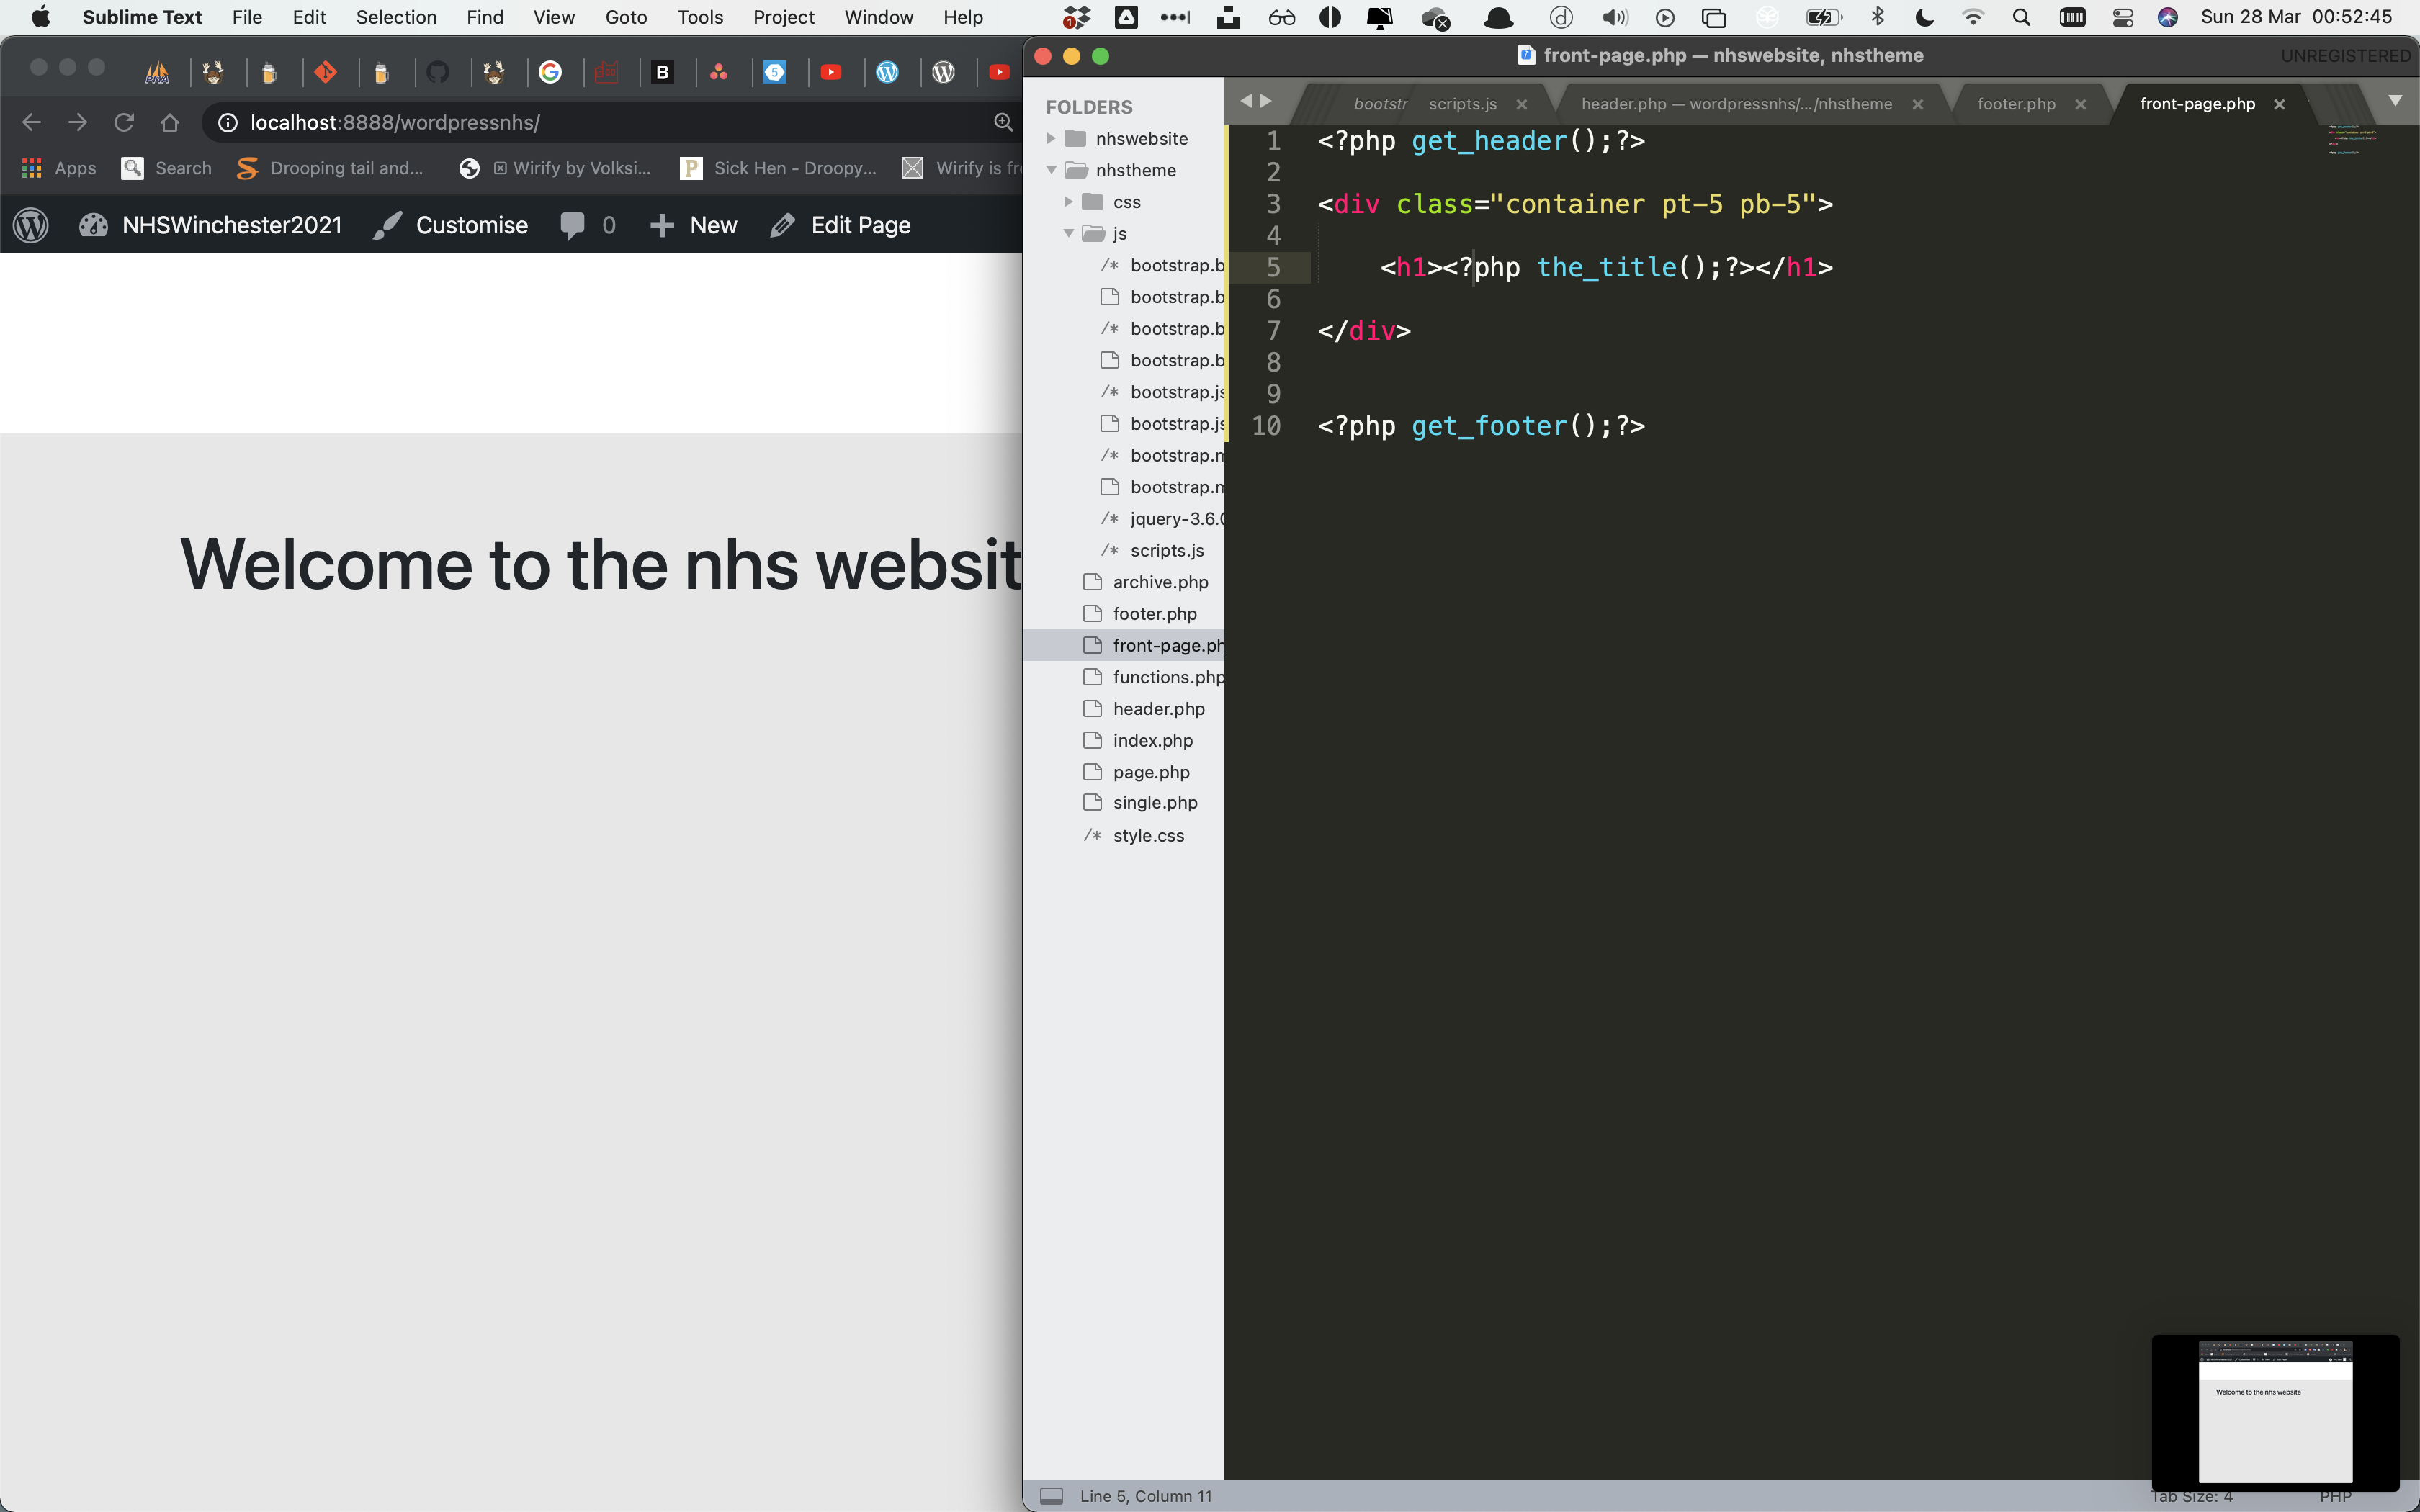
Next i started customising the front page with basic css (added a grey background with a height of 100px for the white bar on the header). I then wrote out the welcoming h1 tags for the front page, with "pt-5 pb-5" adding basic padding to the site.
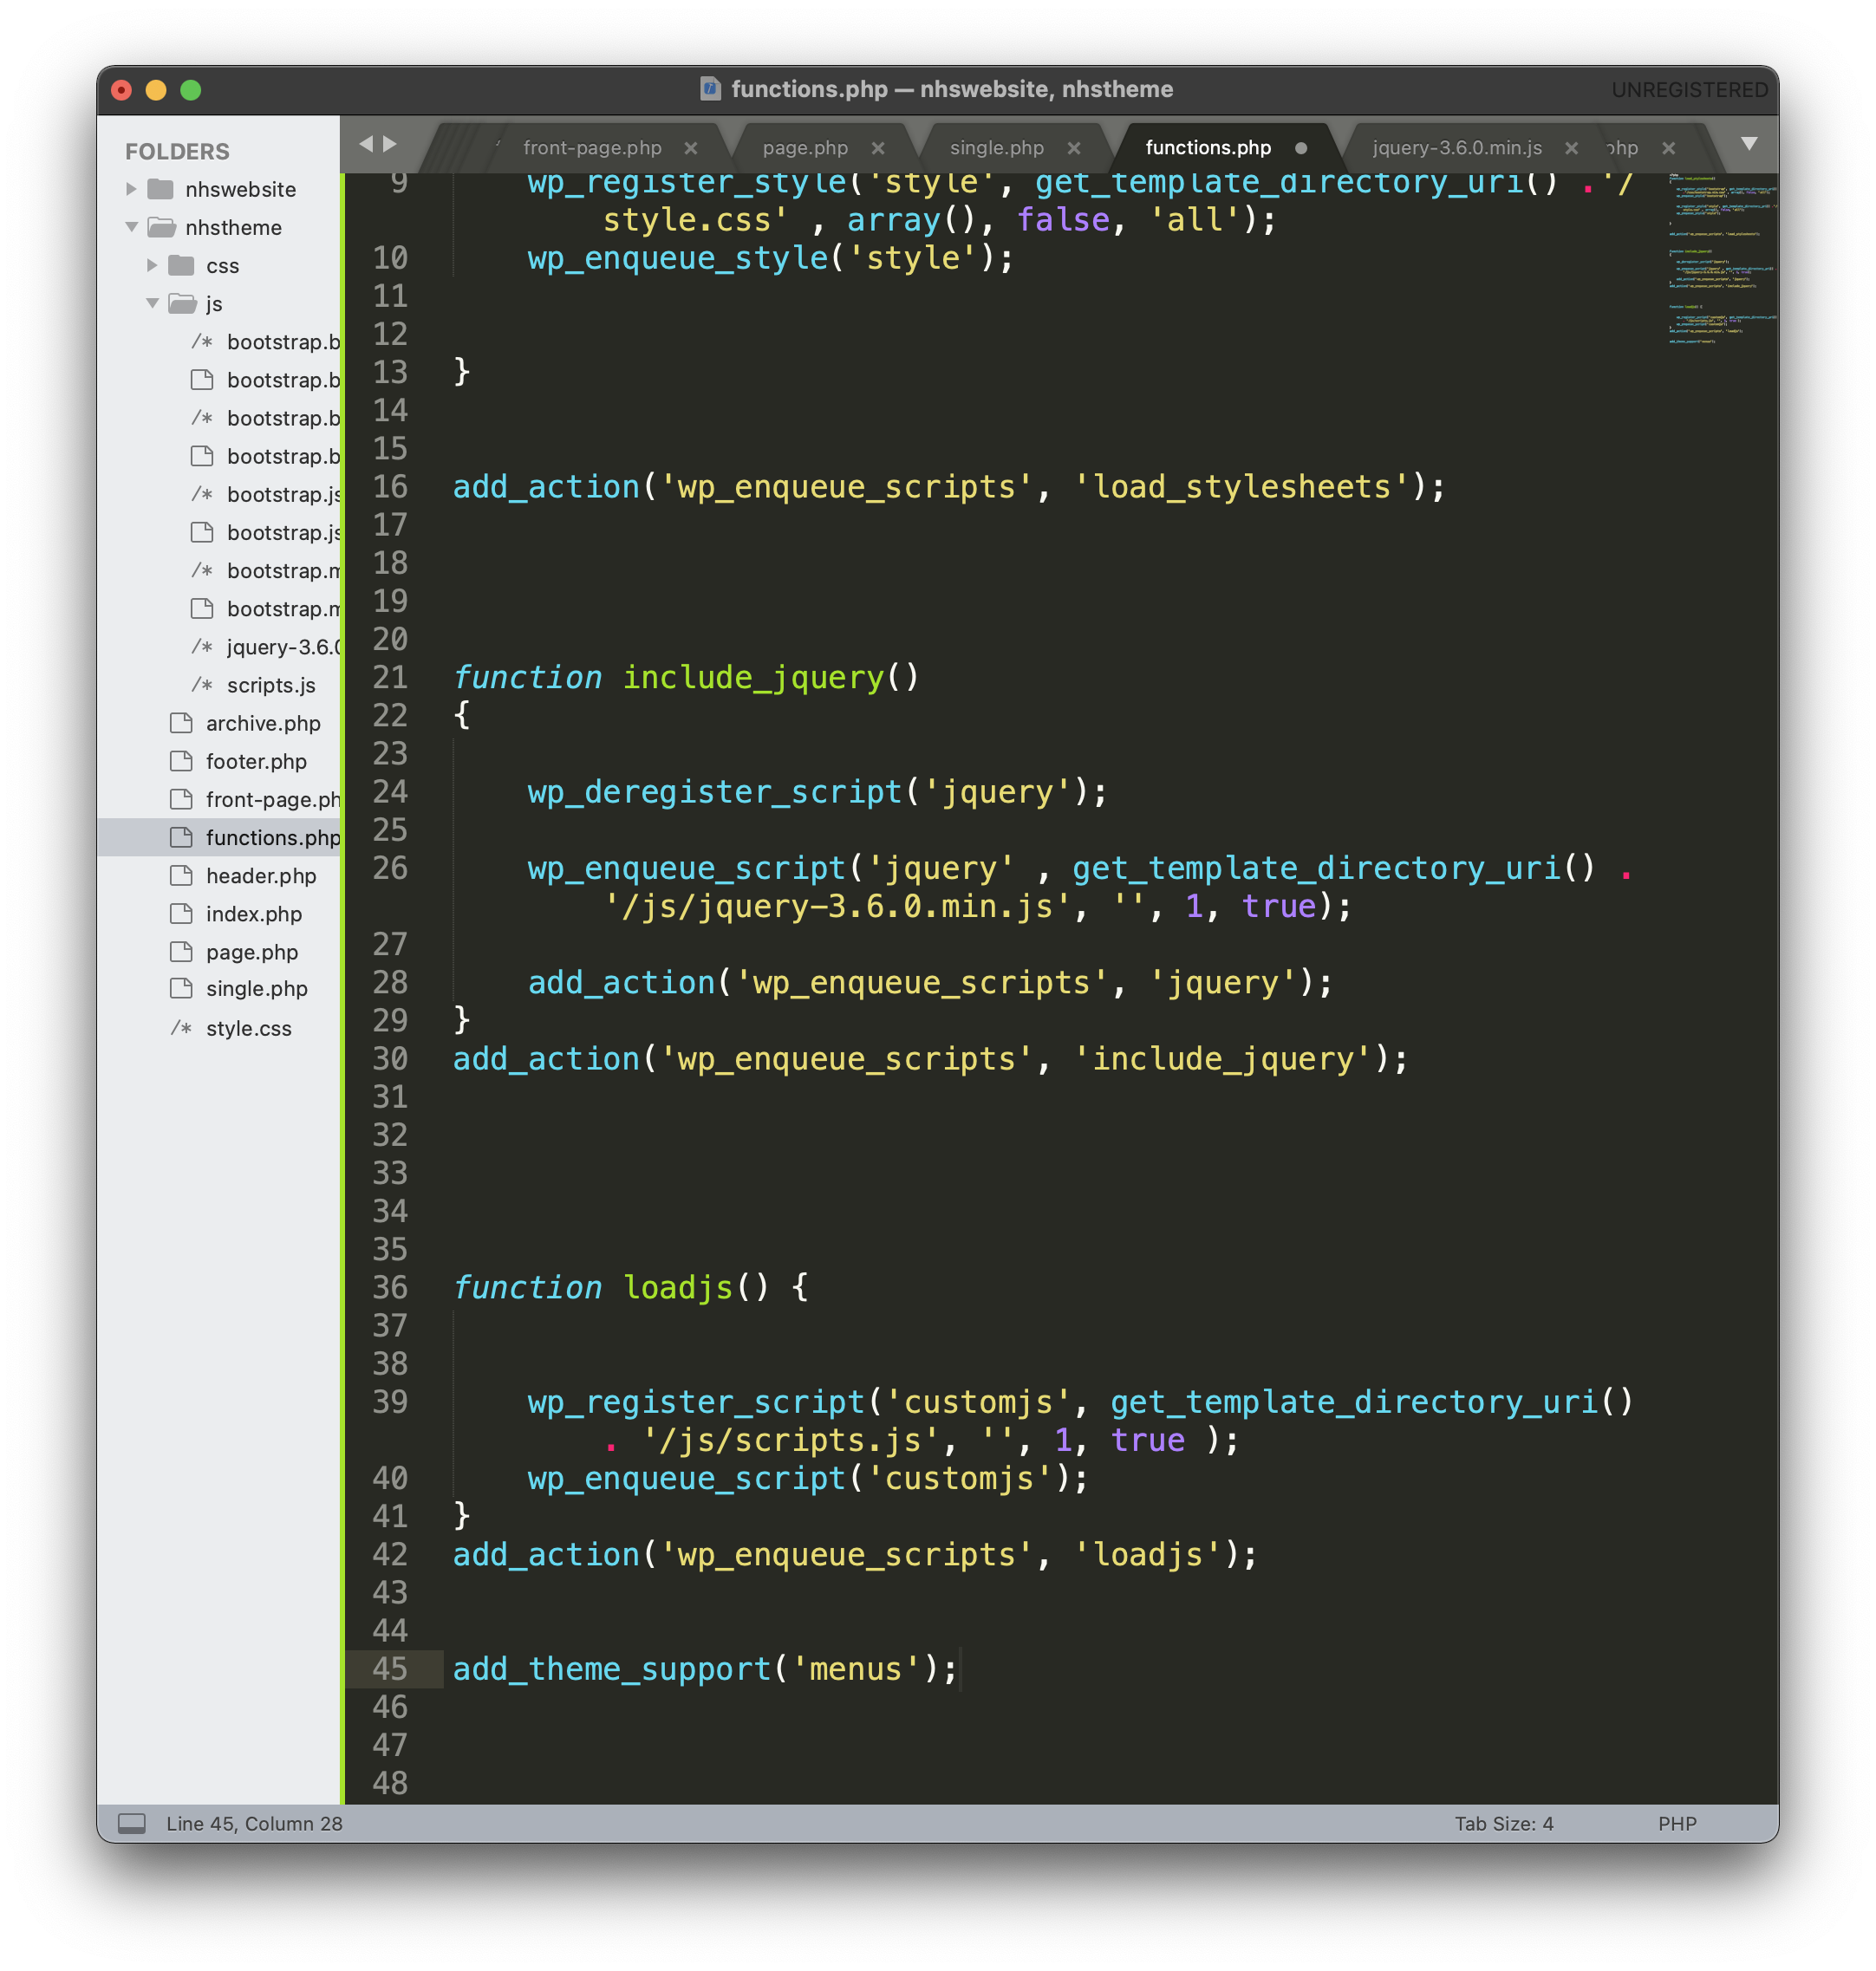
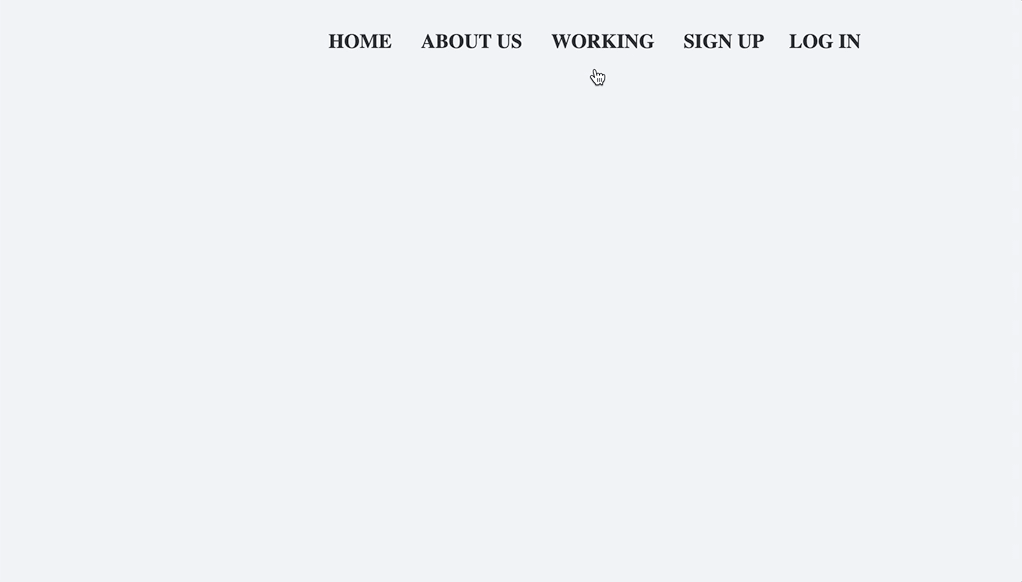
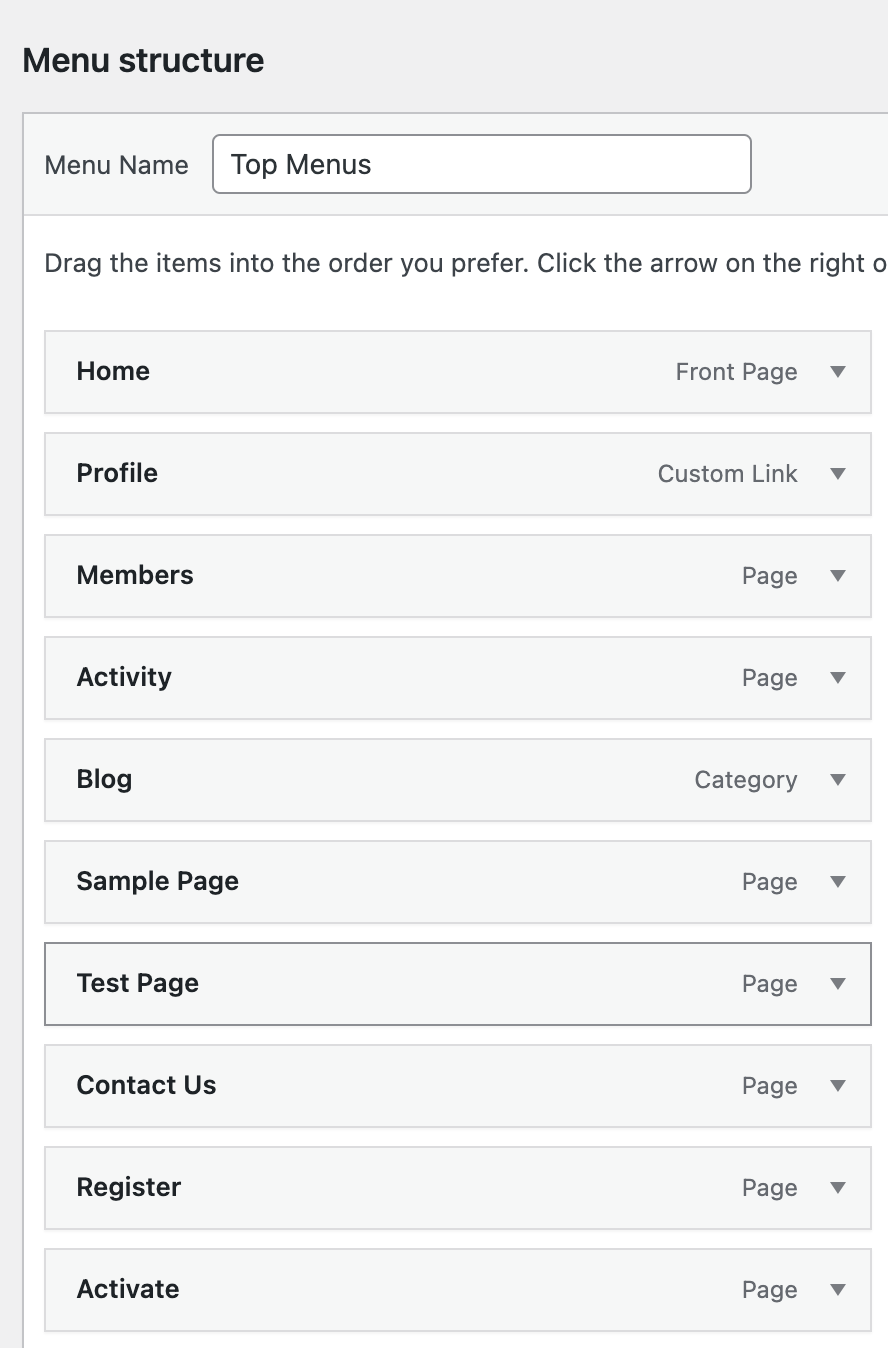
The next step was to add menu support to the website, where i intergrated a menu system to allow the user to navigate through the pages on the site with ease. This was done by adding theme support on line 45.
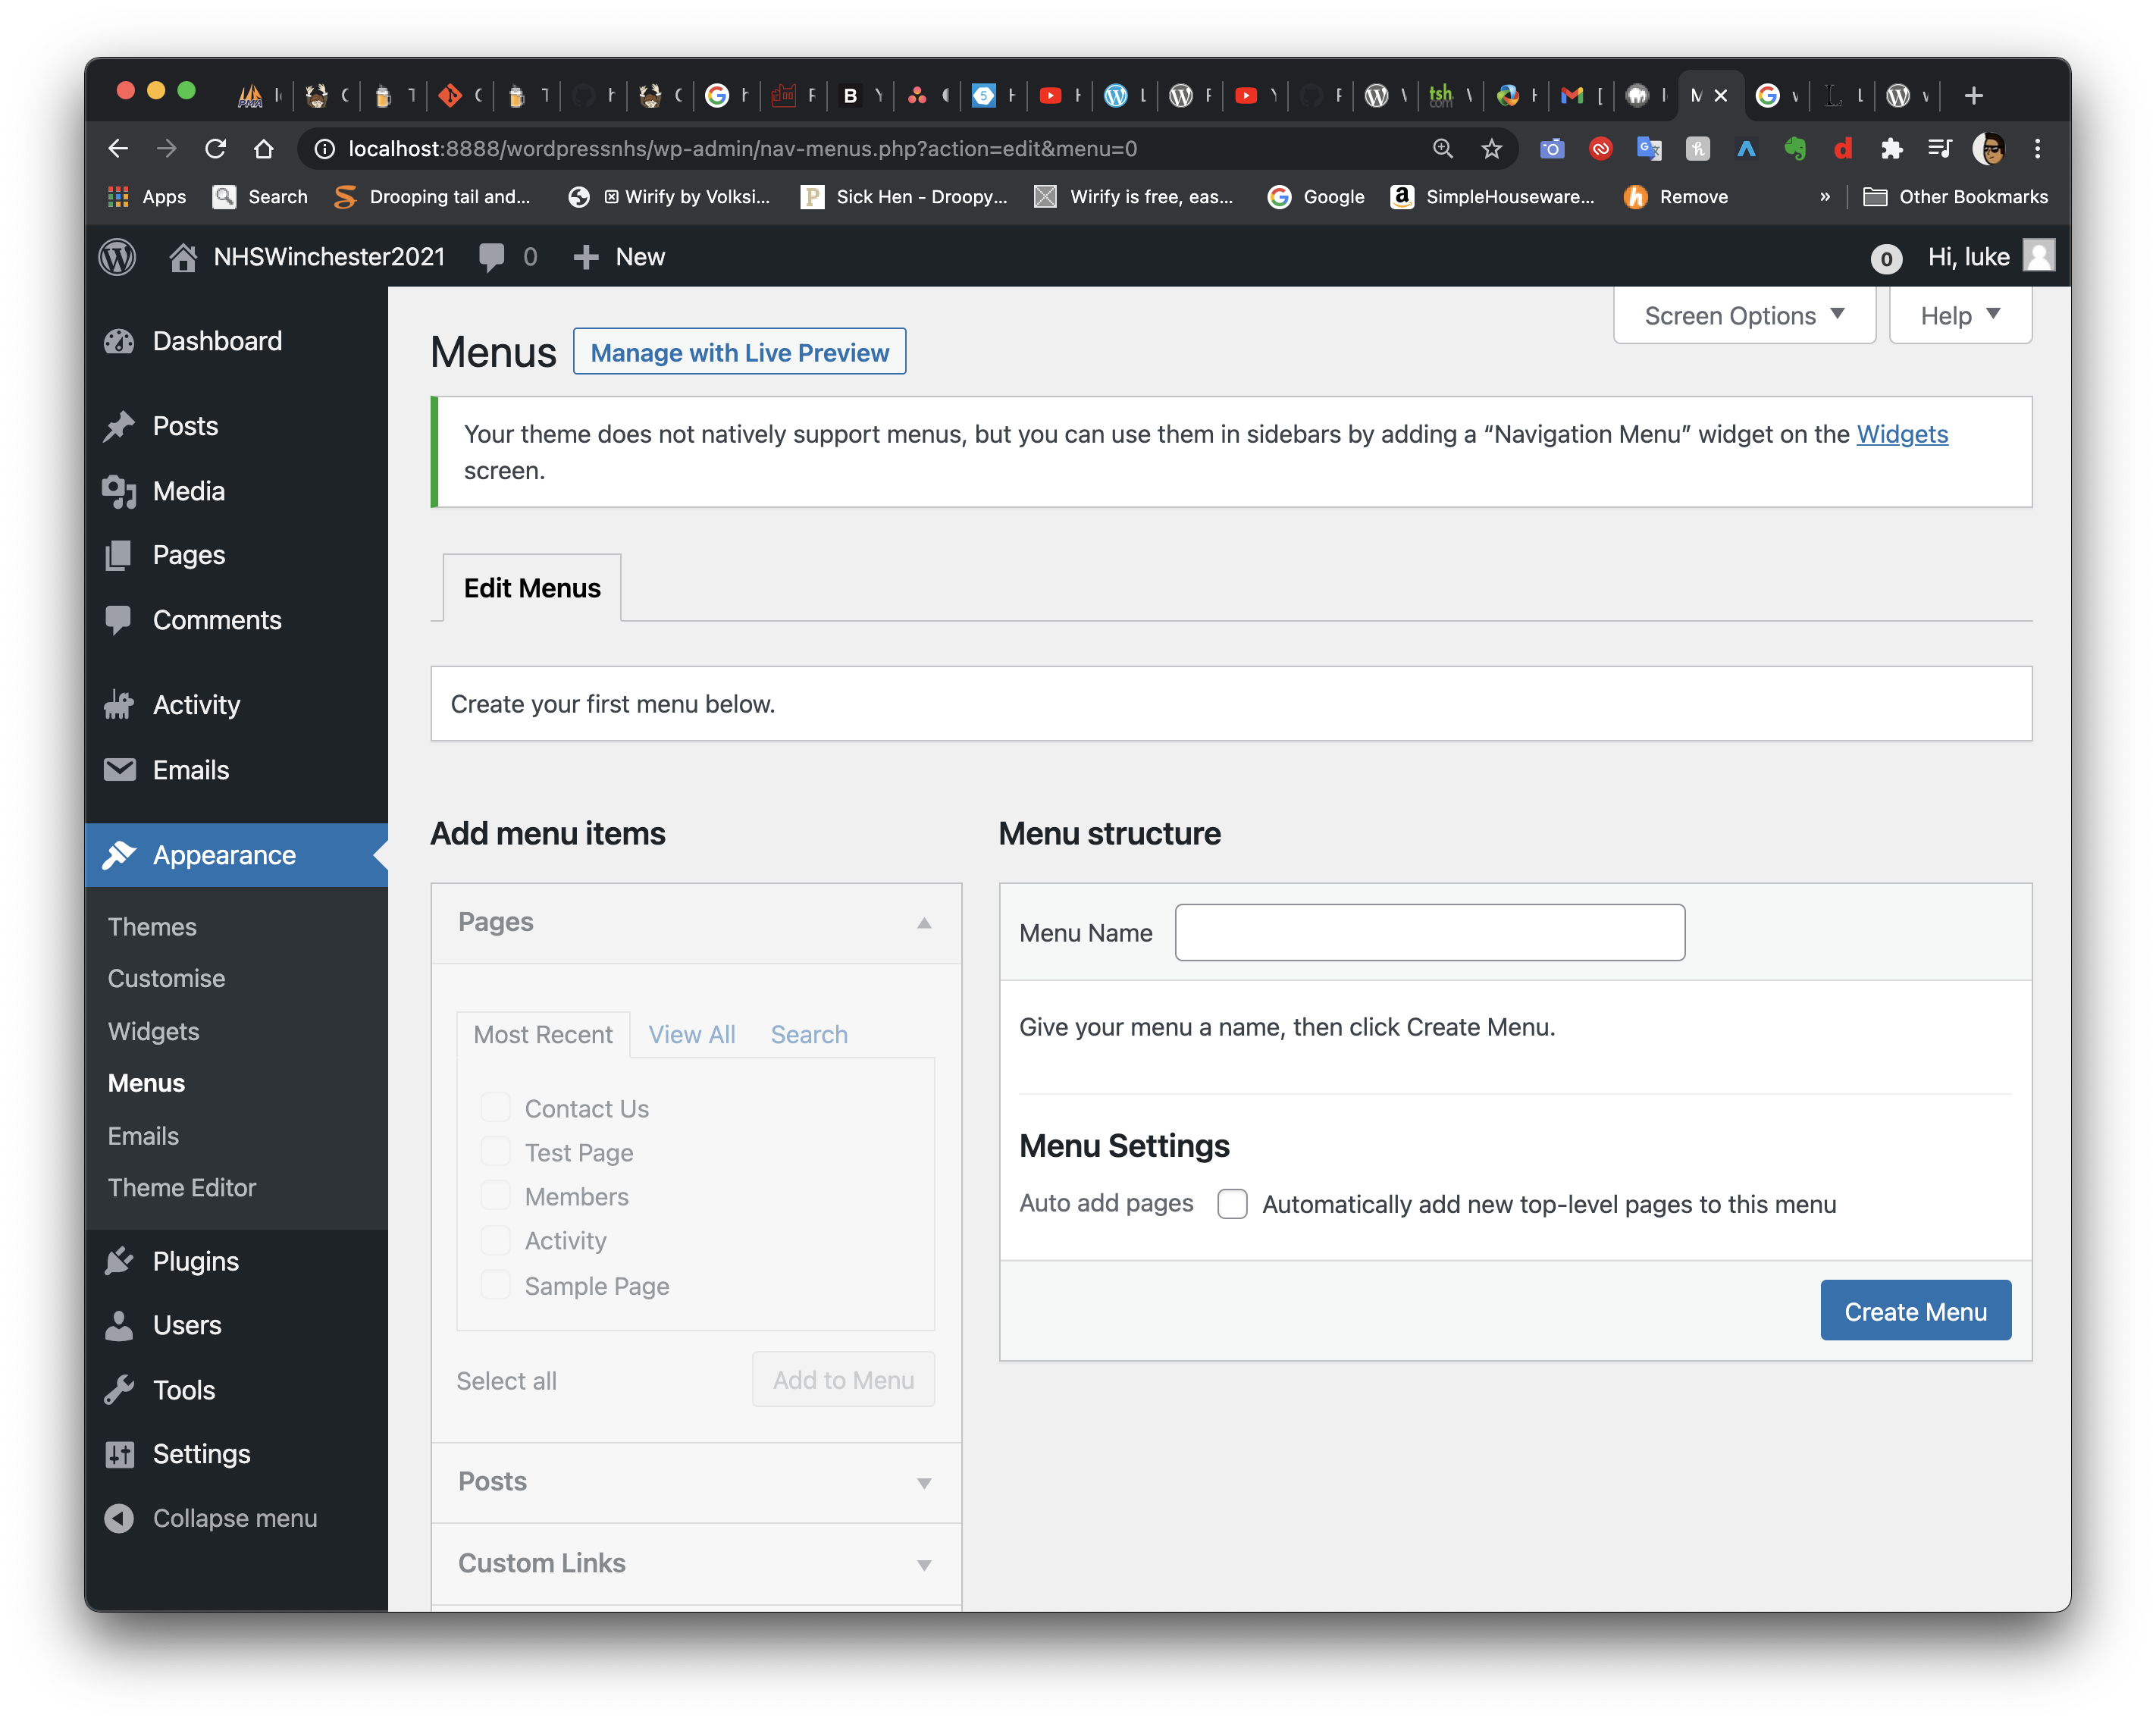
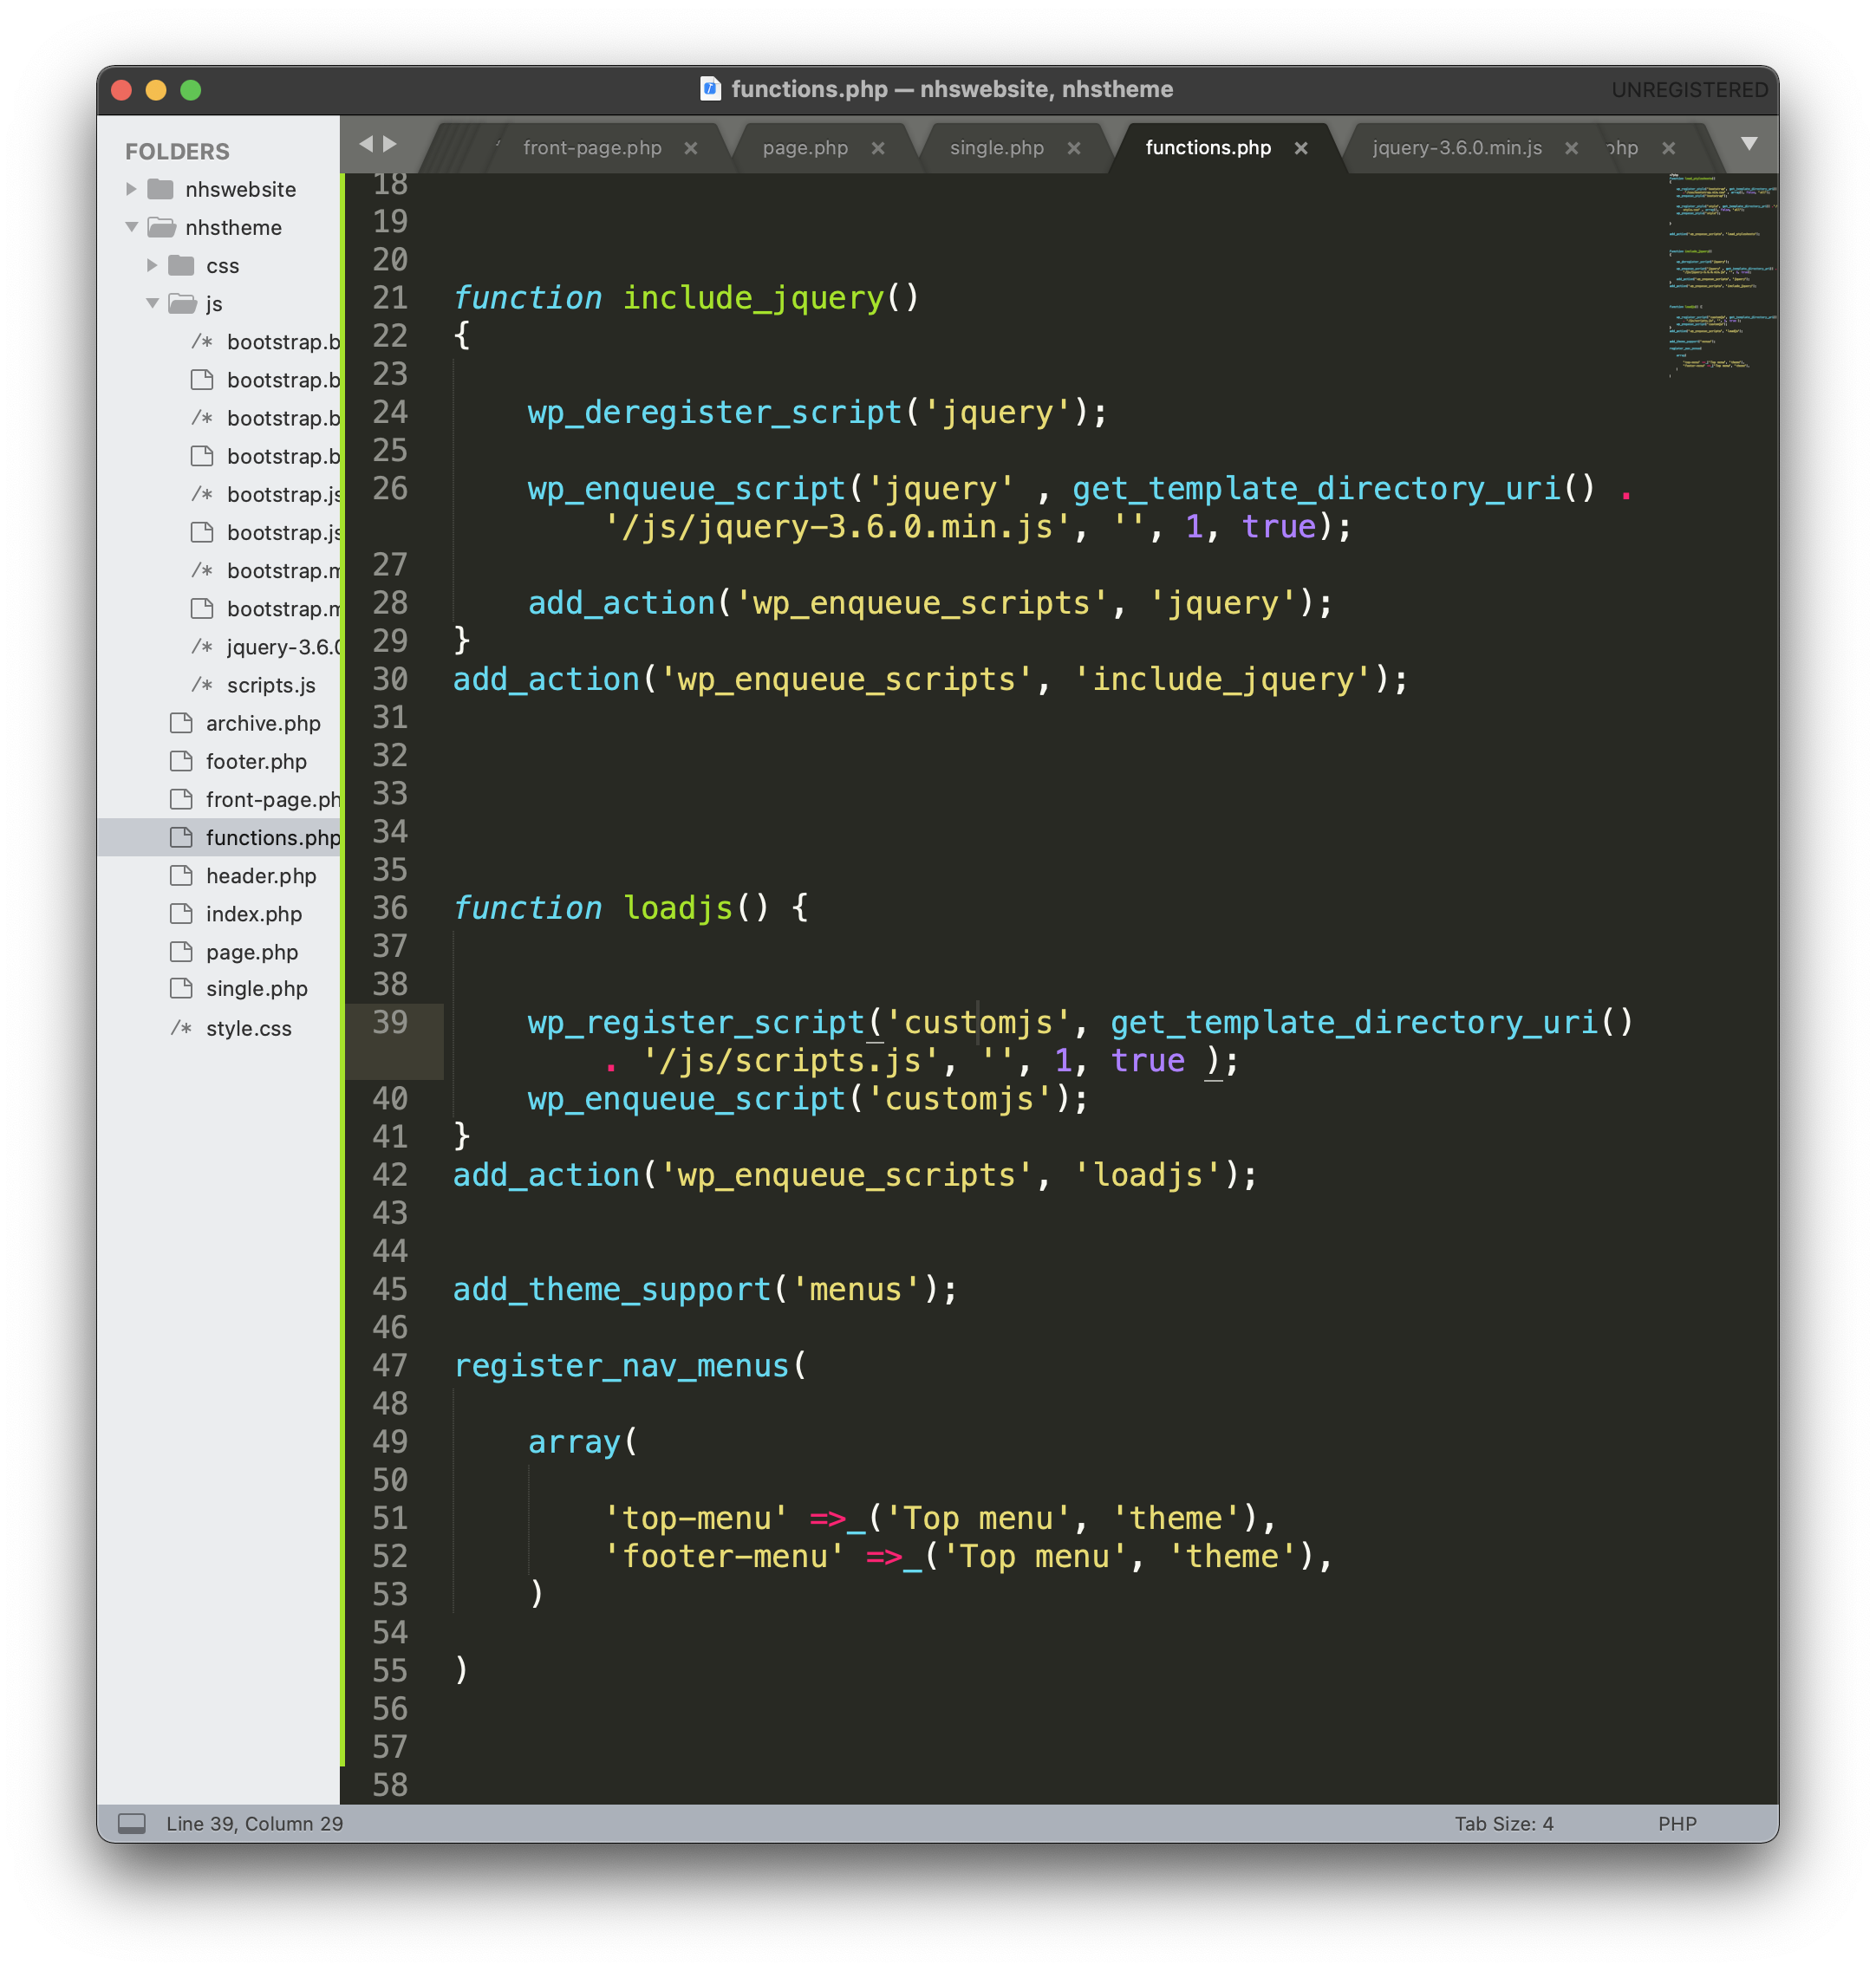
Once the menu system had been created, i was able to selecet menu items and add it to the site with the menu name for example. Once the menu had been added, i then selected pages to add to the site such as contact us, acvity, members etc
In order for the menu to appear on the site, i had to create a menu location. On line 47 i wrote, out register_nav_menus, that enables menus to be added to the site. Then on line 51 and 52 I assigned the name for two menus, Top menu and footer menu.
After refreshing the page, i then saw two options to display the location on the top menu, which i ticked to enable that to function and appear. I then arranged the page's order starting with members at the top and contact us at the bottem.
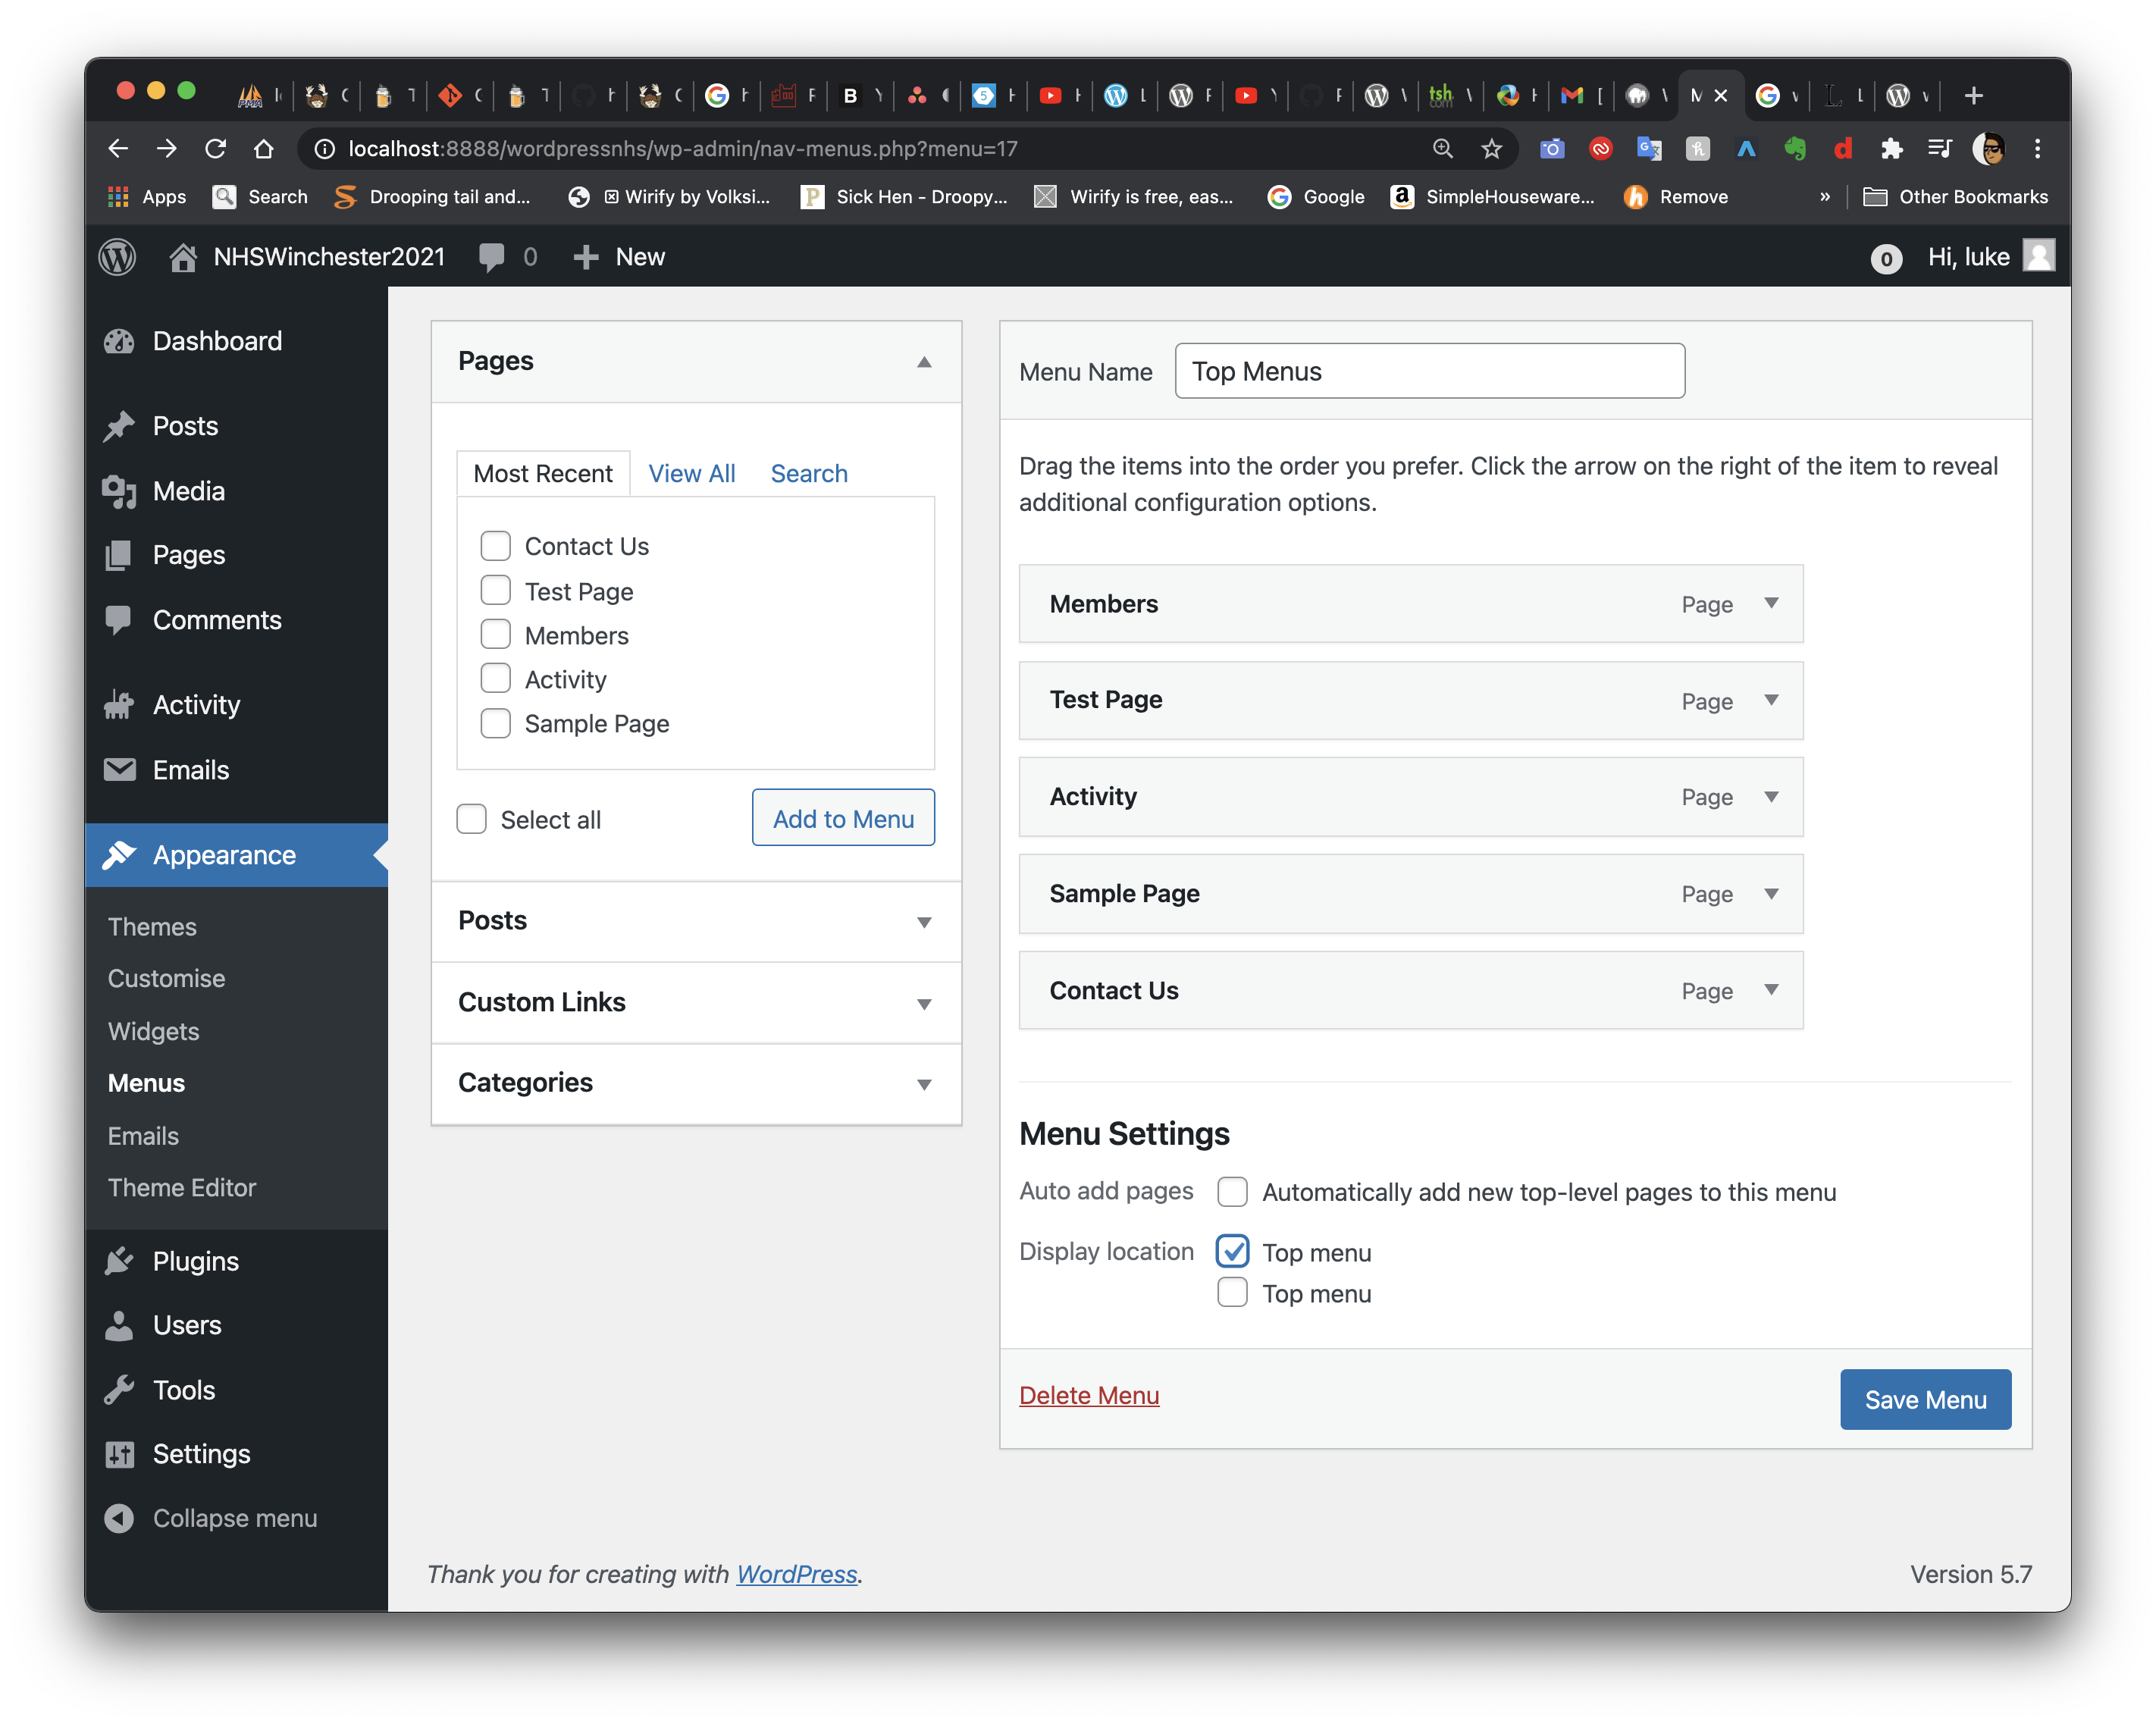
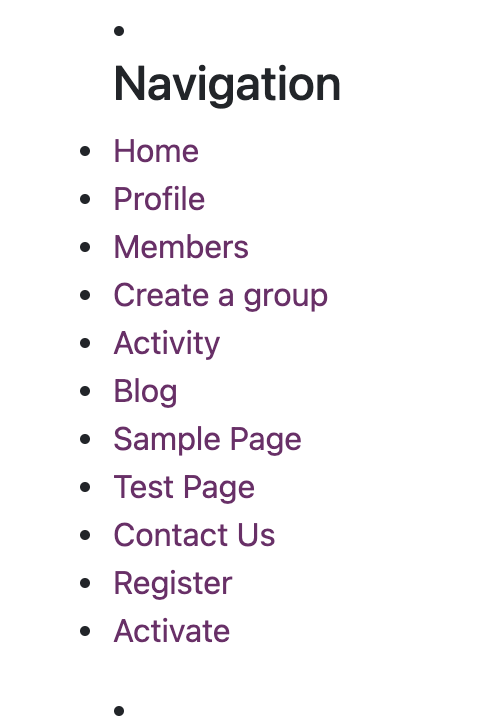
I then saved the page, which inturn enabled the nav menus to appear on the top left as basic links to other pages. I placed the links into the header in the header.php file, where i arrayed the location to that area.
Section 6.5- Blog pages
One key feature that the client wanted to have on the site, was the abilty for the NHS staff to have a blog section where users could write posts on the site, upload images and files. This part is absolutly critical for the overall communication of the site.
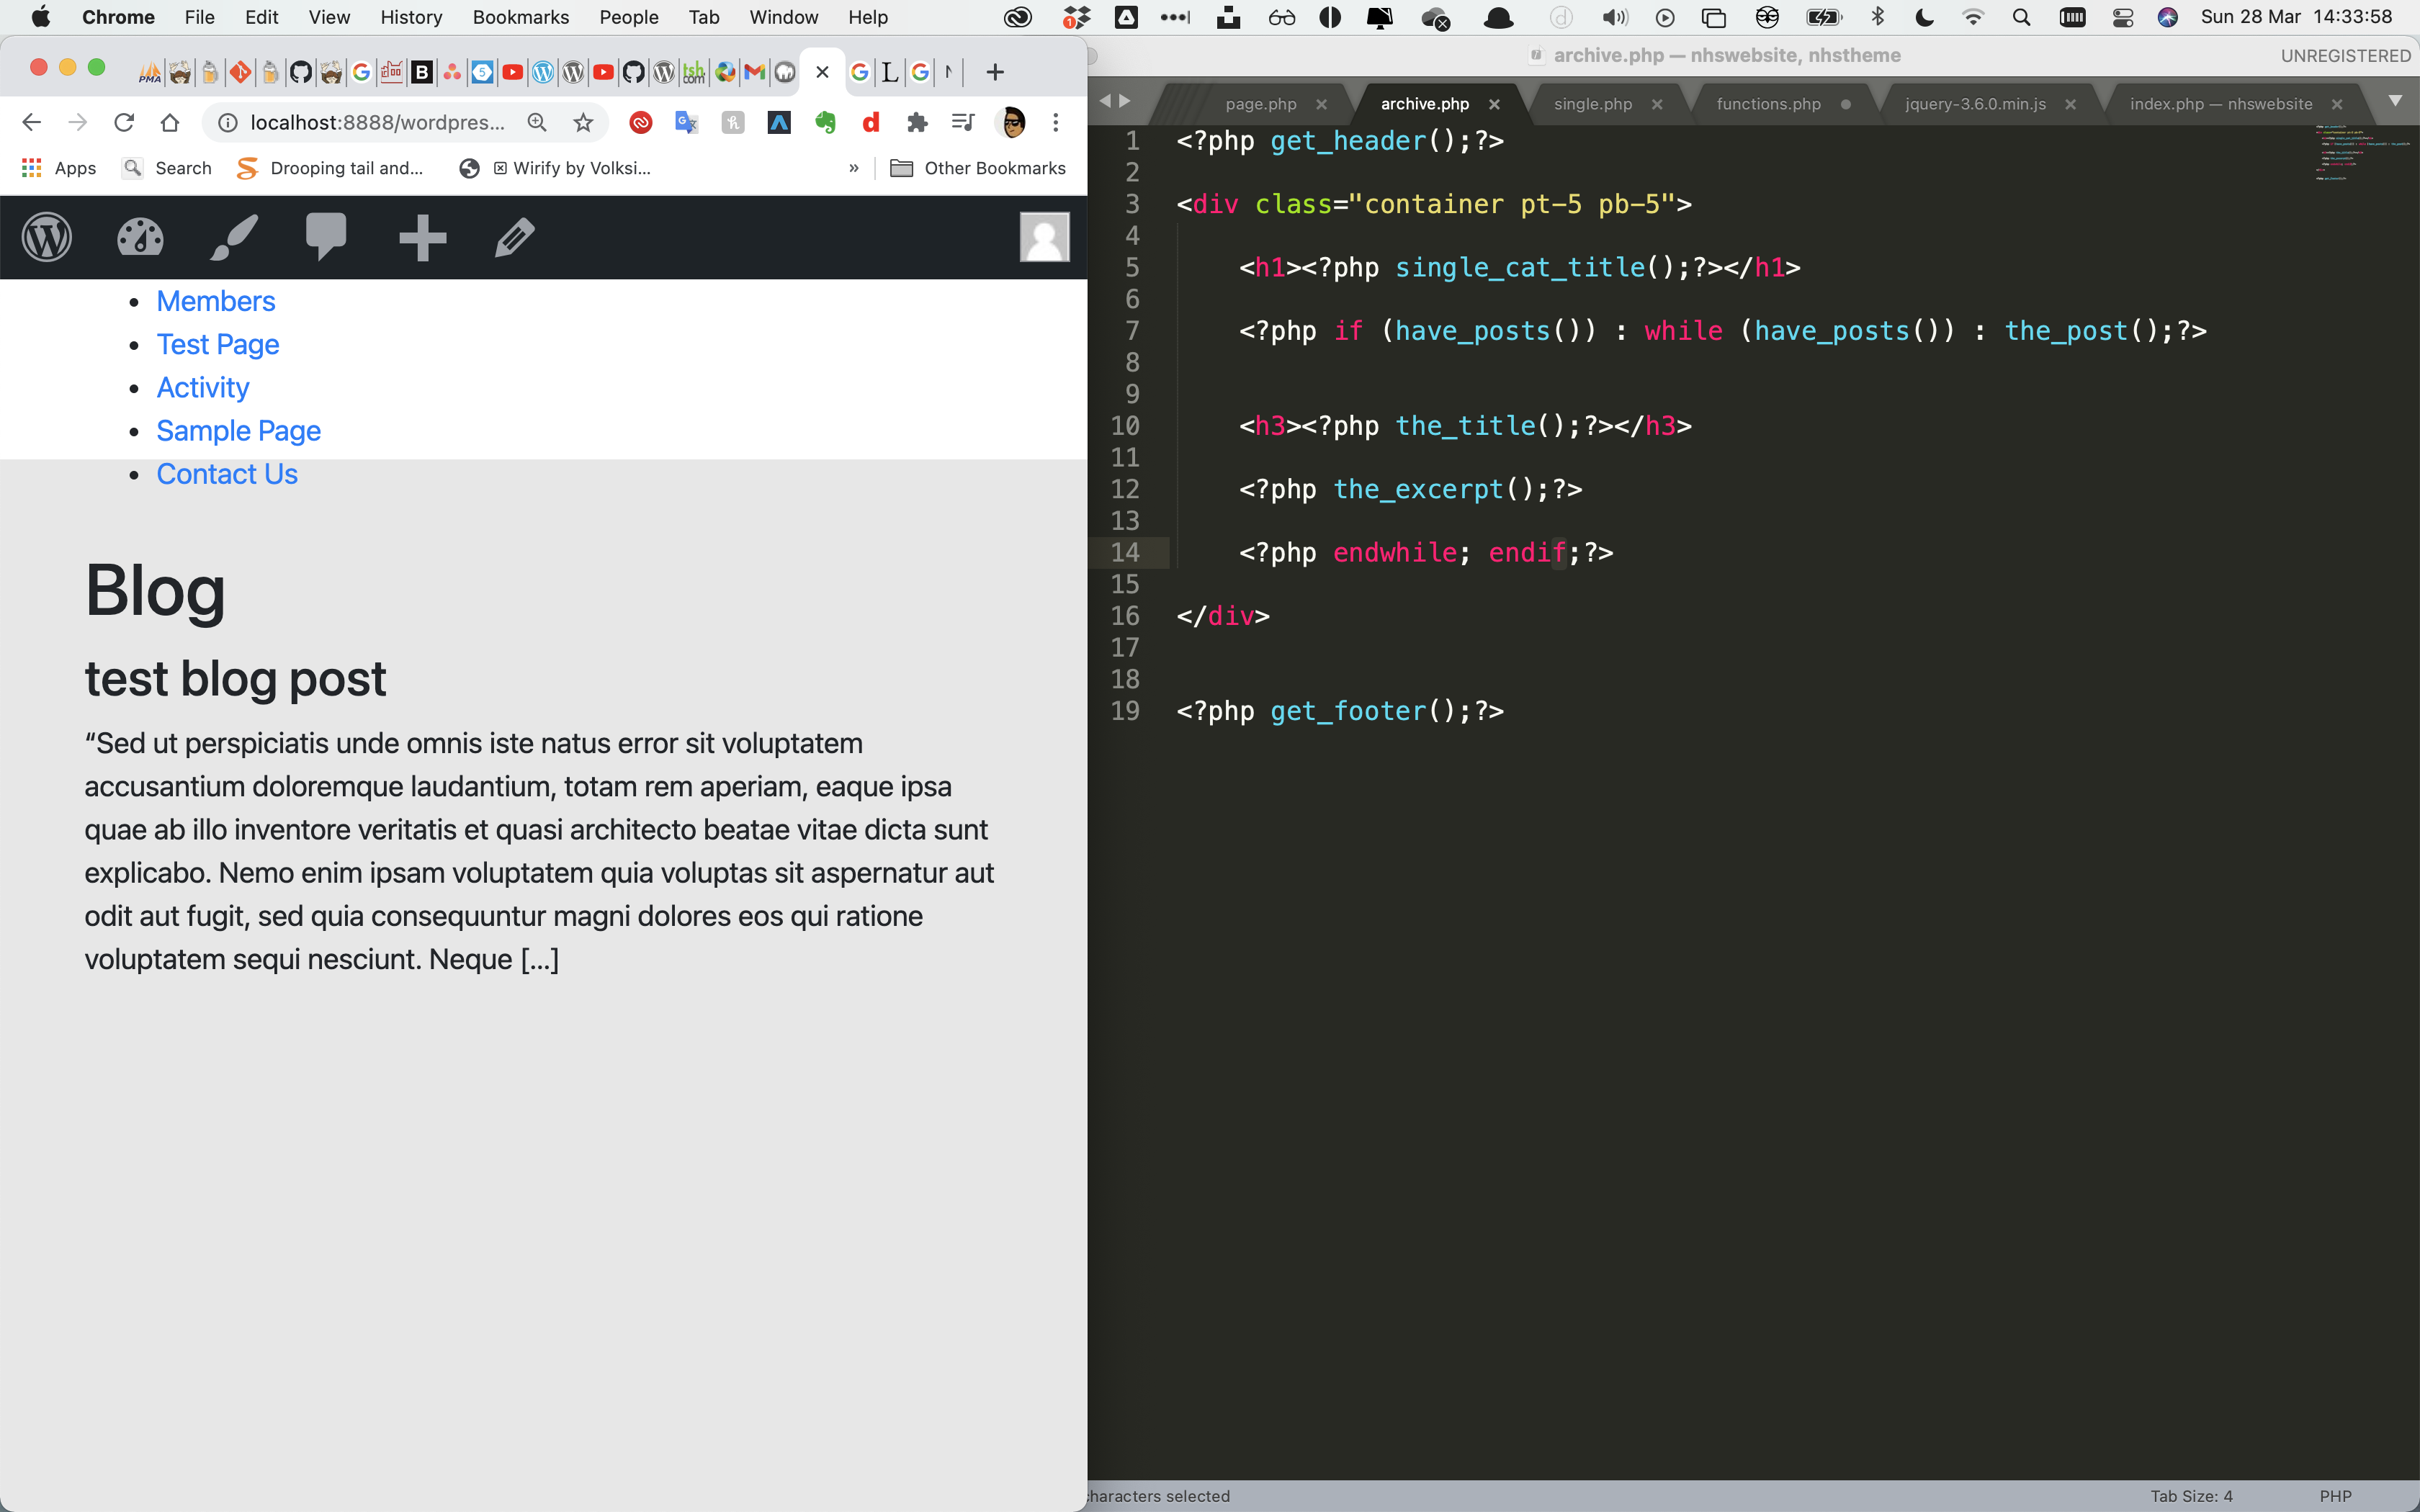
Next i started to code the archive page from where the posts are situated, so i pasted in the same code from page.php to speed up the process. After pasting in the code, you can then see the blog on the right.
I then added the blog category into wordpress to allow the posts to be written inside the blog.
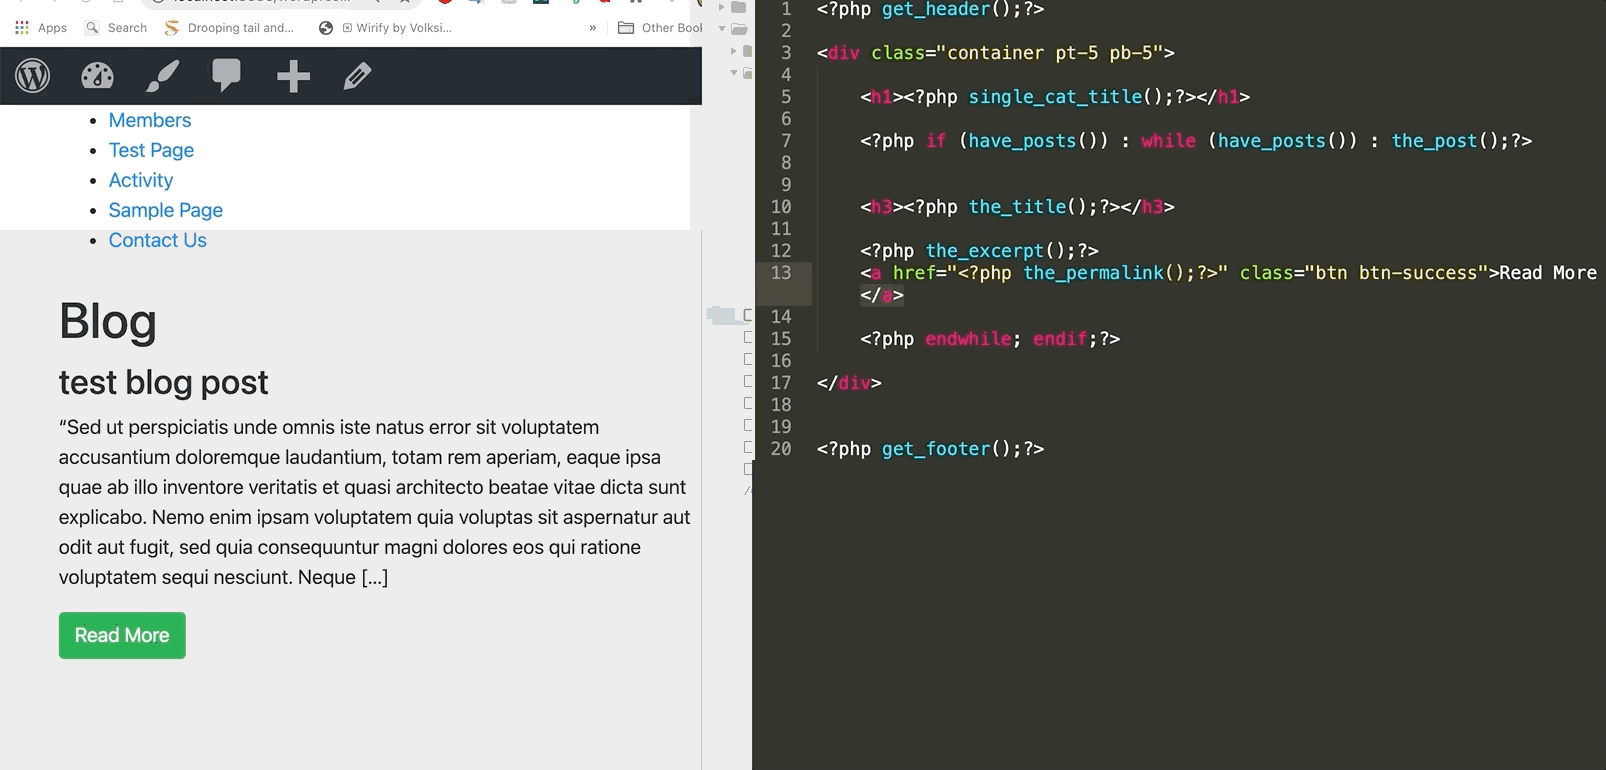
Next in order for the archives title to appear, i wrote in 'single_cat_title' instead of each individual post title to appear. 'I then wrote ?php the_title()' which puts the title of the acutal blog post below it.
Next i added a link to allow the user to expand that post article, showing more text of it, on line 13 with the_permalink added. I then added bootstrap button instead of a standard button with "btn btn-sucess". As you can see on the left hte text expands when the button is clicked.
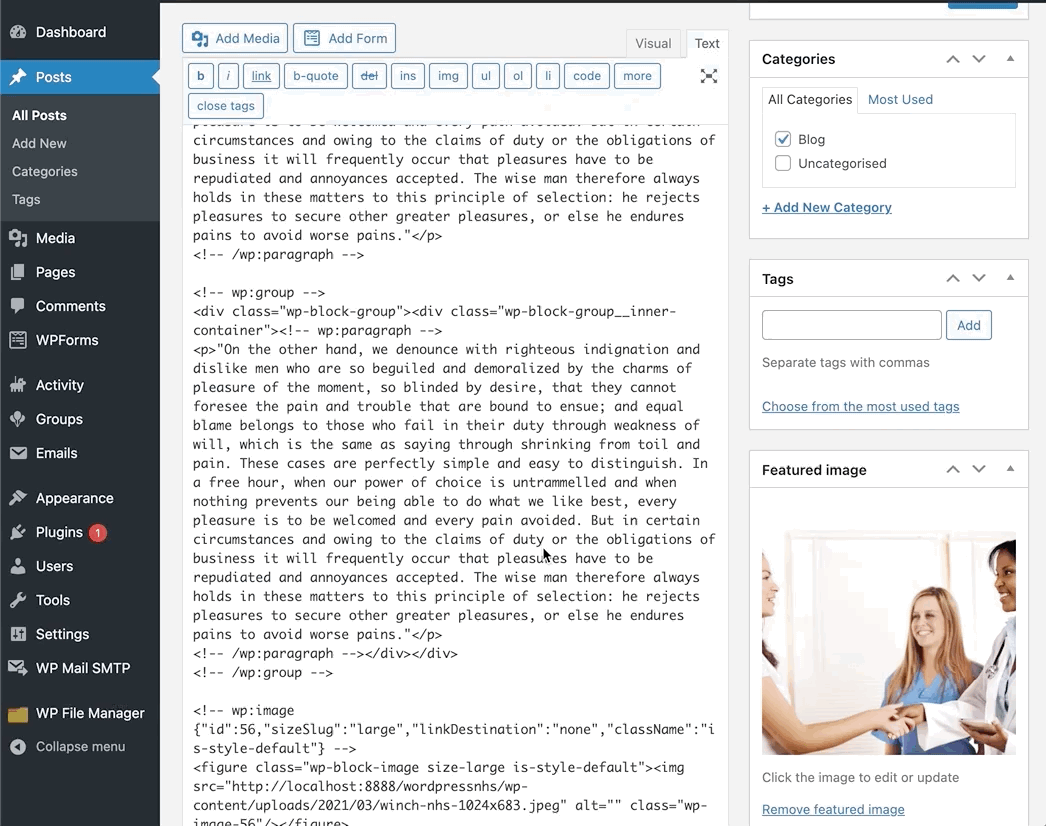
I then started to write out using loren ispum text to fill out the page with basic infomation and images on what a typical blog page could look like with a cover image added as well.
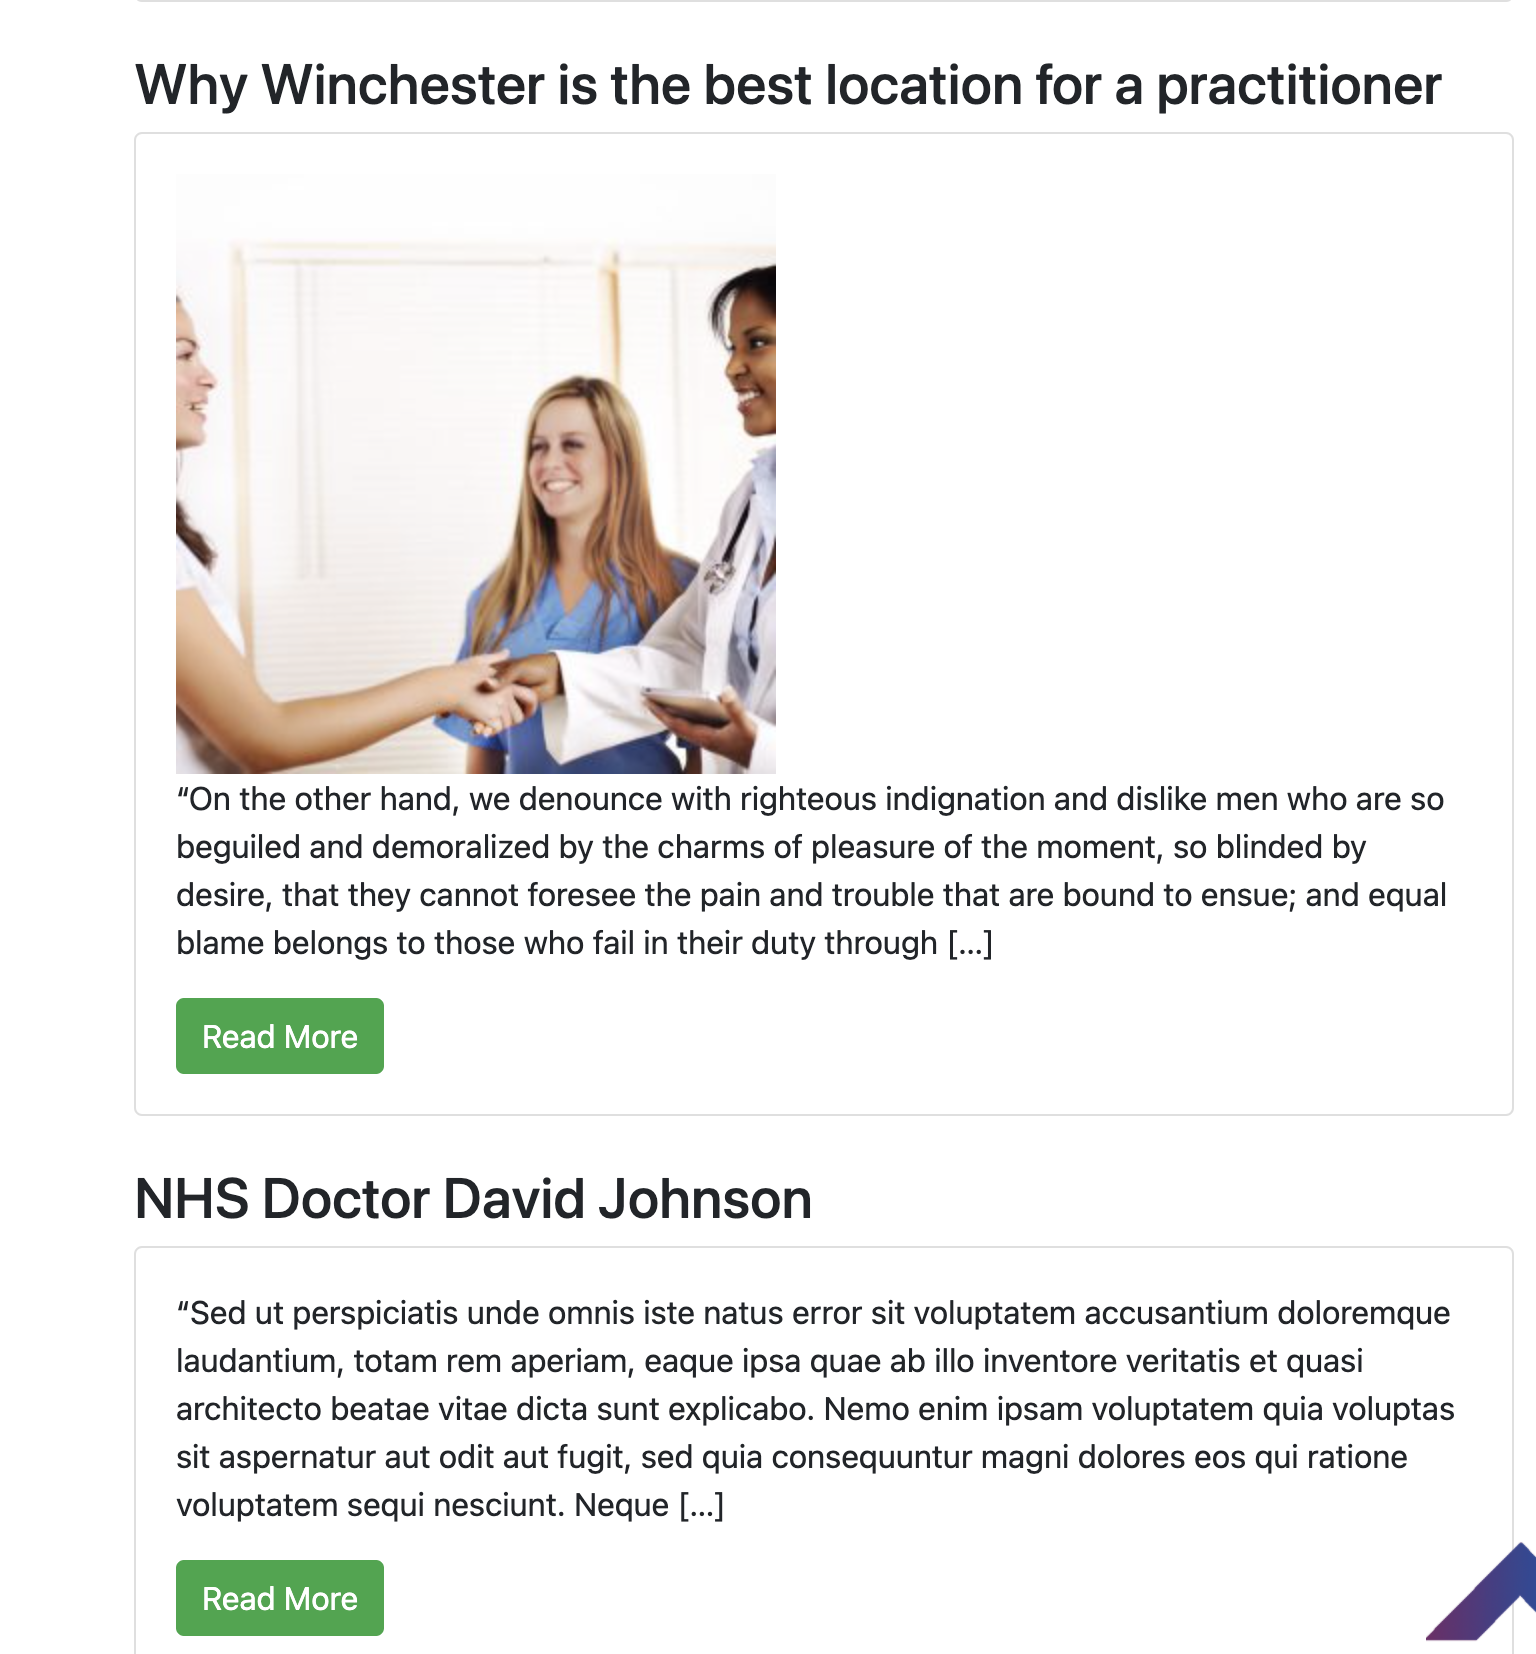
Finally i added another blog post.to complete the admin side of the blogpage.
Section 6.7- User's writing on blog pages
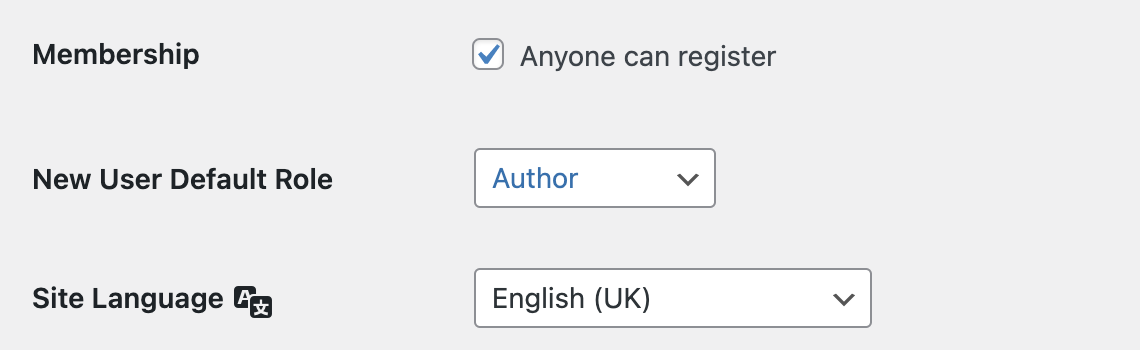
To enable users to write their own blog pages on the sie, i changed the new membership for new members to author. Author allows them to immediately submit a post, without the need for the post to reviewed by amn admin, whereas a conntributor would do.
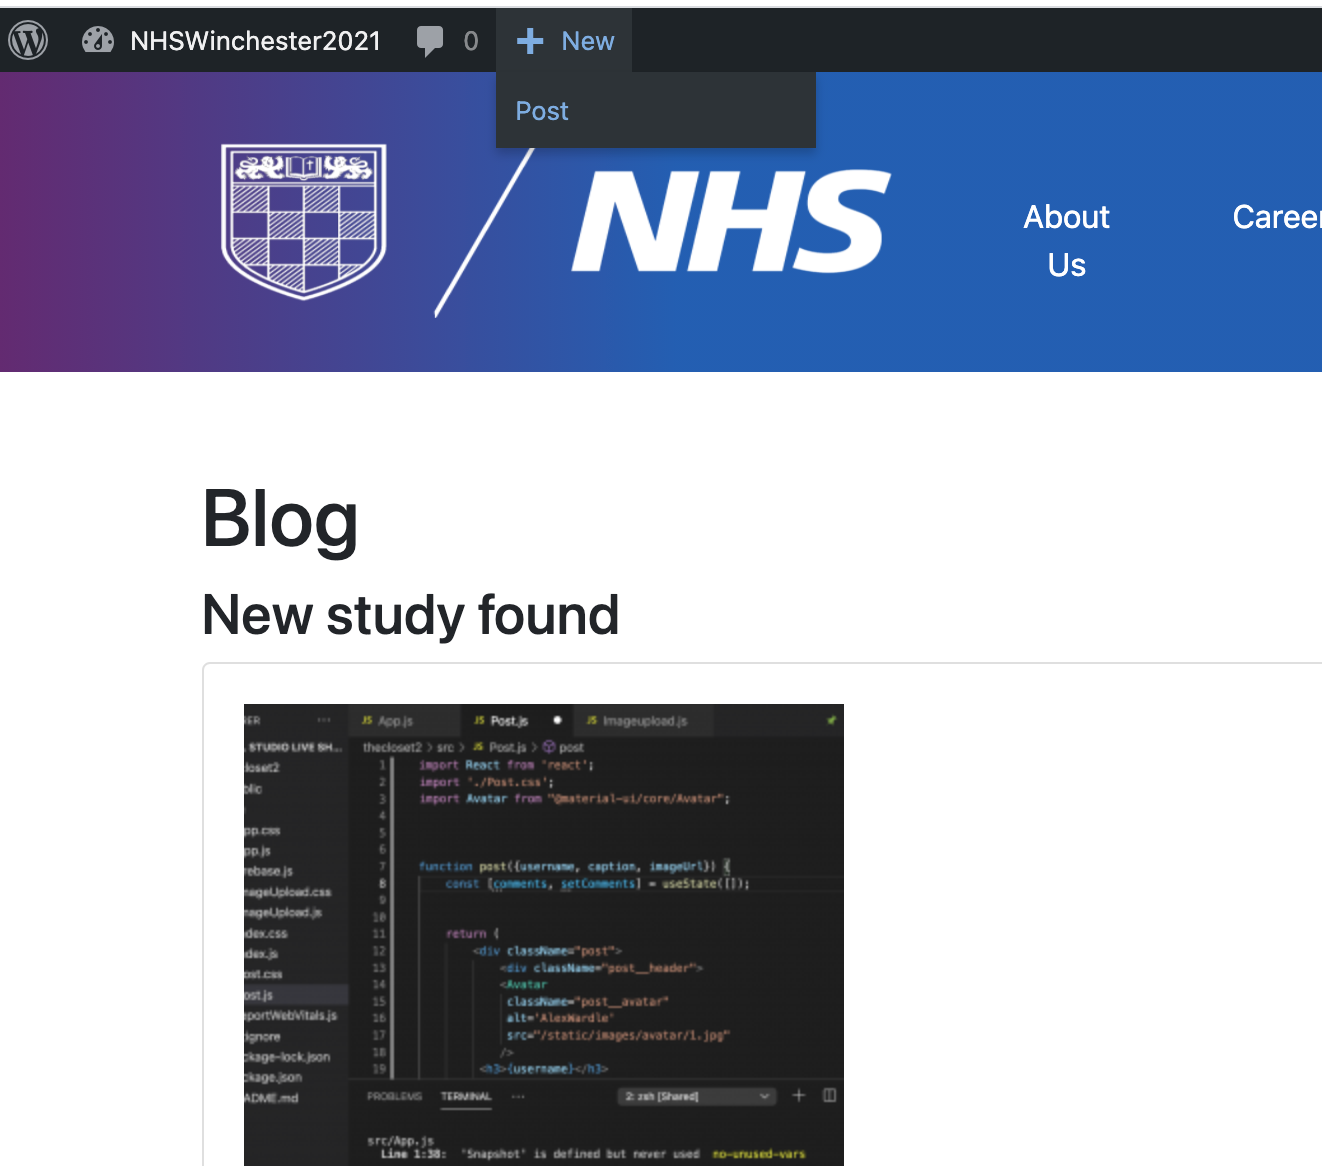
As you can see the user is able to click on 'new' and the click post allowing them to write the post.
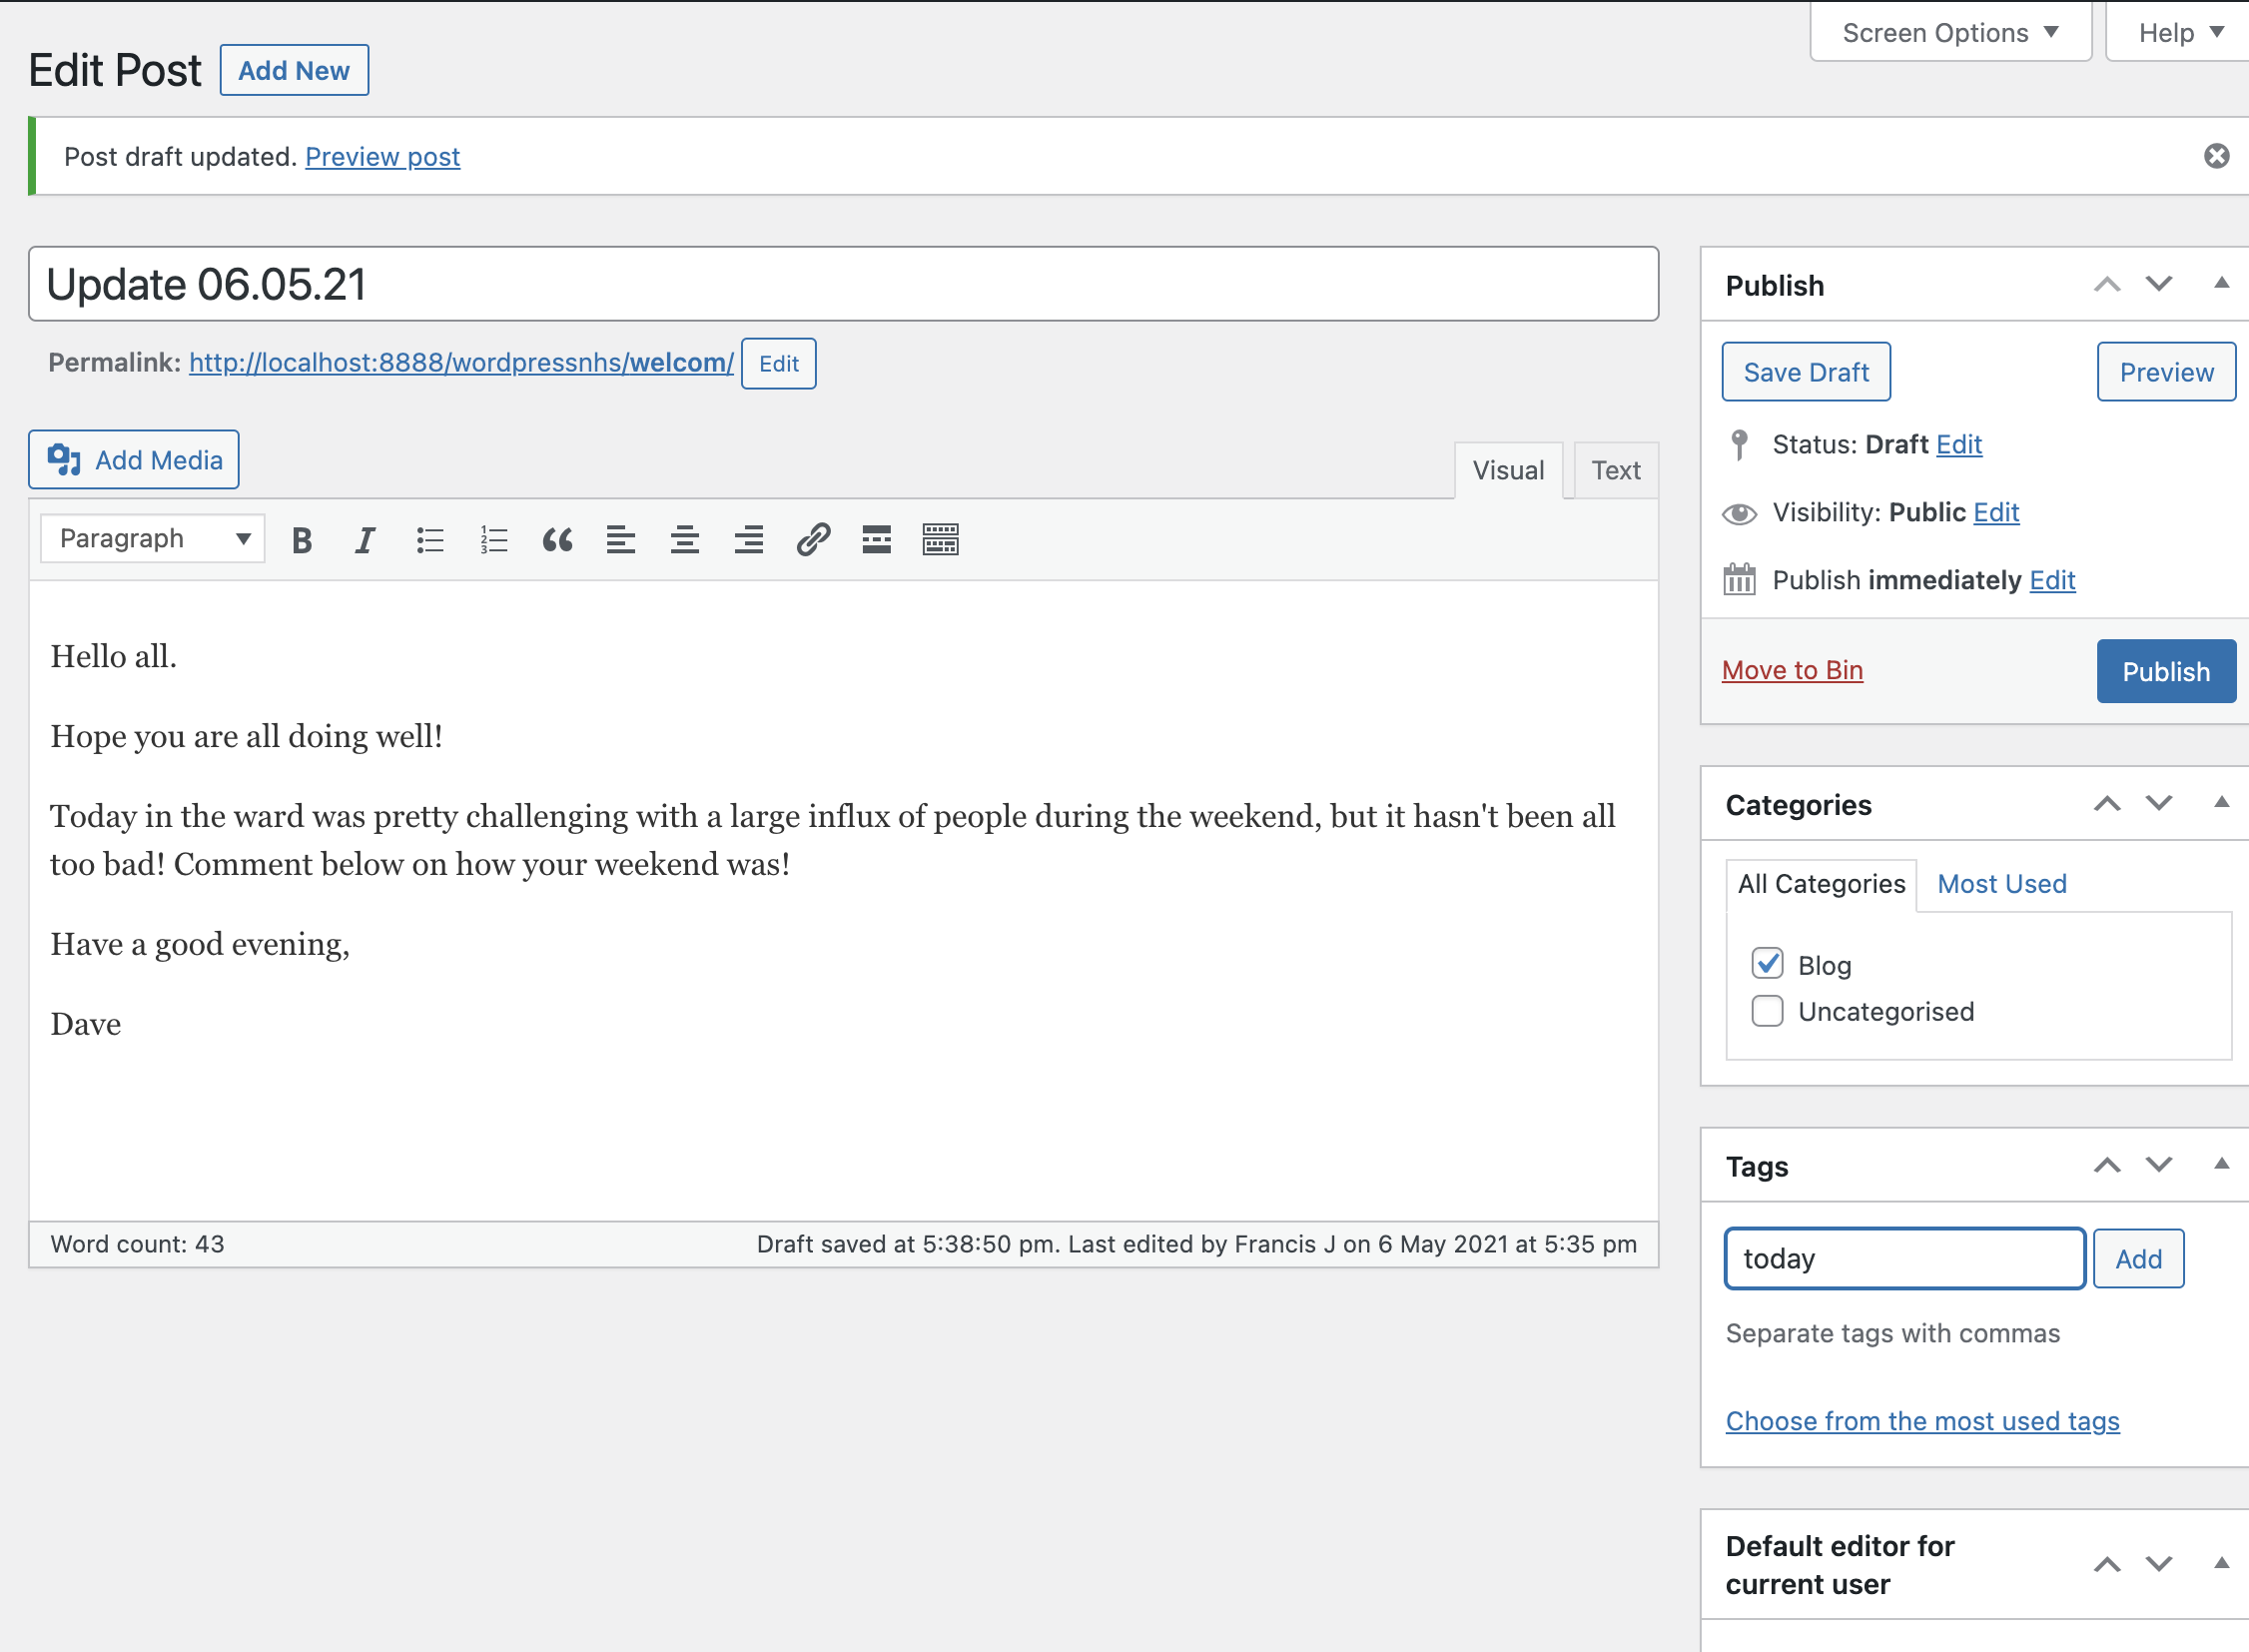
As you can see the user has a variety of options avalble to them when creating a particlaur post, with the option to add tags, links, image and video content as well as files which was a key feature that our clients requested. After completion the user can simply press 'publish' and the post will be live!
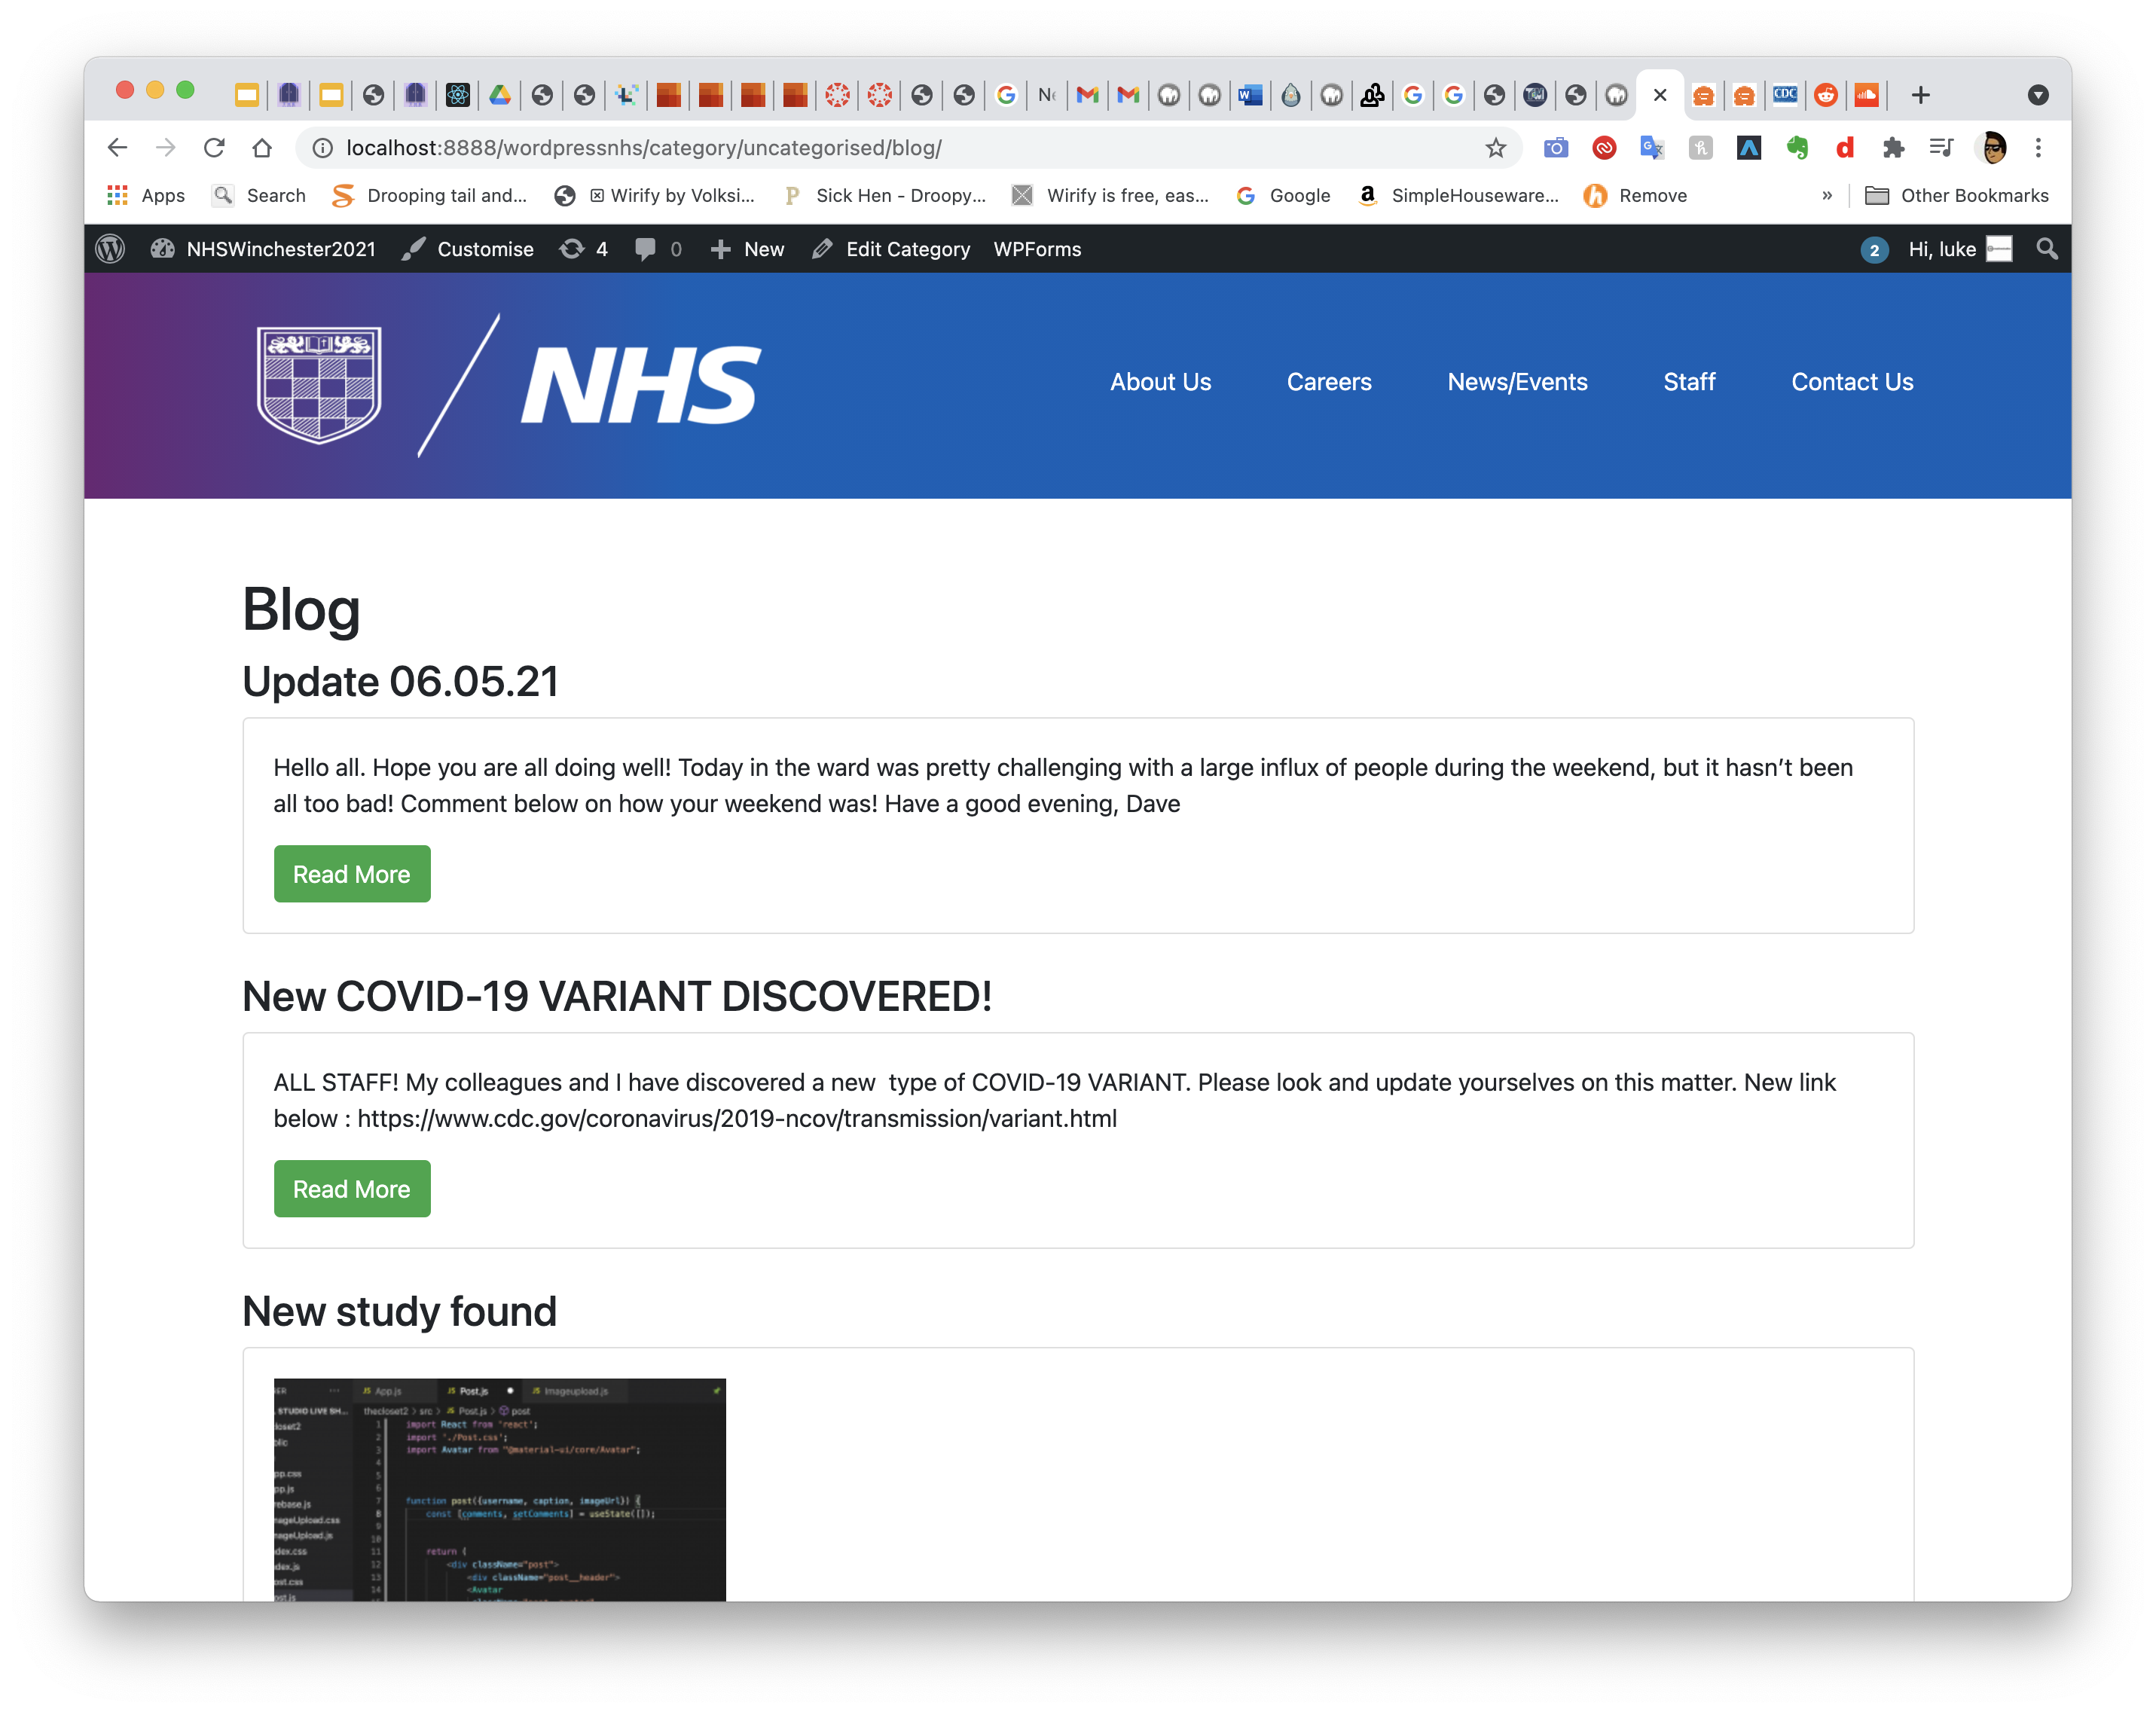
After submitting the post they are ranked in chronicallogical order with the abilty choose particualr posts by the month.
Section 7- Sidebar menu intergration
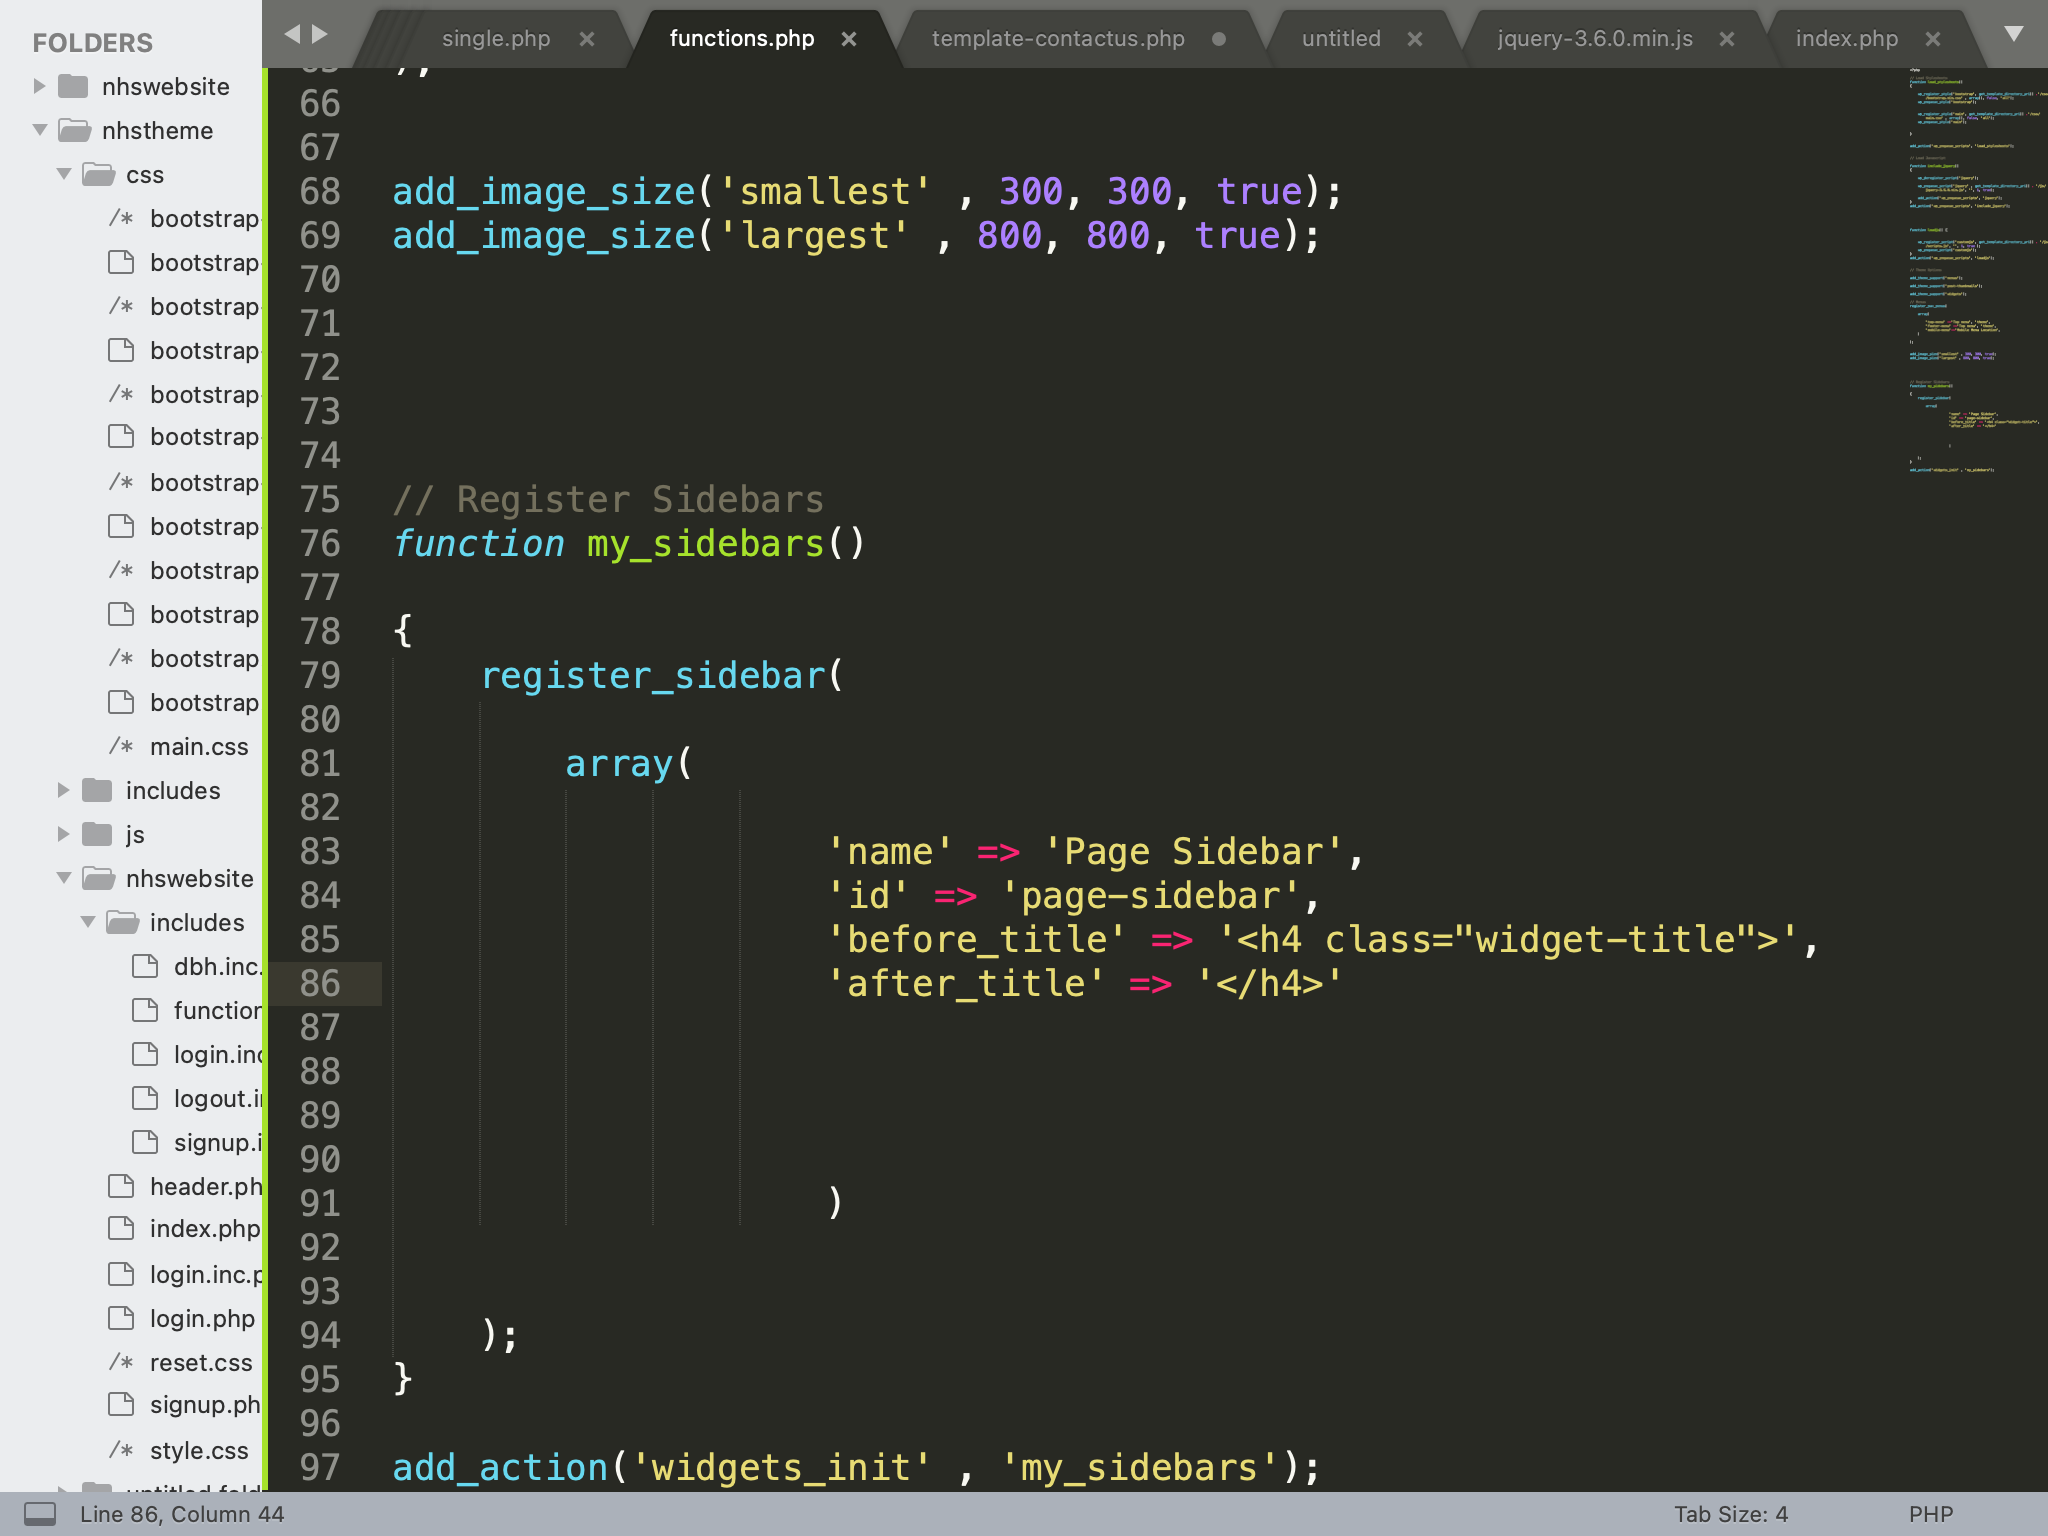
Next it was time to add in the page side bar navigation, enabling users to navigate the website.
On line 76, i added the function for sidebars to be intergrated onto the site. Once i added an array I added name, id called page sidebar.
Then i added the title of a spefic widget that is implemented with before title and after title.
After the structure for the sidebar was created, was then able to customise the structure of the navigational menu.
Finally after layingout the structure, the menu was complete, with images of the menu intergrated on the fronthomepage will be shown later.
Section 7.5- Widgets menu intergration
Next i added the abilty for widgets to be added to the website on line 117.
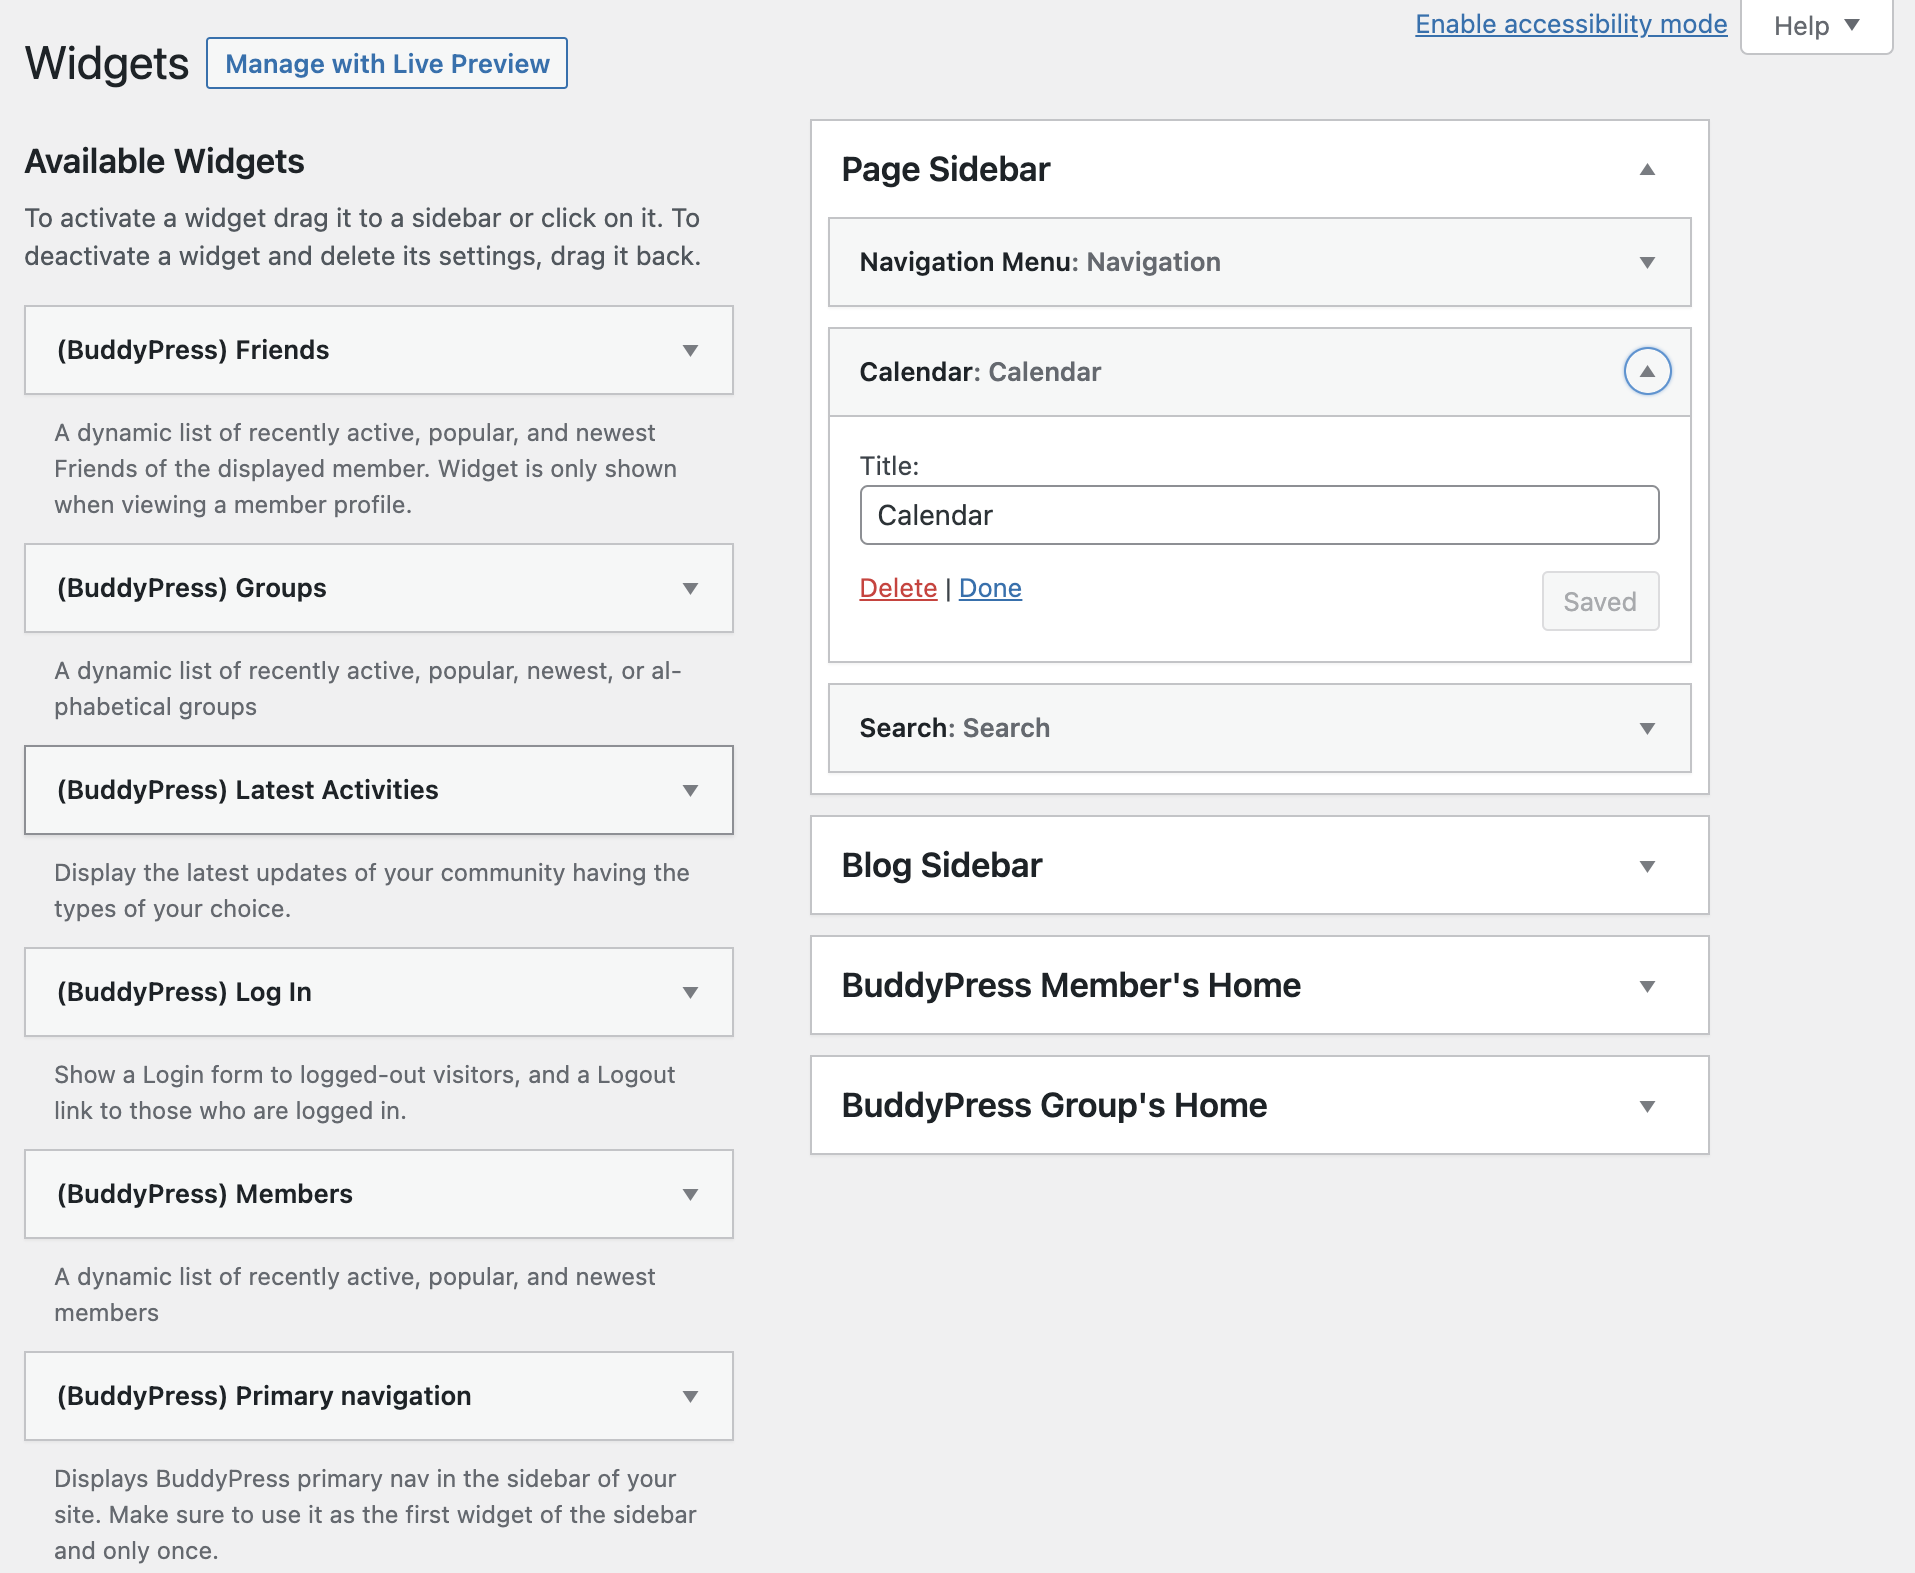
Afterwards i then customised the front page to include a variety of features including a the website navigation, calandar and a tempory search funciton.
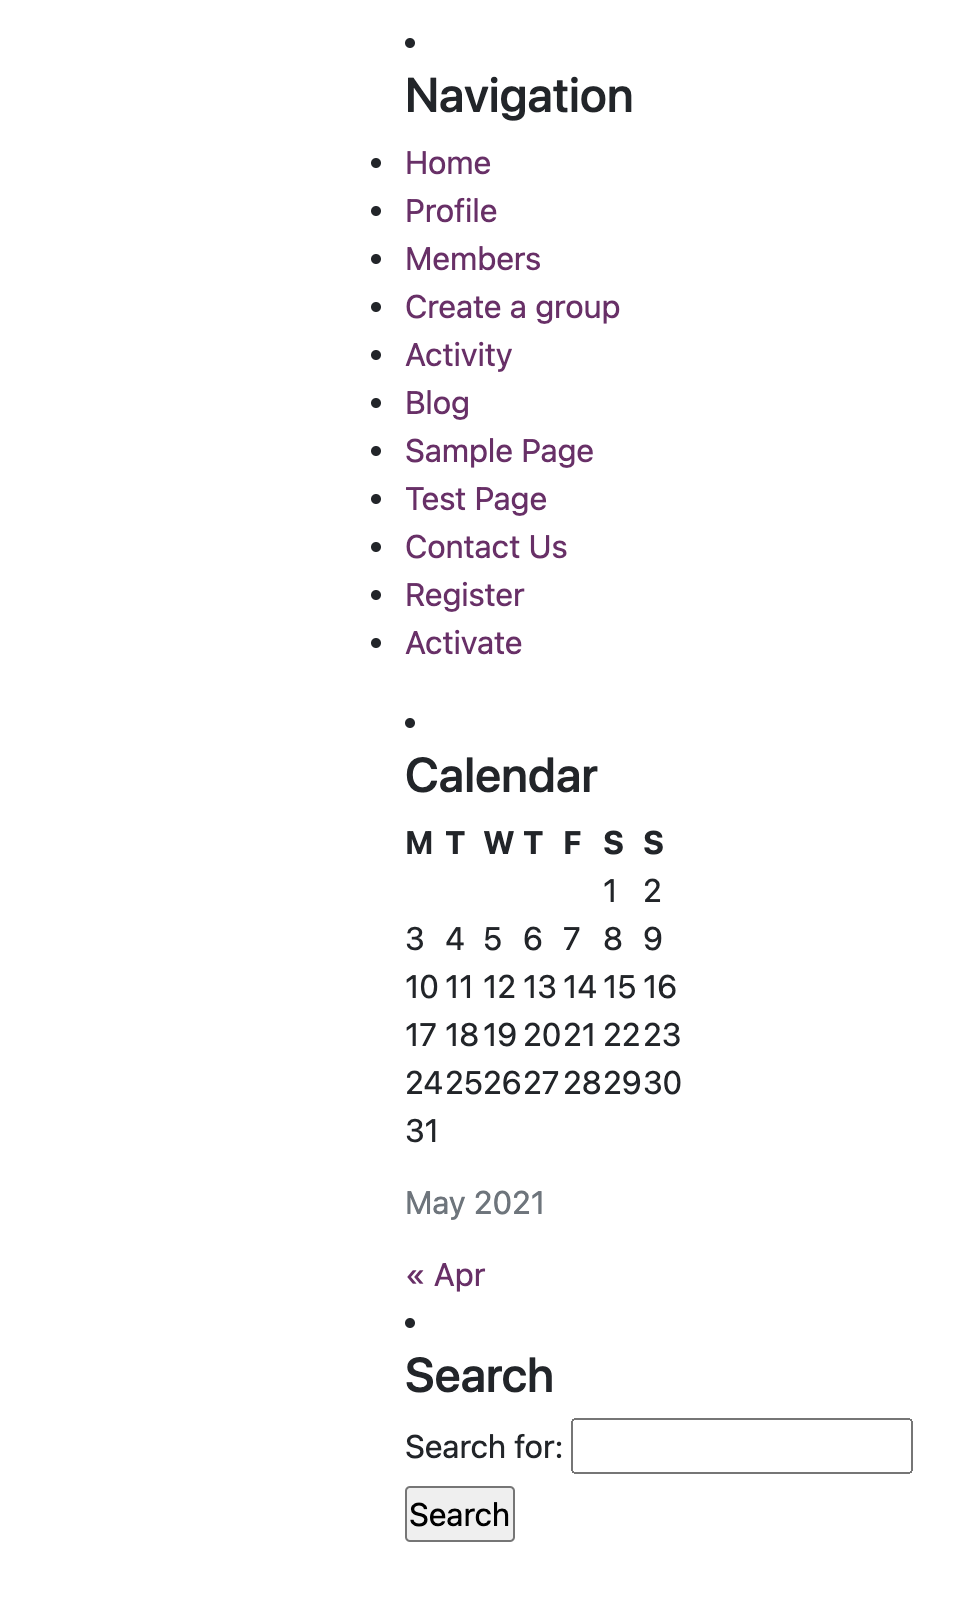
This is the final layout of the sidebar! The calendar changes day aswell as the month giving the user a good overview for dates in the current month.
Buddy Press installation
One key feature of the website that the client requested was to add a socail element to the site. This enables users to create a vast array of soical options, including profiles, groups, contacts, private messaging etc.
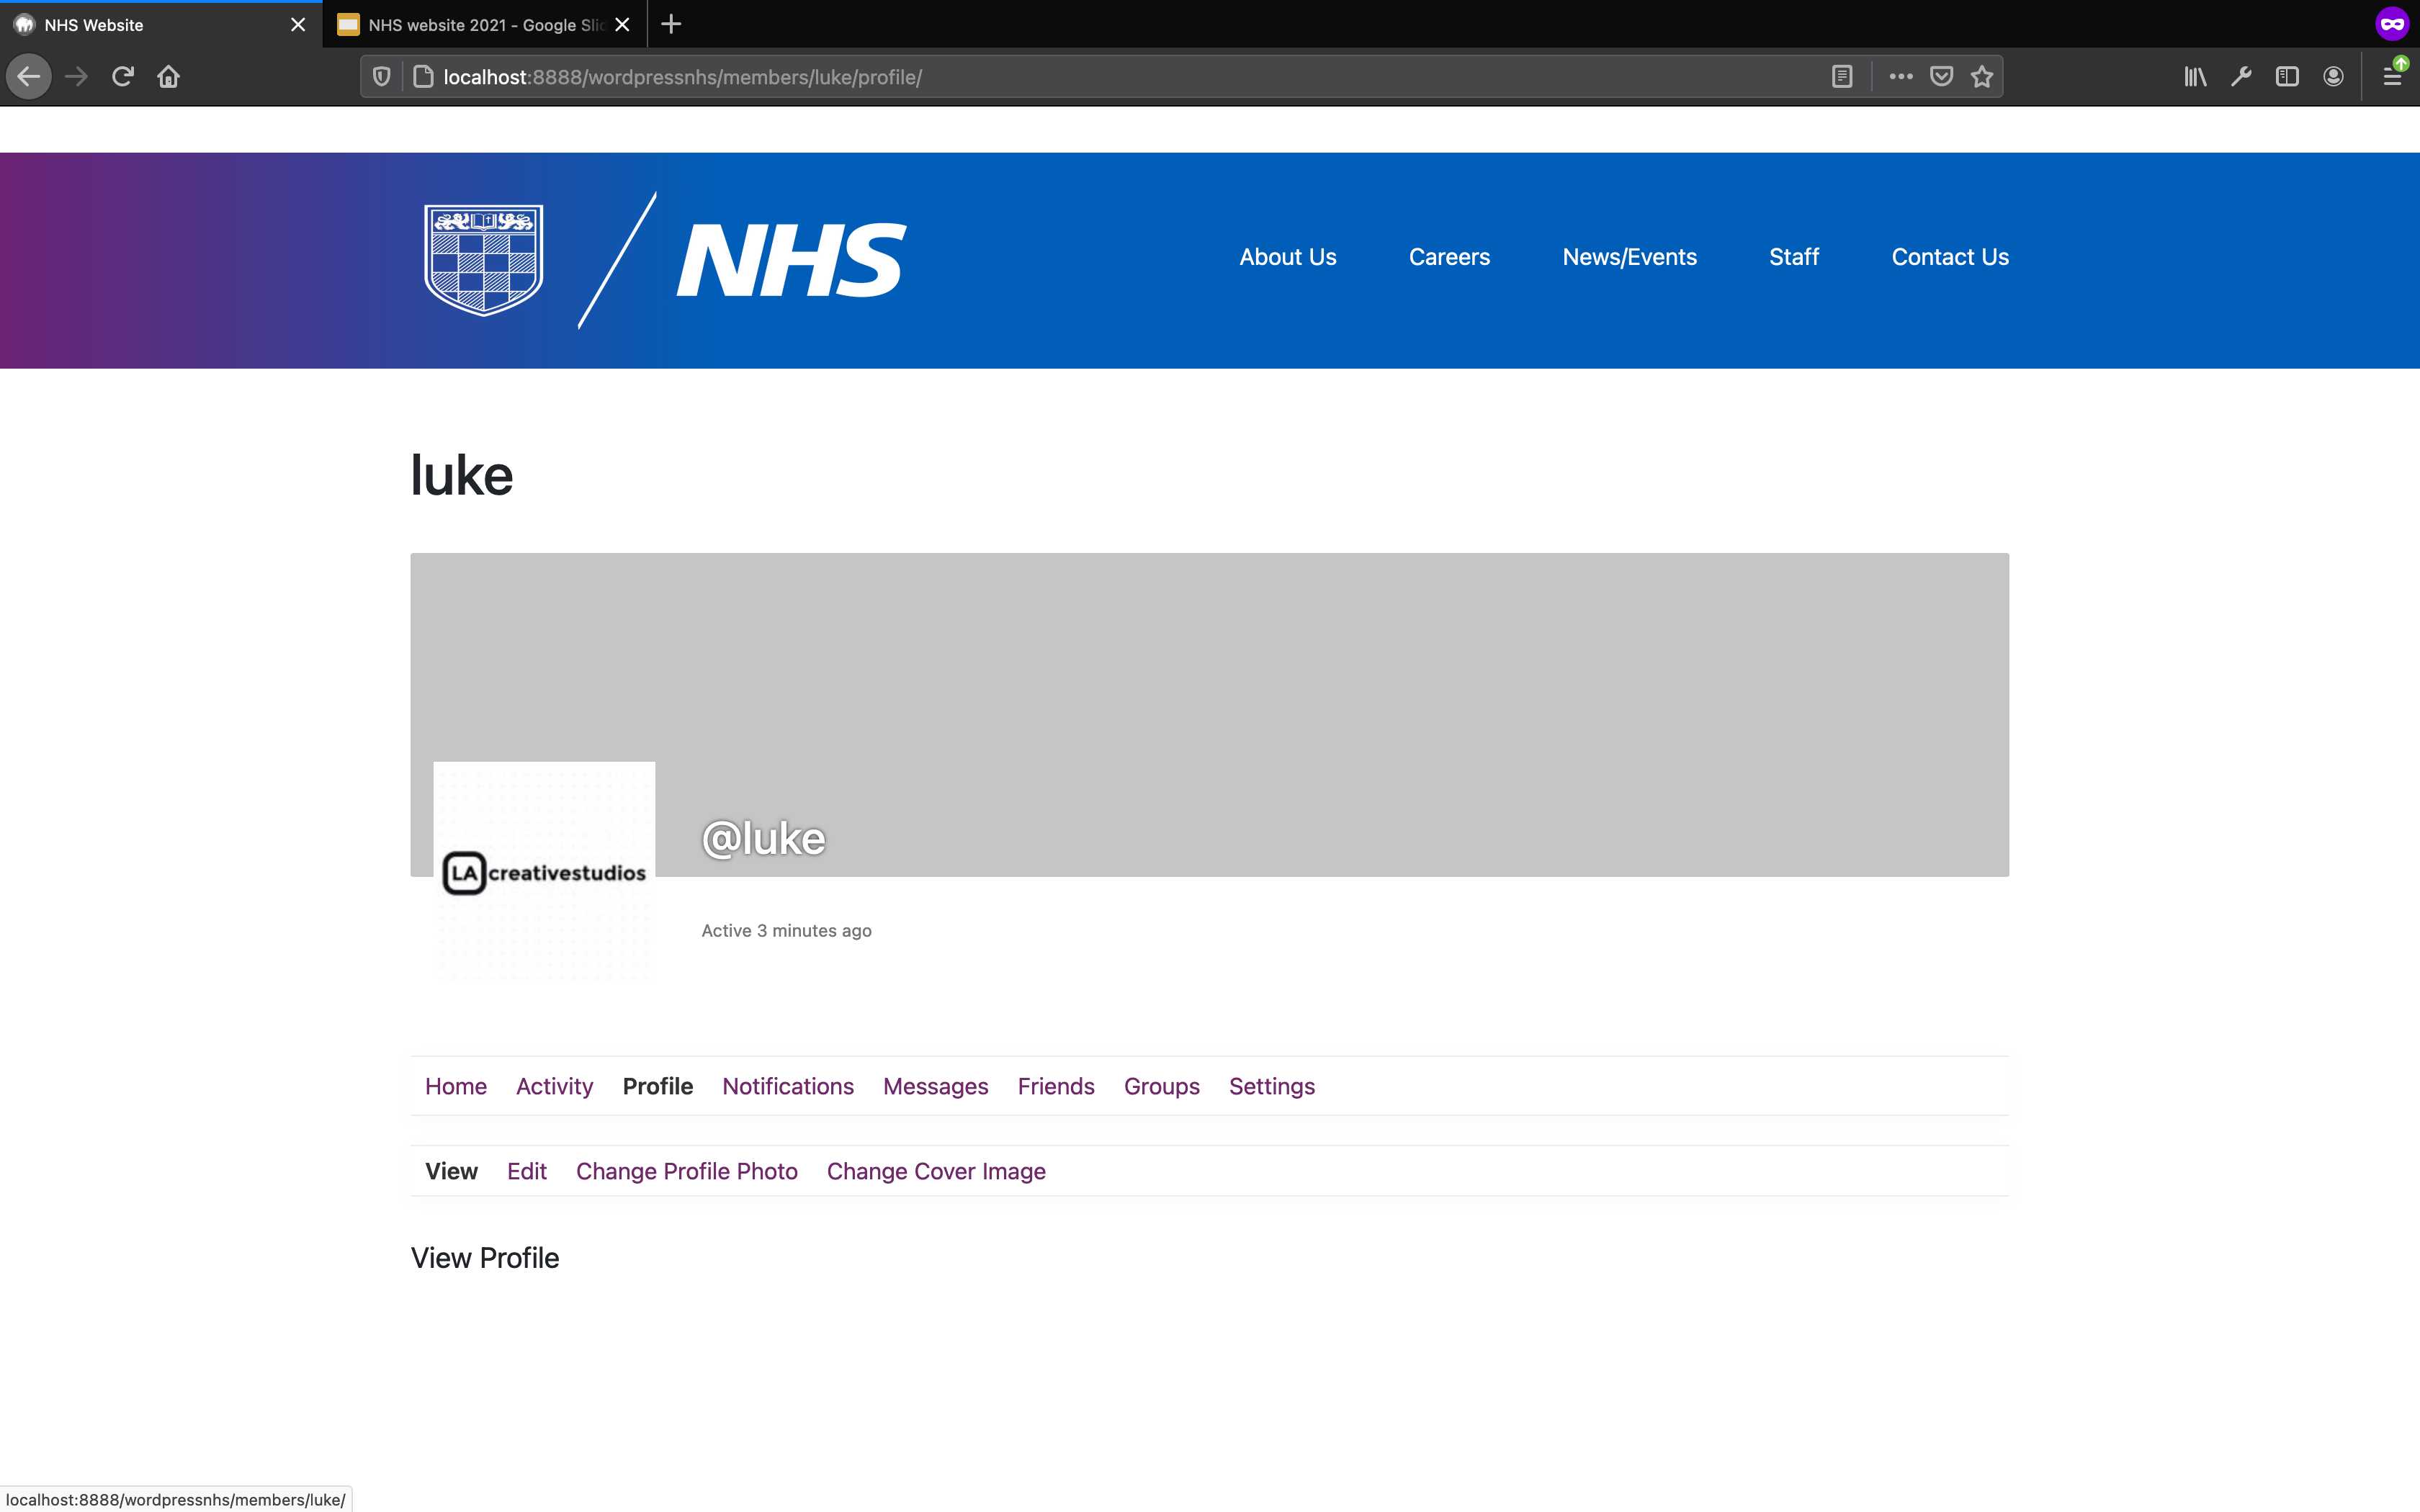
As you can see on the right, each user will have their own profile area, in which the the user will be able to customise their profile picture, cover image.
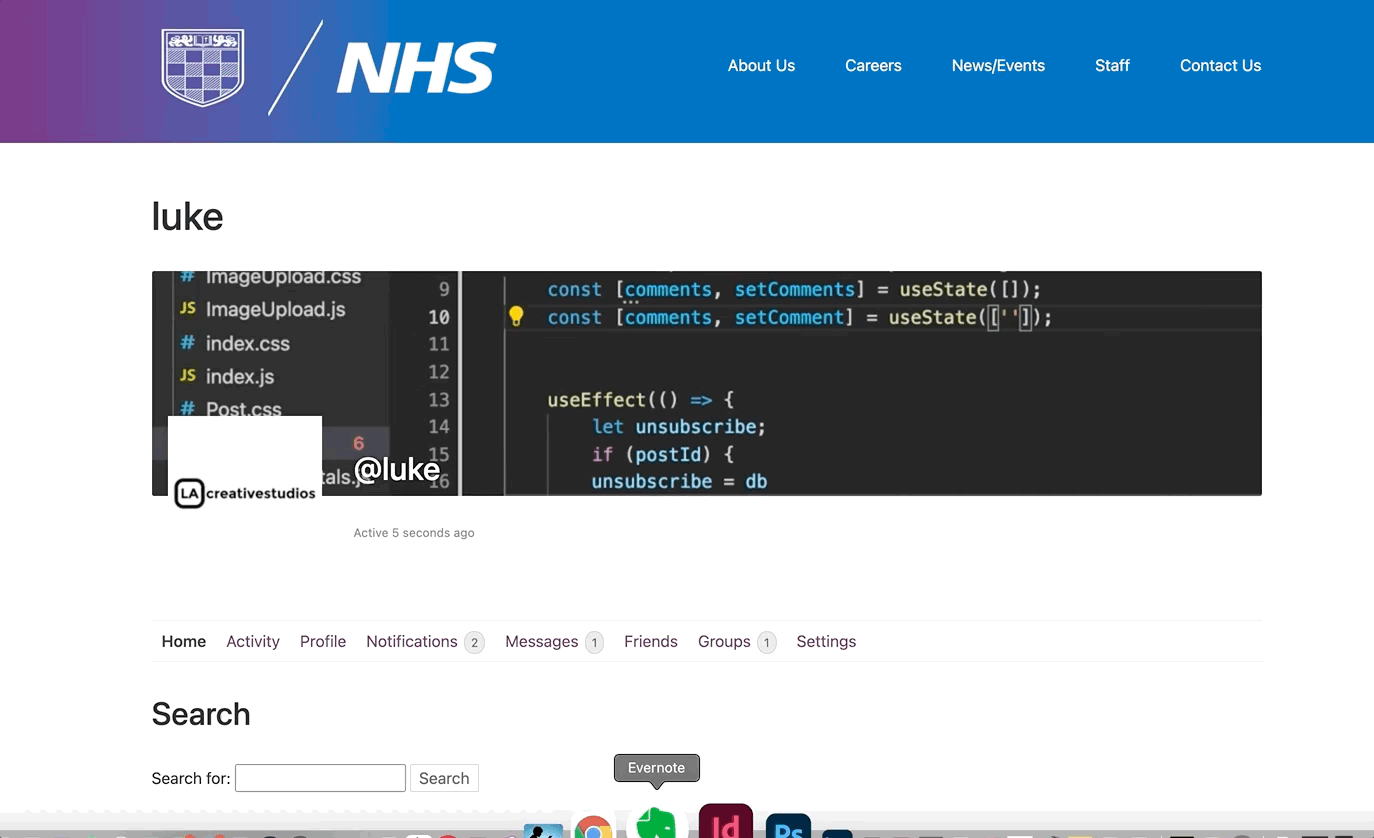
On the left I run through the amount of features that the user can utilise. Including the activity page, direct messaging, notificaitons, friends list etc.
Marcus's CSS Intergration and Github intergation
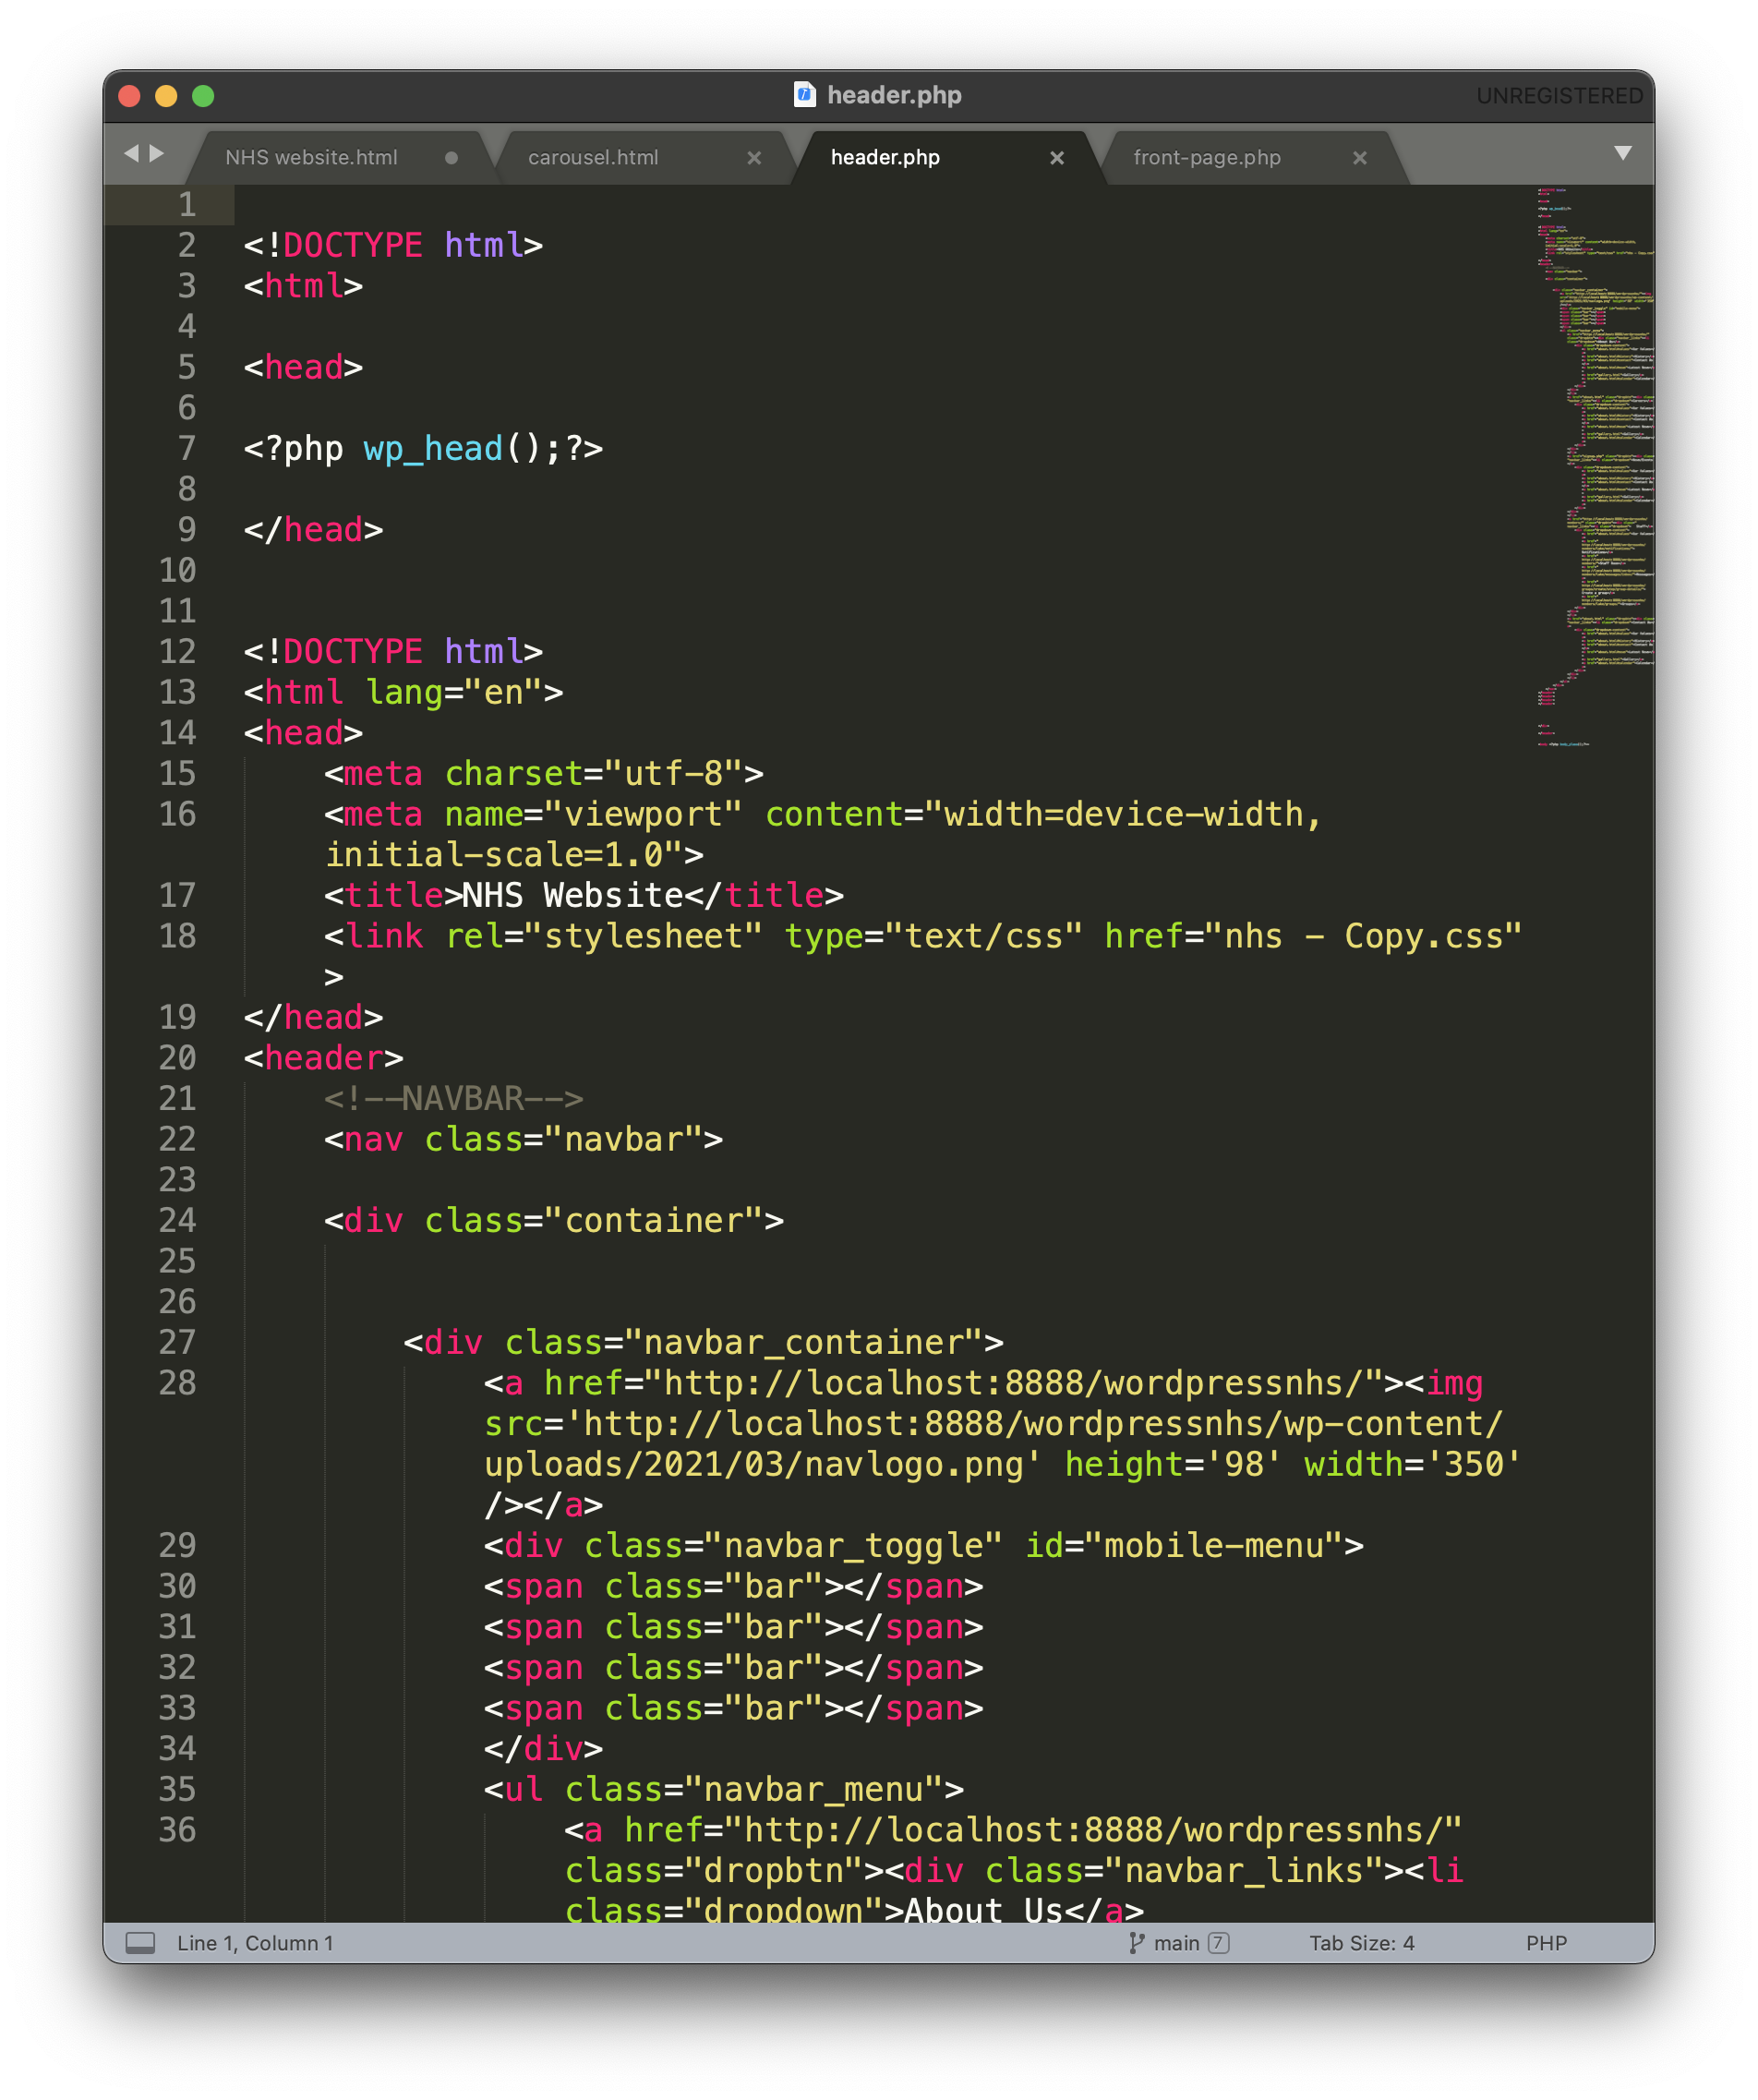

The next step was to implement Marcus's css styling that he had created for the site. First i added the navigation bar that he had implemented into the site. This was done by placing the code into the header.php of the site.
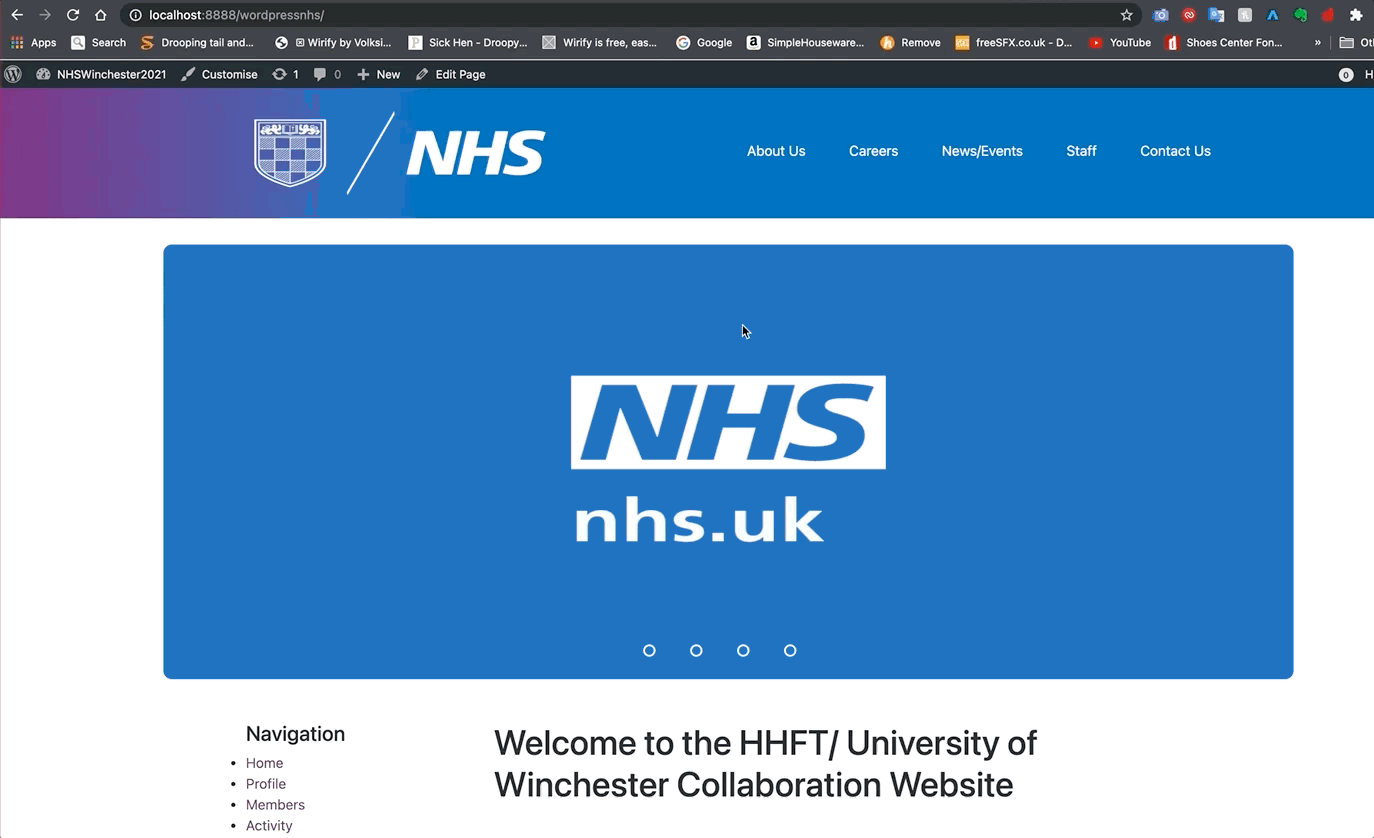
Next i pasted in the carousel that highlights key images into the site, with hte current images being placeholder images.
Next i altered the staff section of the wesite, where i customised the social dropdowns of the website that Marcus had implemented into the site. I added, notificaitons, messages and groups to the dropdown. The otehr drop downs shown are a work in progress as our client is currently unsure what should feature.
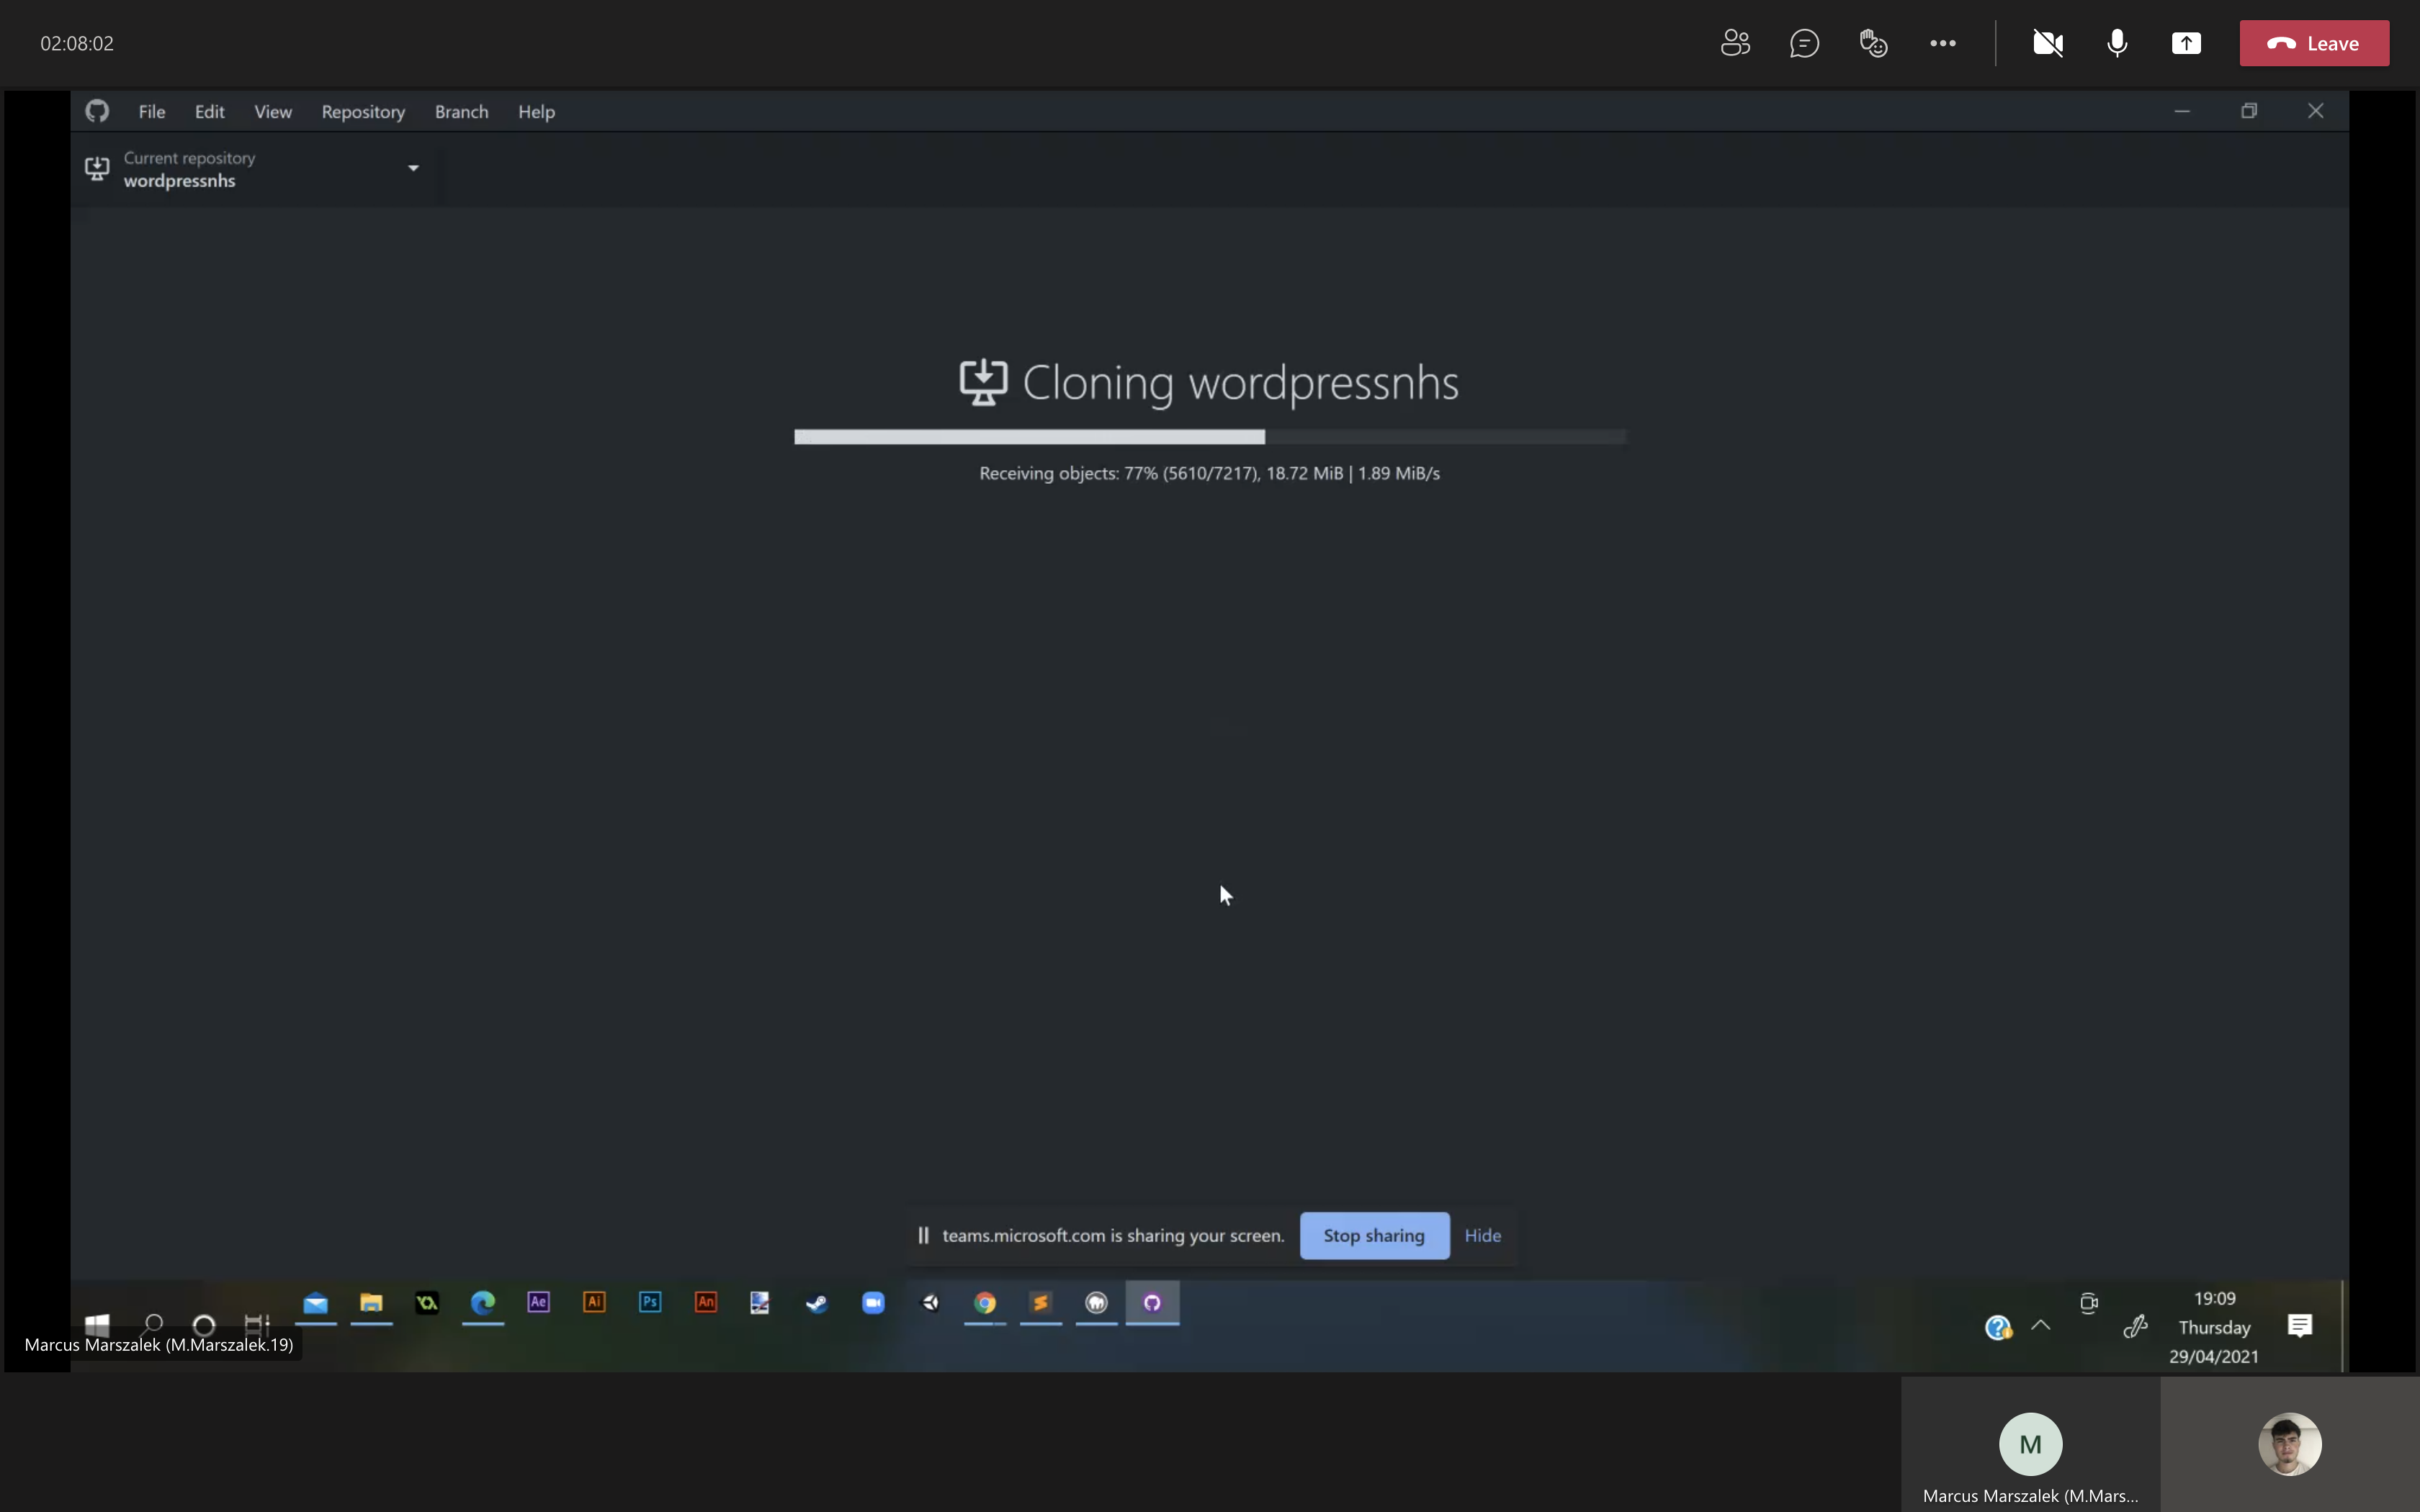
In order for Marcus and I to successfully communicate, we used Github. Github allows projects to be collaborated with two or more people seamlessly where files and code can updated together via a repository. First of all i made a repository and cloned the 'wordpressnhs' to my desktop (using github desktop) where i could make local changes to the site.
Once i had made a change to the site, i could directly uplaod the changes online and psuh them onto github. Once they were pushed, i then published the files on githubn and Marcus could then download the changes to his local host.
Improved user signup- Wrong methods
Marcus and i decided to change the register and login process, by using email verificaiton instead of the traditional method i coded earlier.
We felt that using an email verification sent to the user, would make the process more modern and advanced as it's a common practice among larger corperations to use email verification on their sites, which also increases the security on the site by as it prevents users from using other peoples emails as their primary email account, either by malicious intention or by mistake, we felt that this would be a good modern step forward for the website especially with over 100 people expected to use site in full completion. Despite hard coding the previous sign up system, i feel that i gained tremendous insight into how the signup process is coded using php and i a skill that i can take forward into the future.
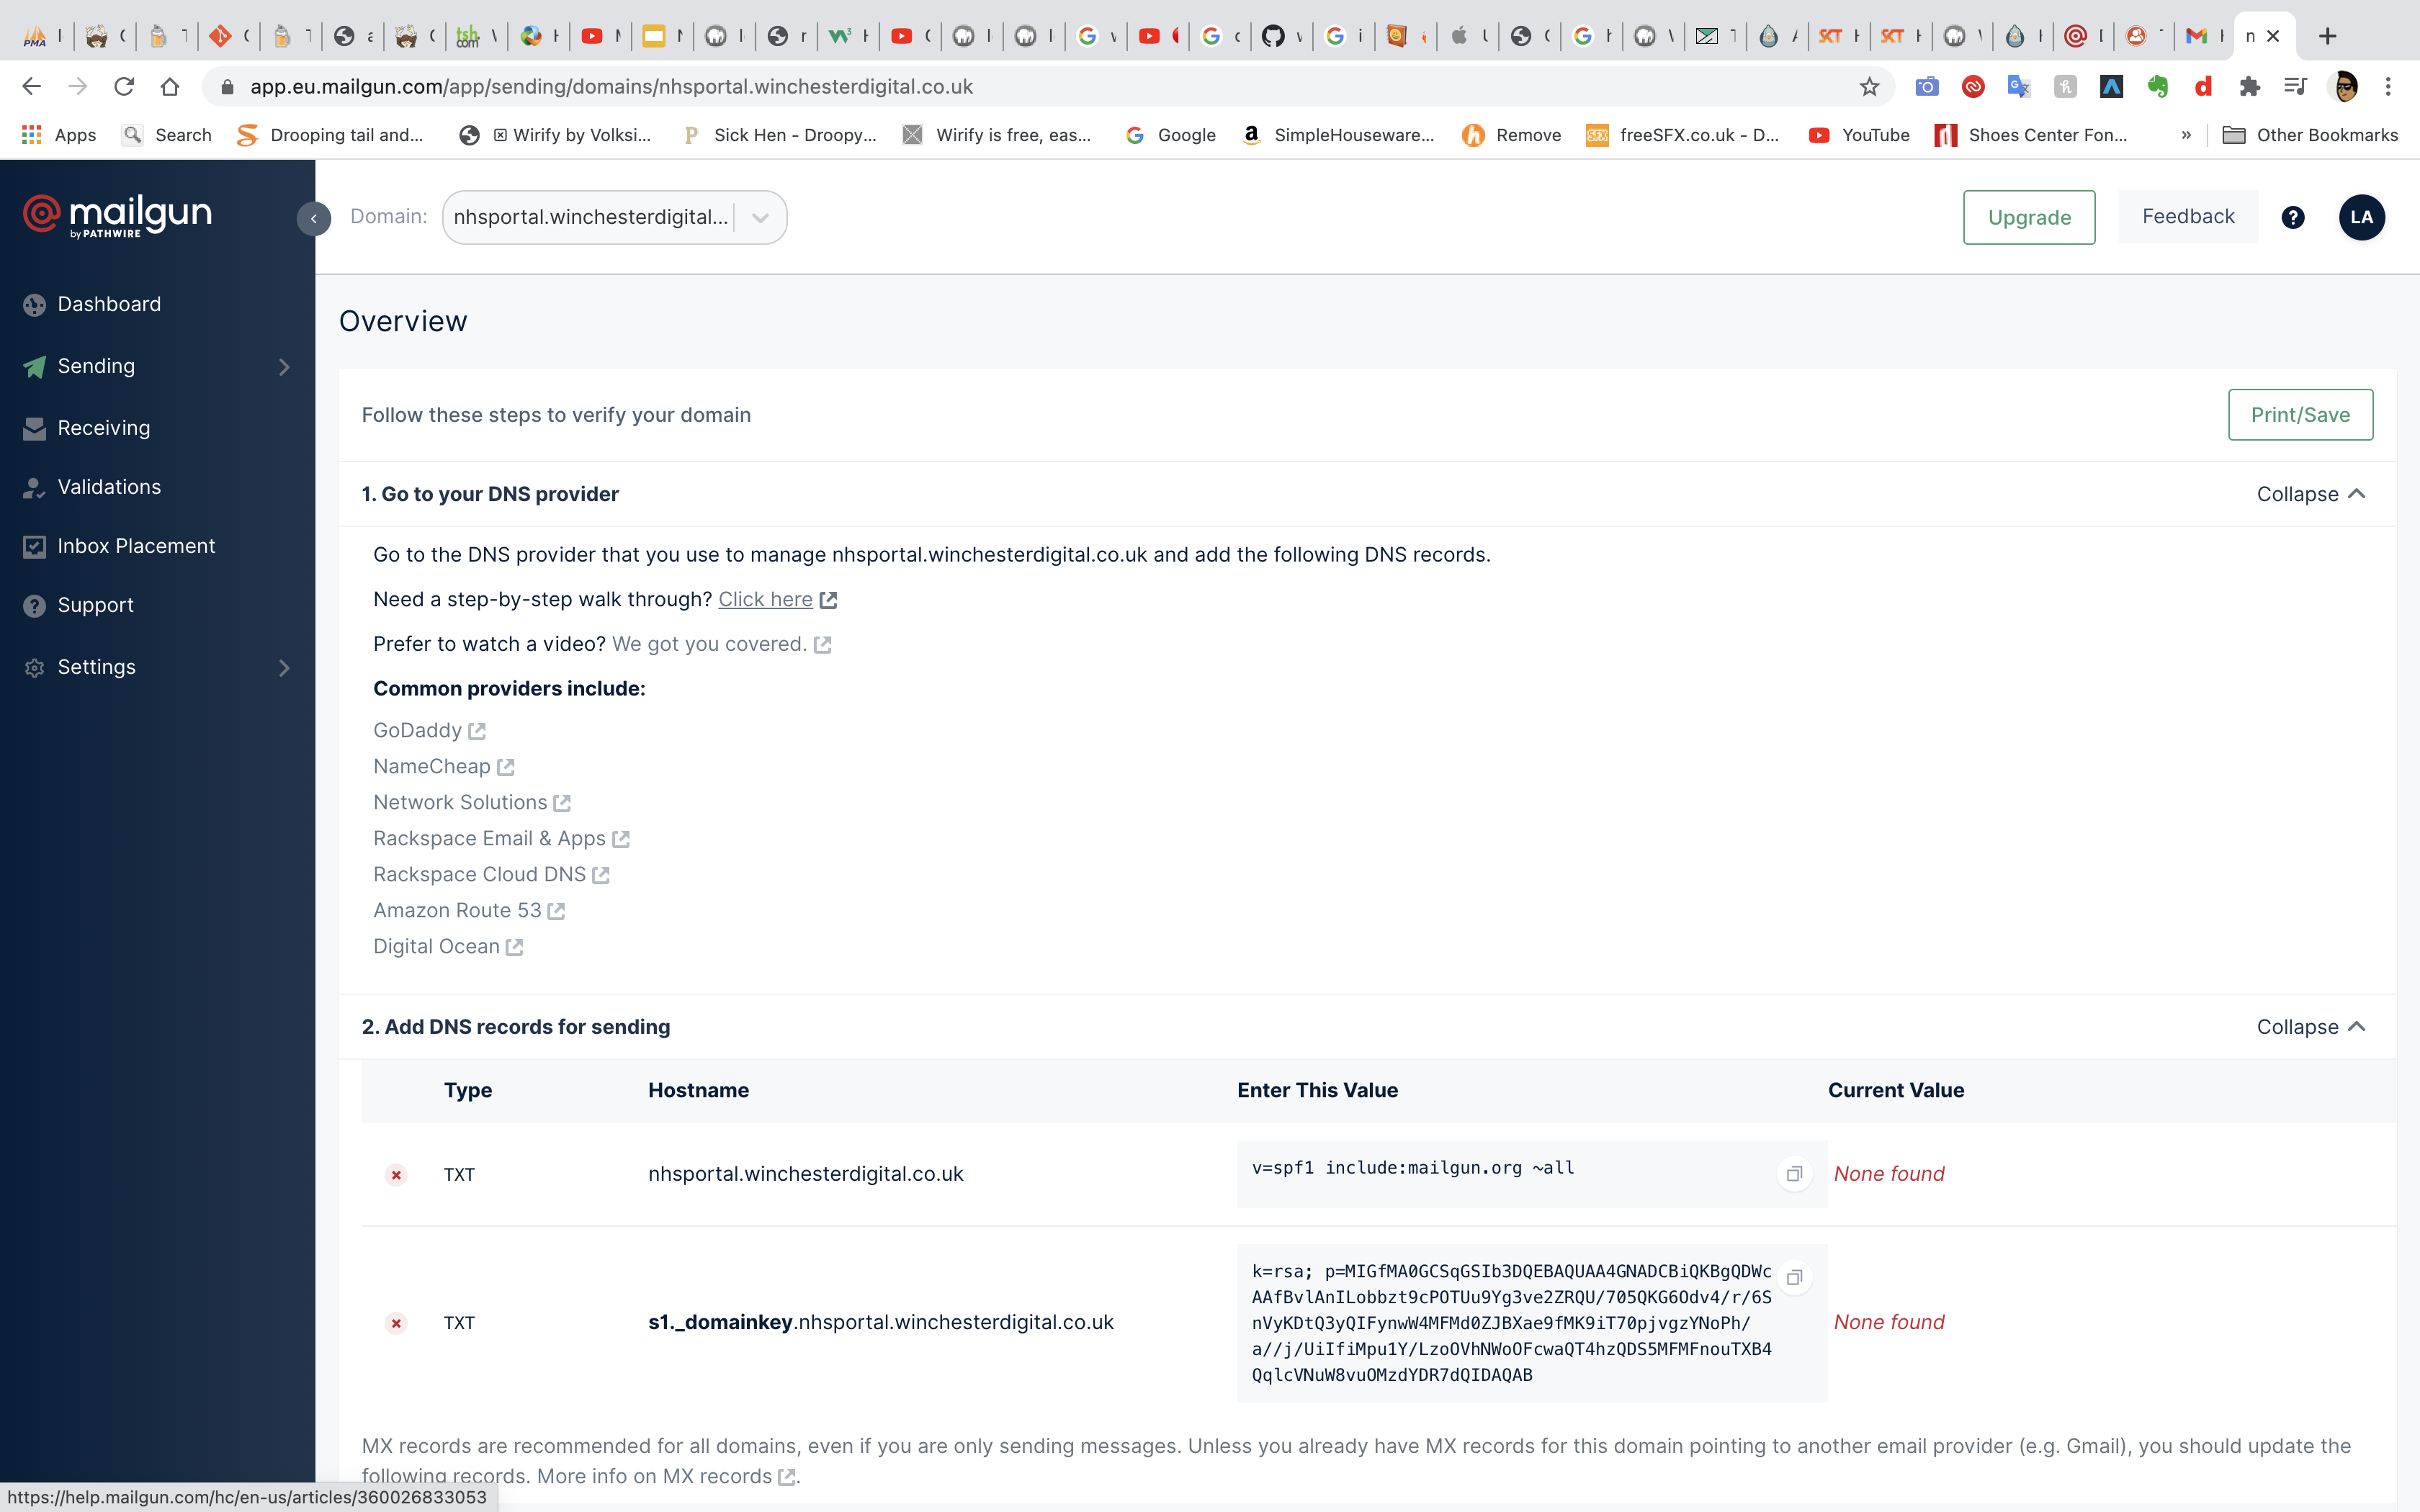
After creating a new database for the website on php my admin, i tried to use hosting services such as mailgun and SMPT.com to enable the email verificaiton to take place as i thought this was the correct way to do so.
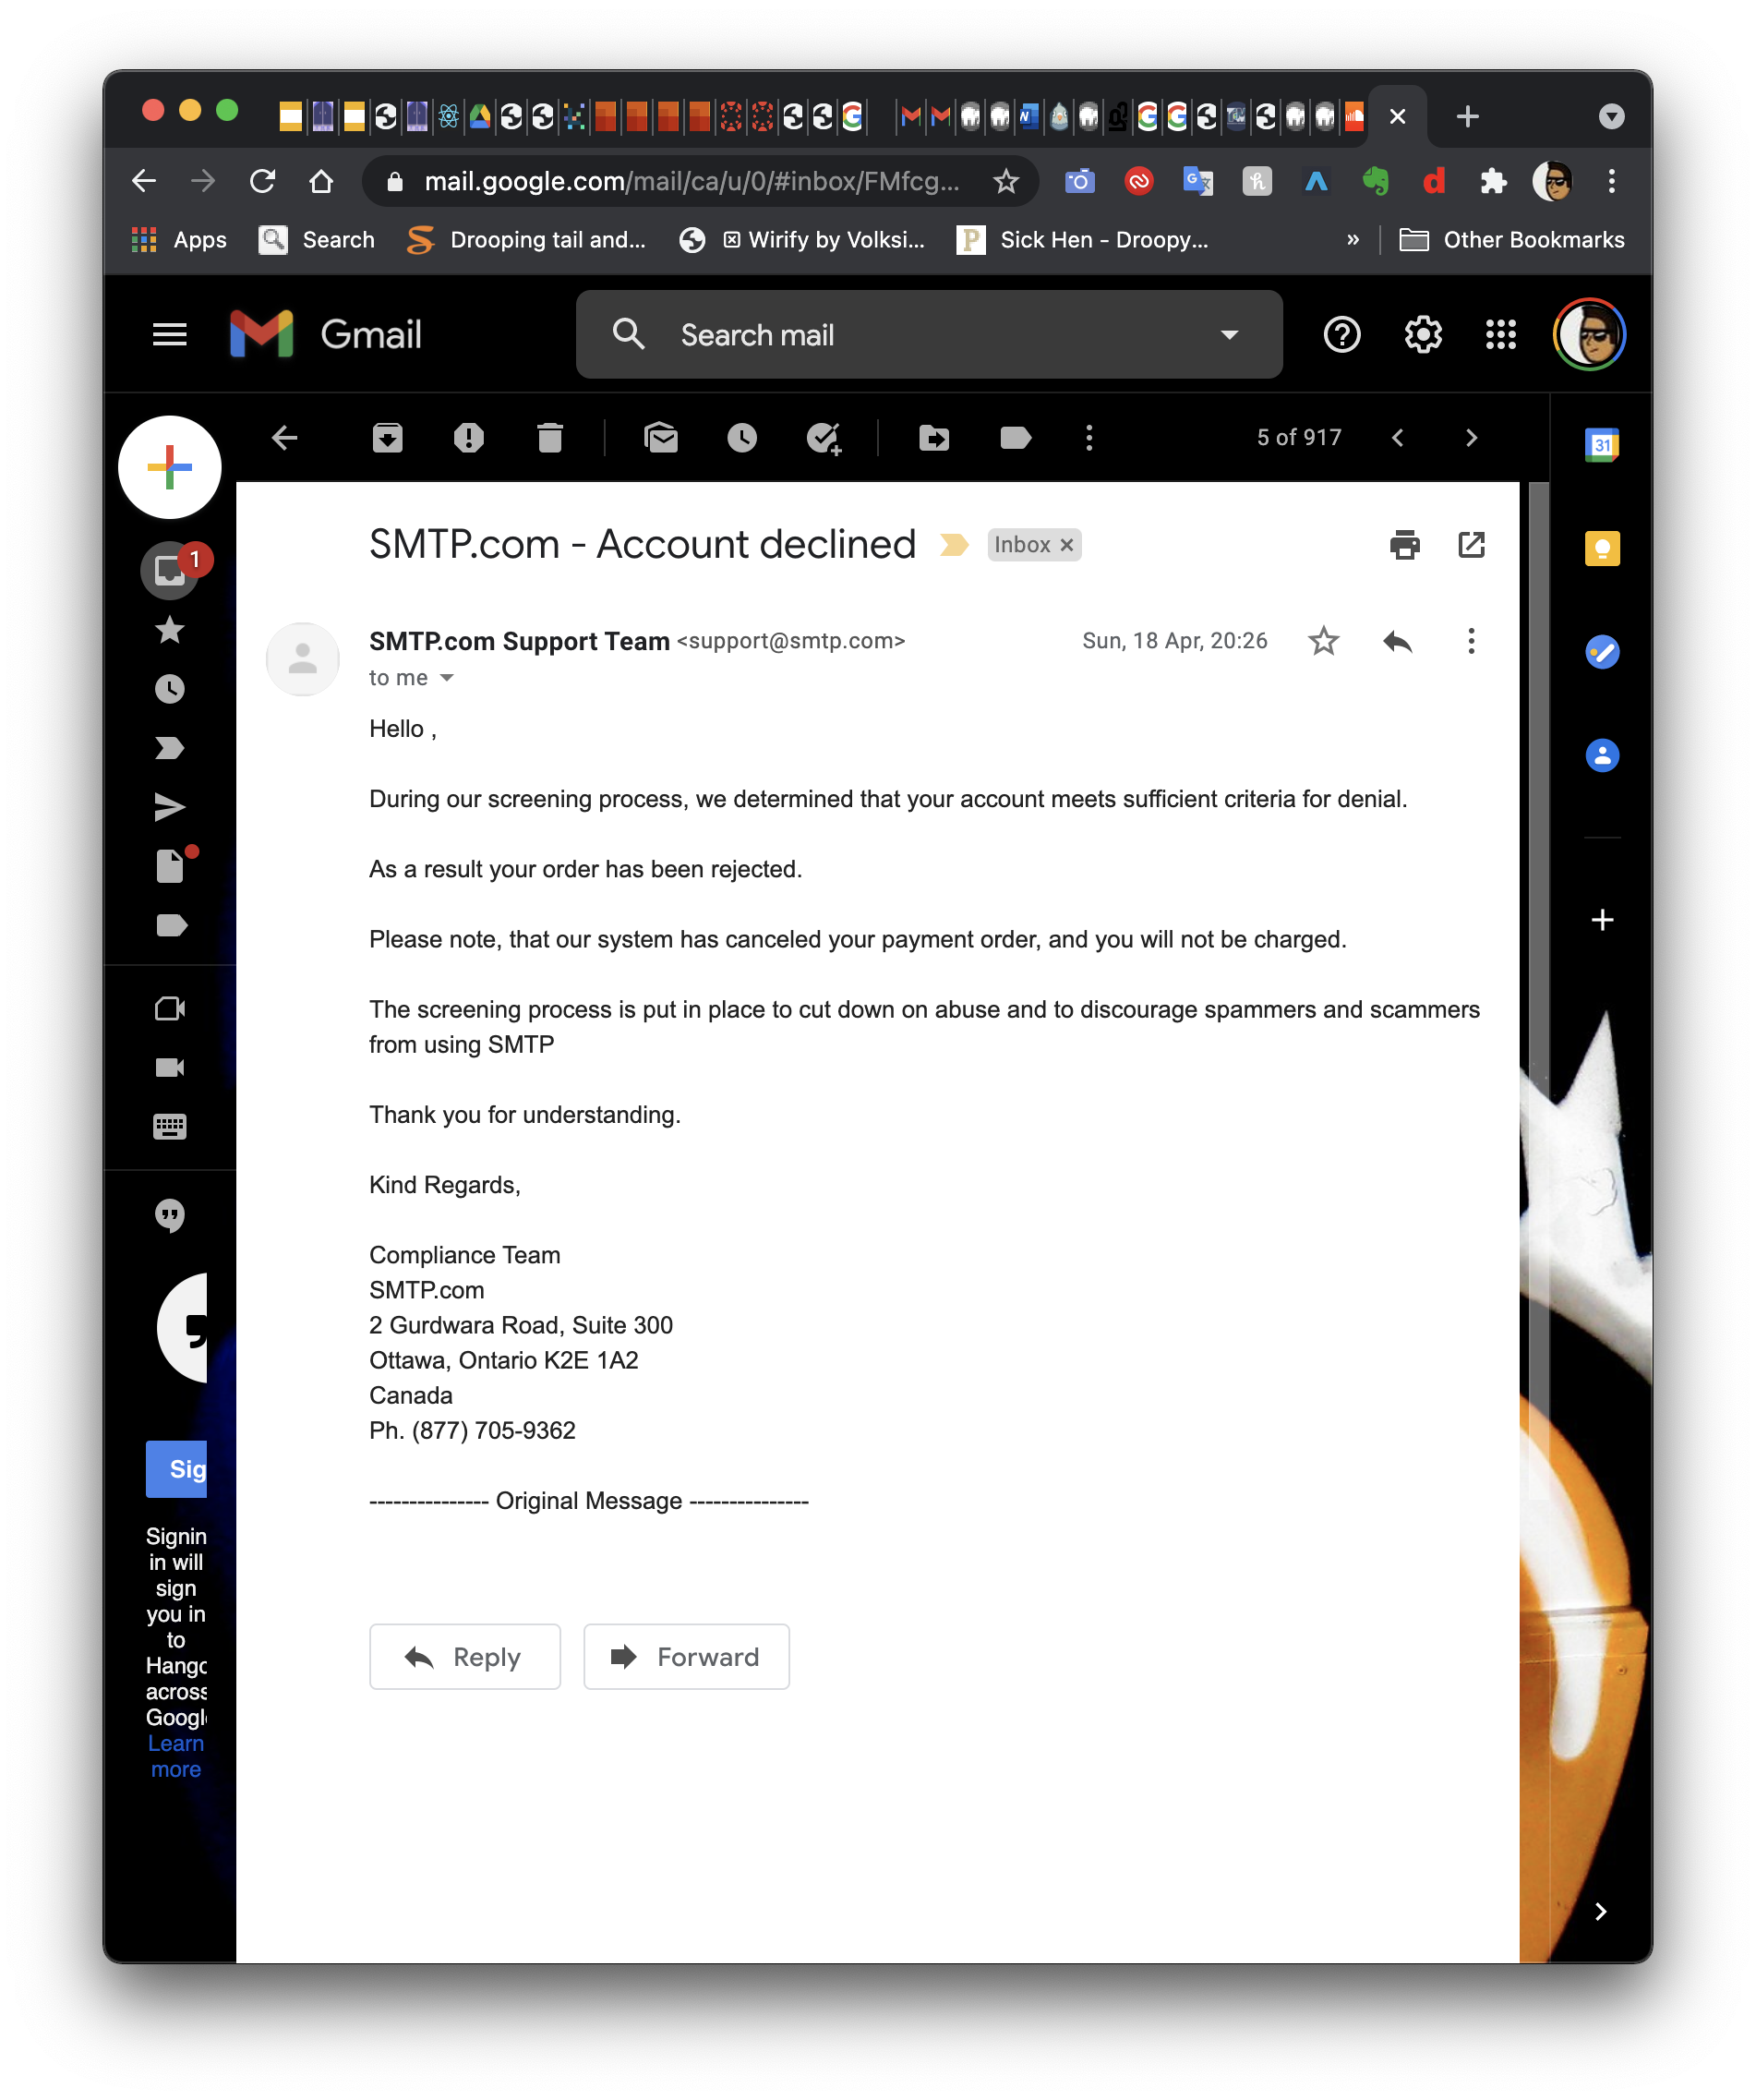
After applying to a SMTP.COM i received an email saying that they have rejected my application to host the website and email verification using them. I therefore realise that I was going down the wrong route of doing so, due to my inexperience.
Section 7- Verification email method
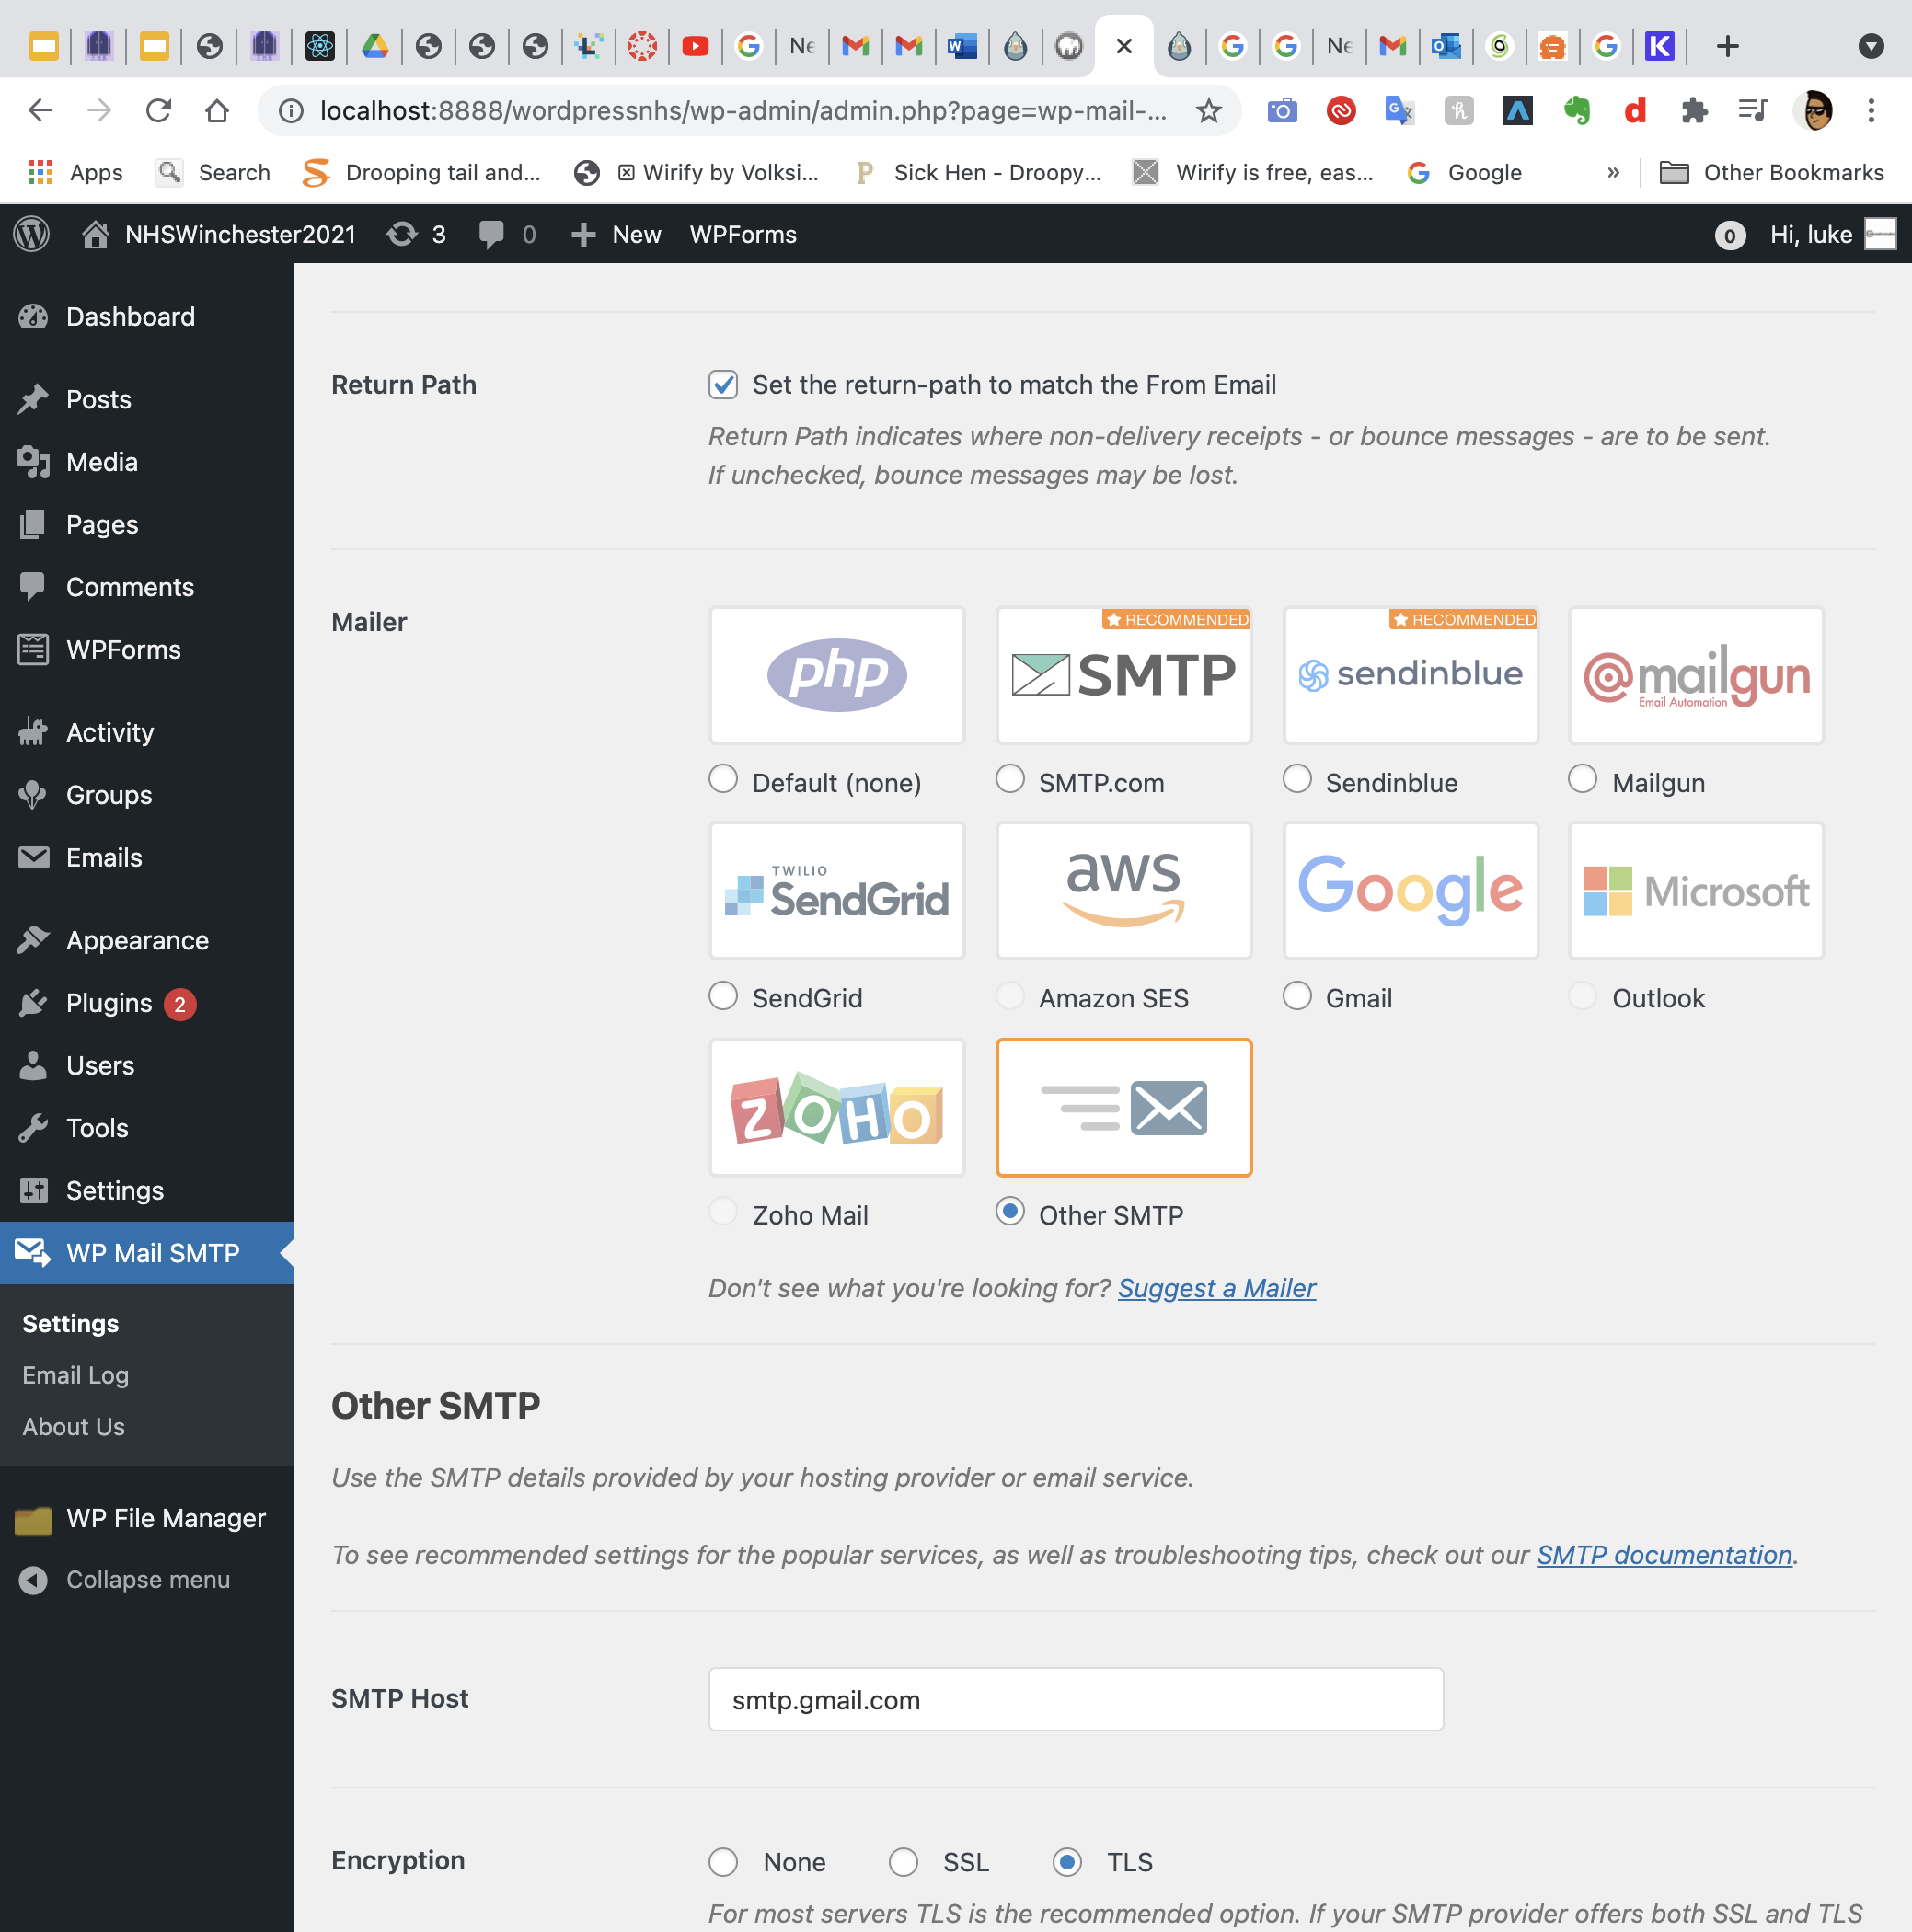
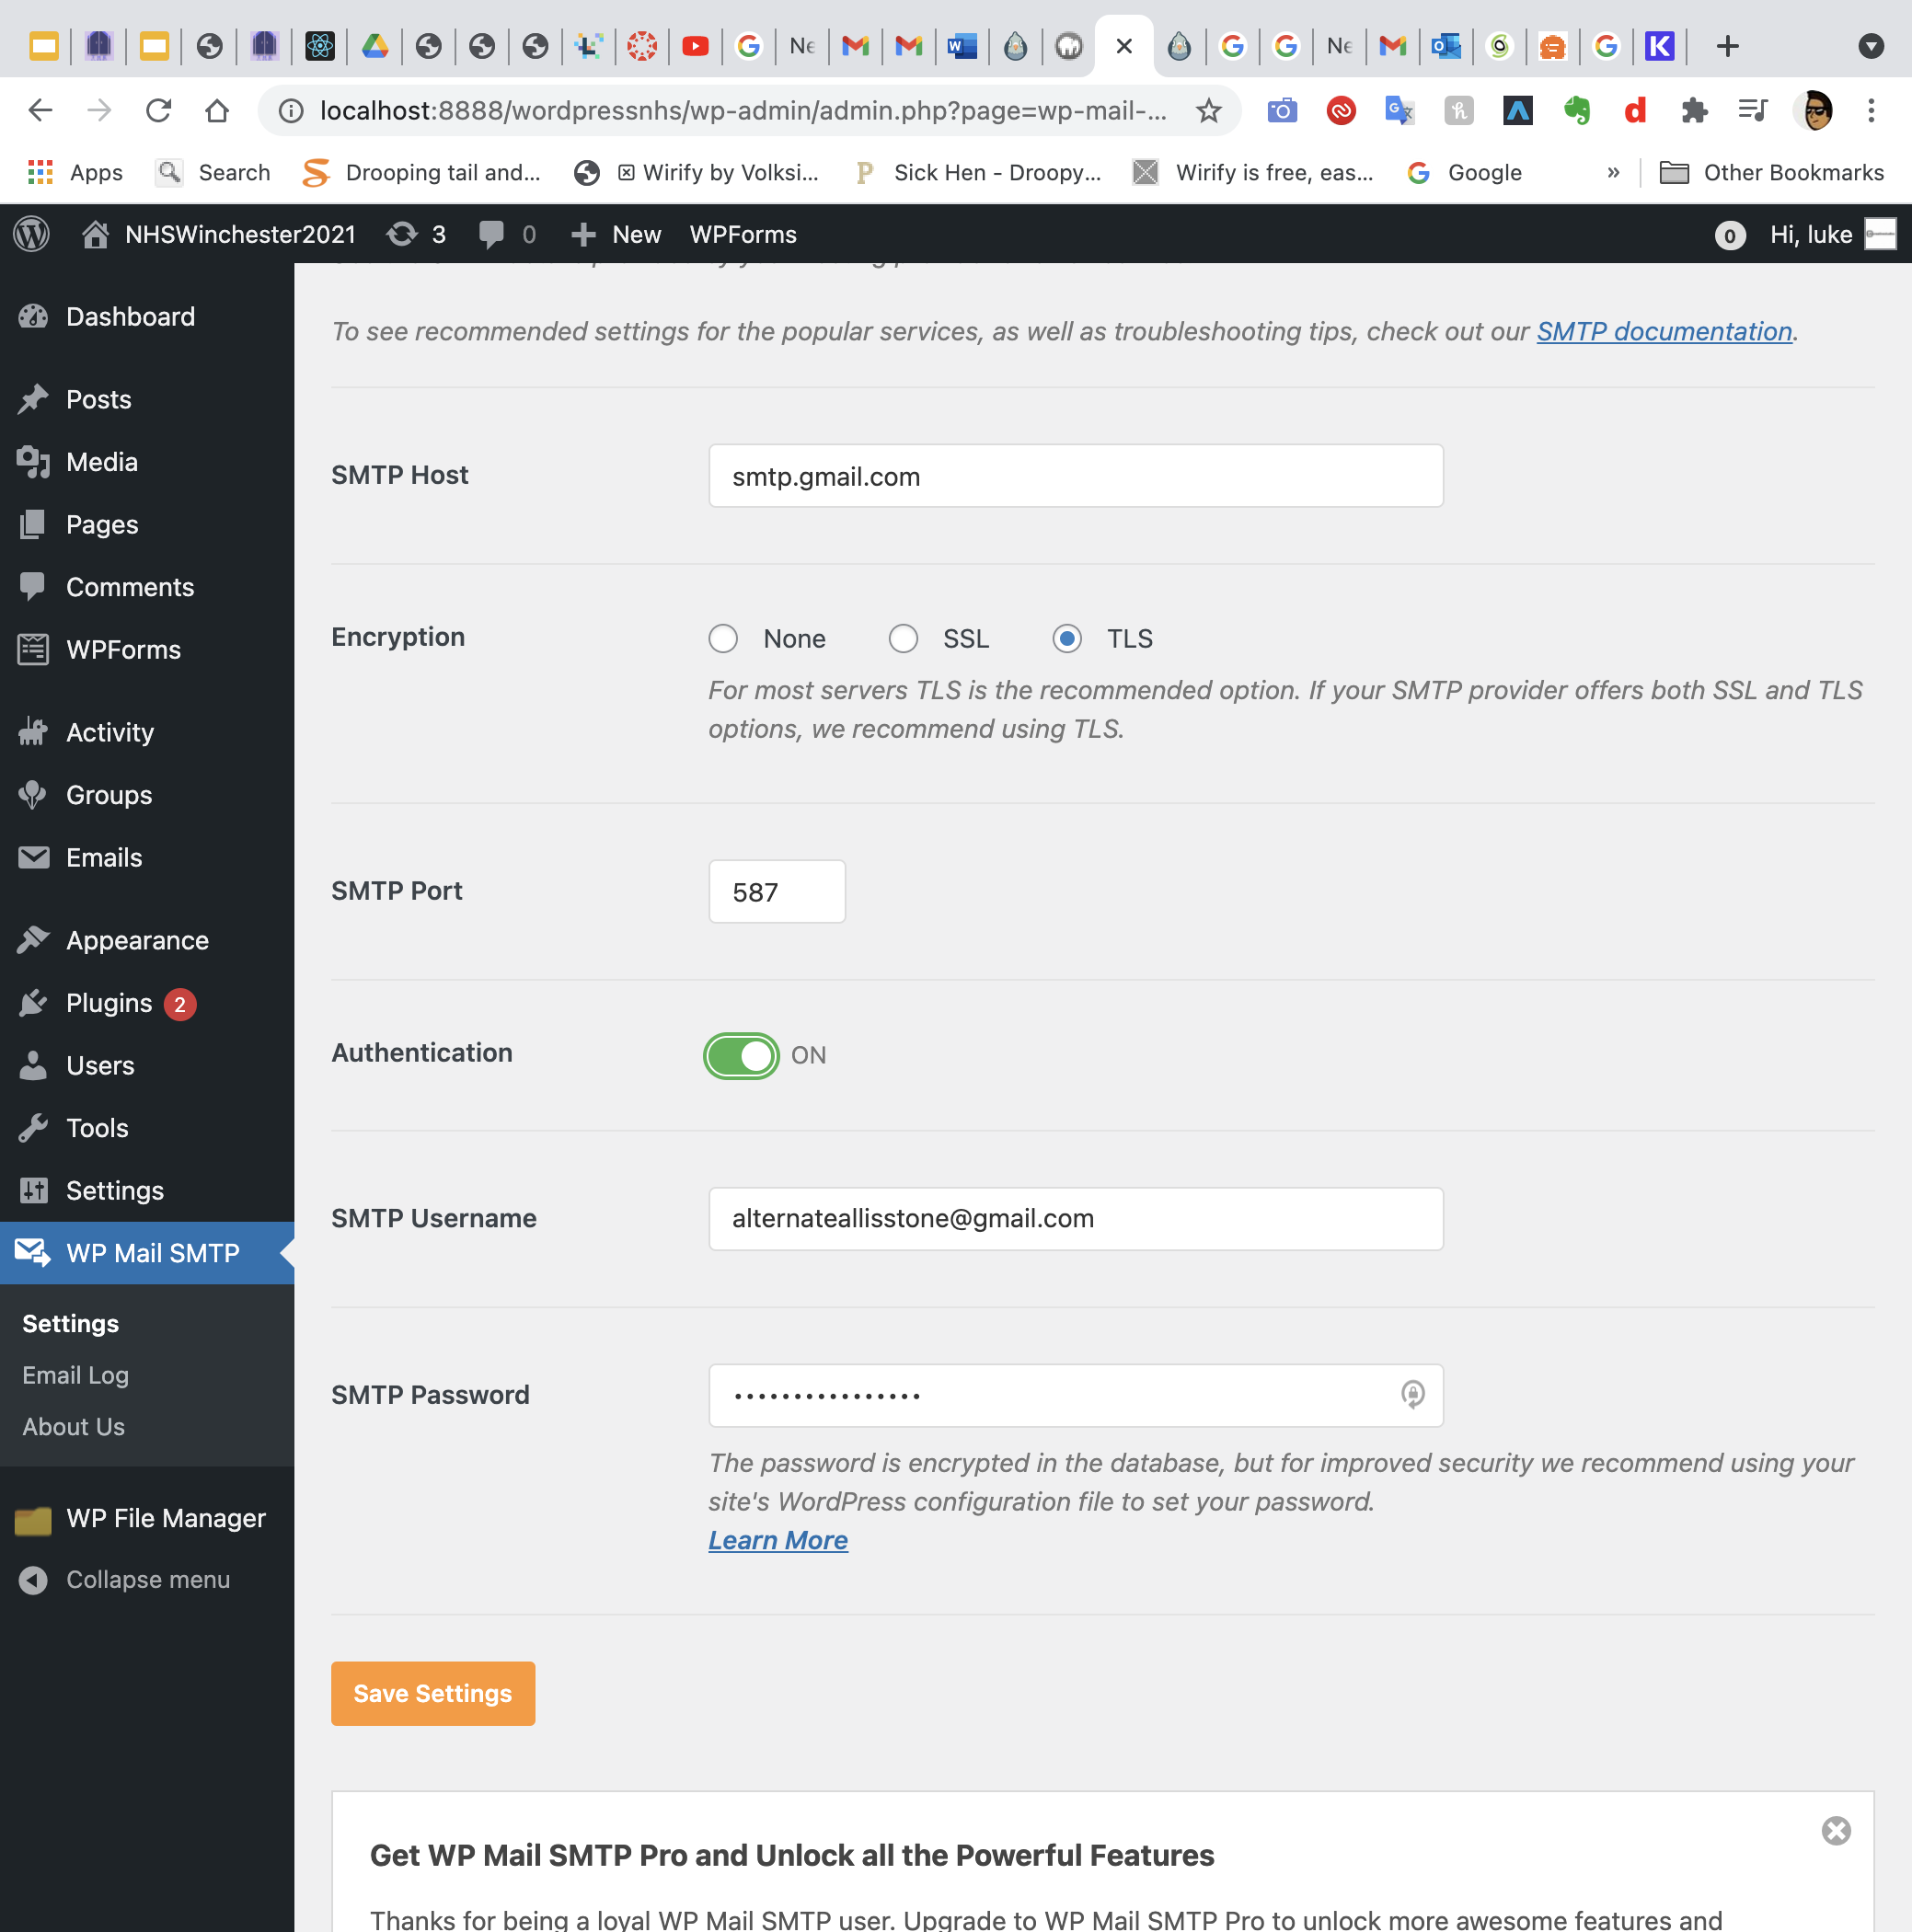
After doing a variety of research, I realise that I had to use WordPress is inbuilt ability to host rather than go through the third-party companies such as mail gun SMTP and send in blue. I therefore selected other SMTP from the mailing list and began filling out the information
after filling out the information for a Gmail host to be supported via WordPress, I decided to temporarily use a backup email I have for projects like this, where I also entered in the password for my Google account.
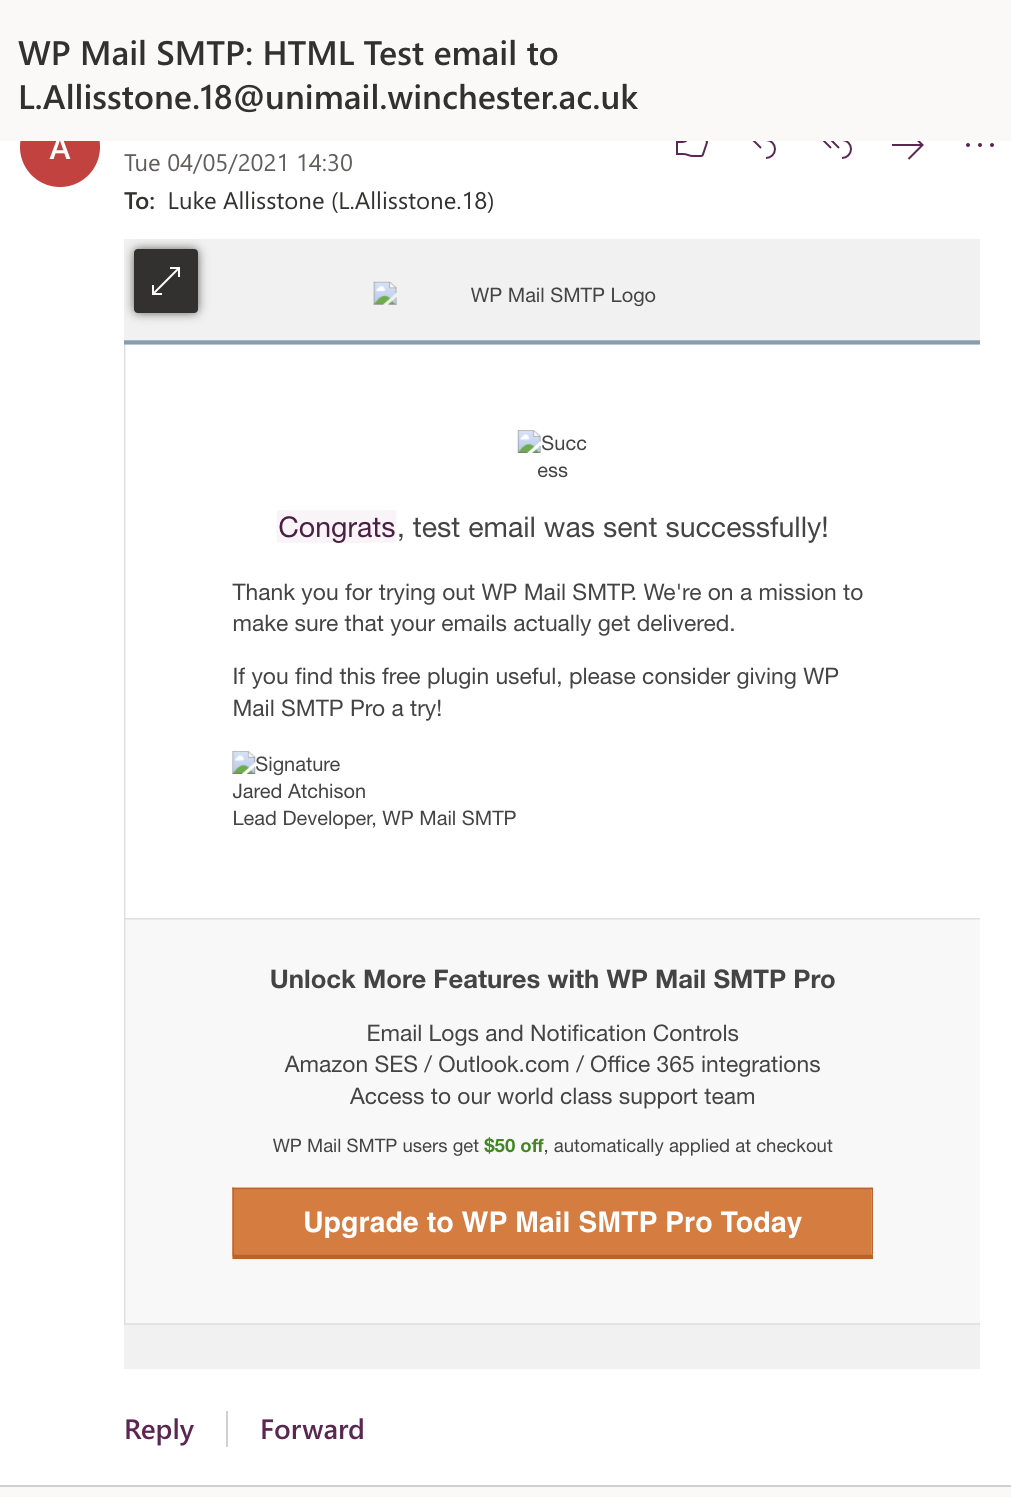
I then saved the settings and sent out a test email to see if the a WP mail SMTP system is functioning. Thankfully it was and work perfectly. This showed that the email and verification system was fully functional.
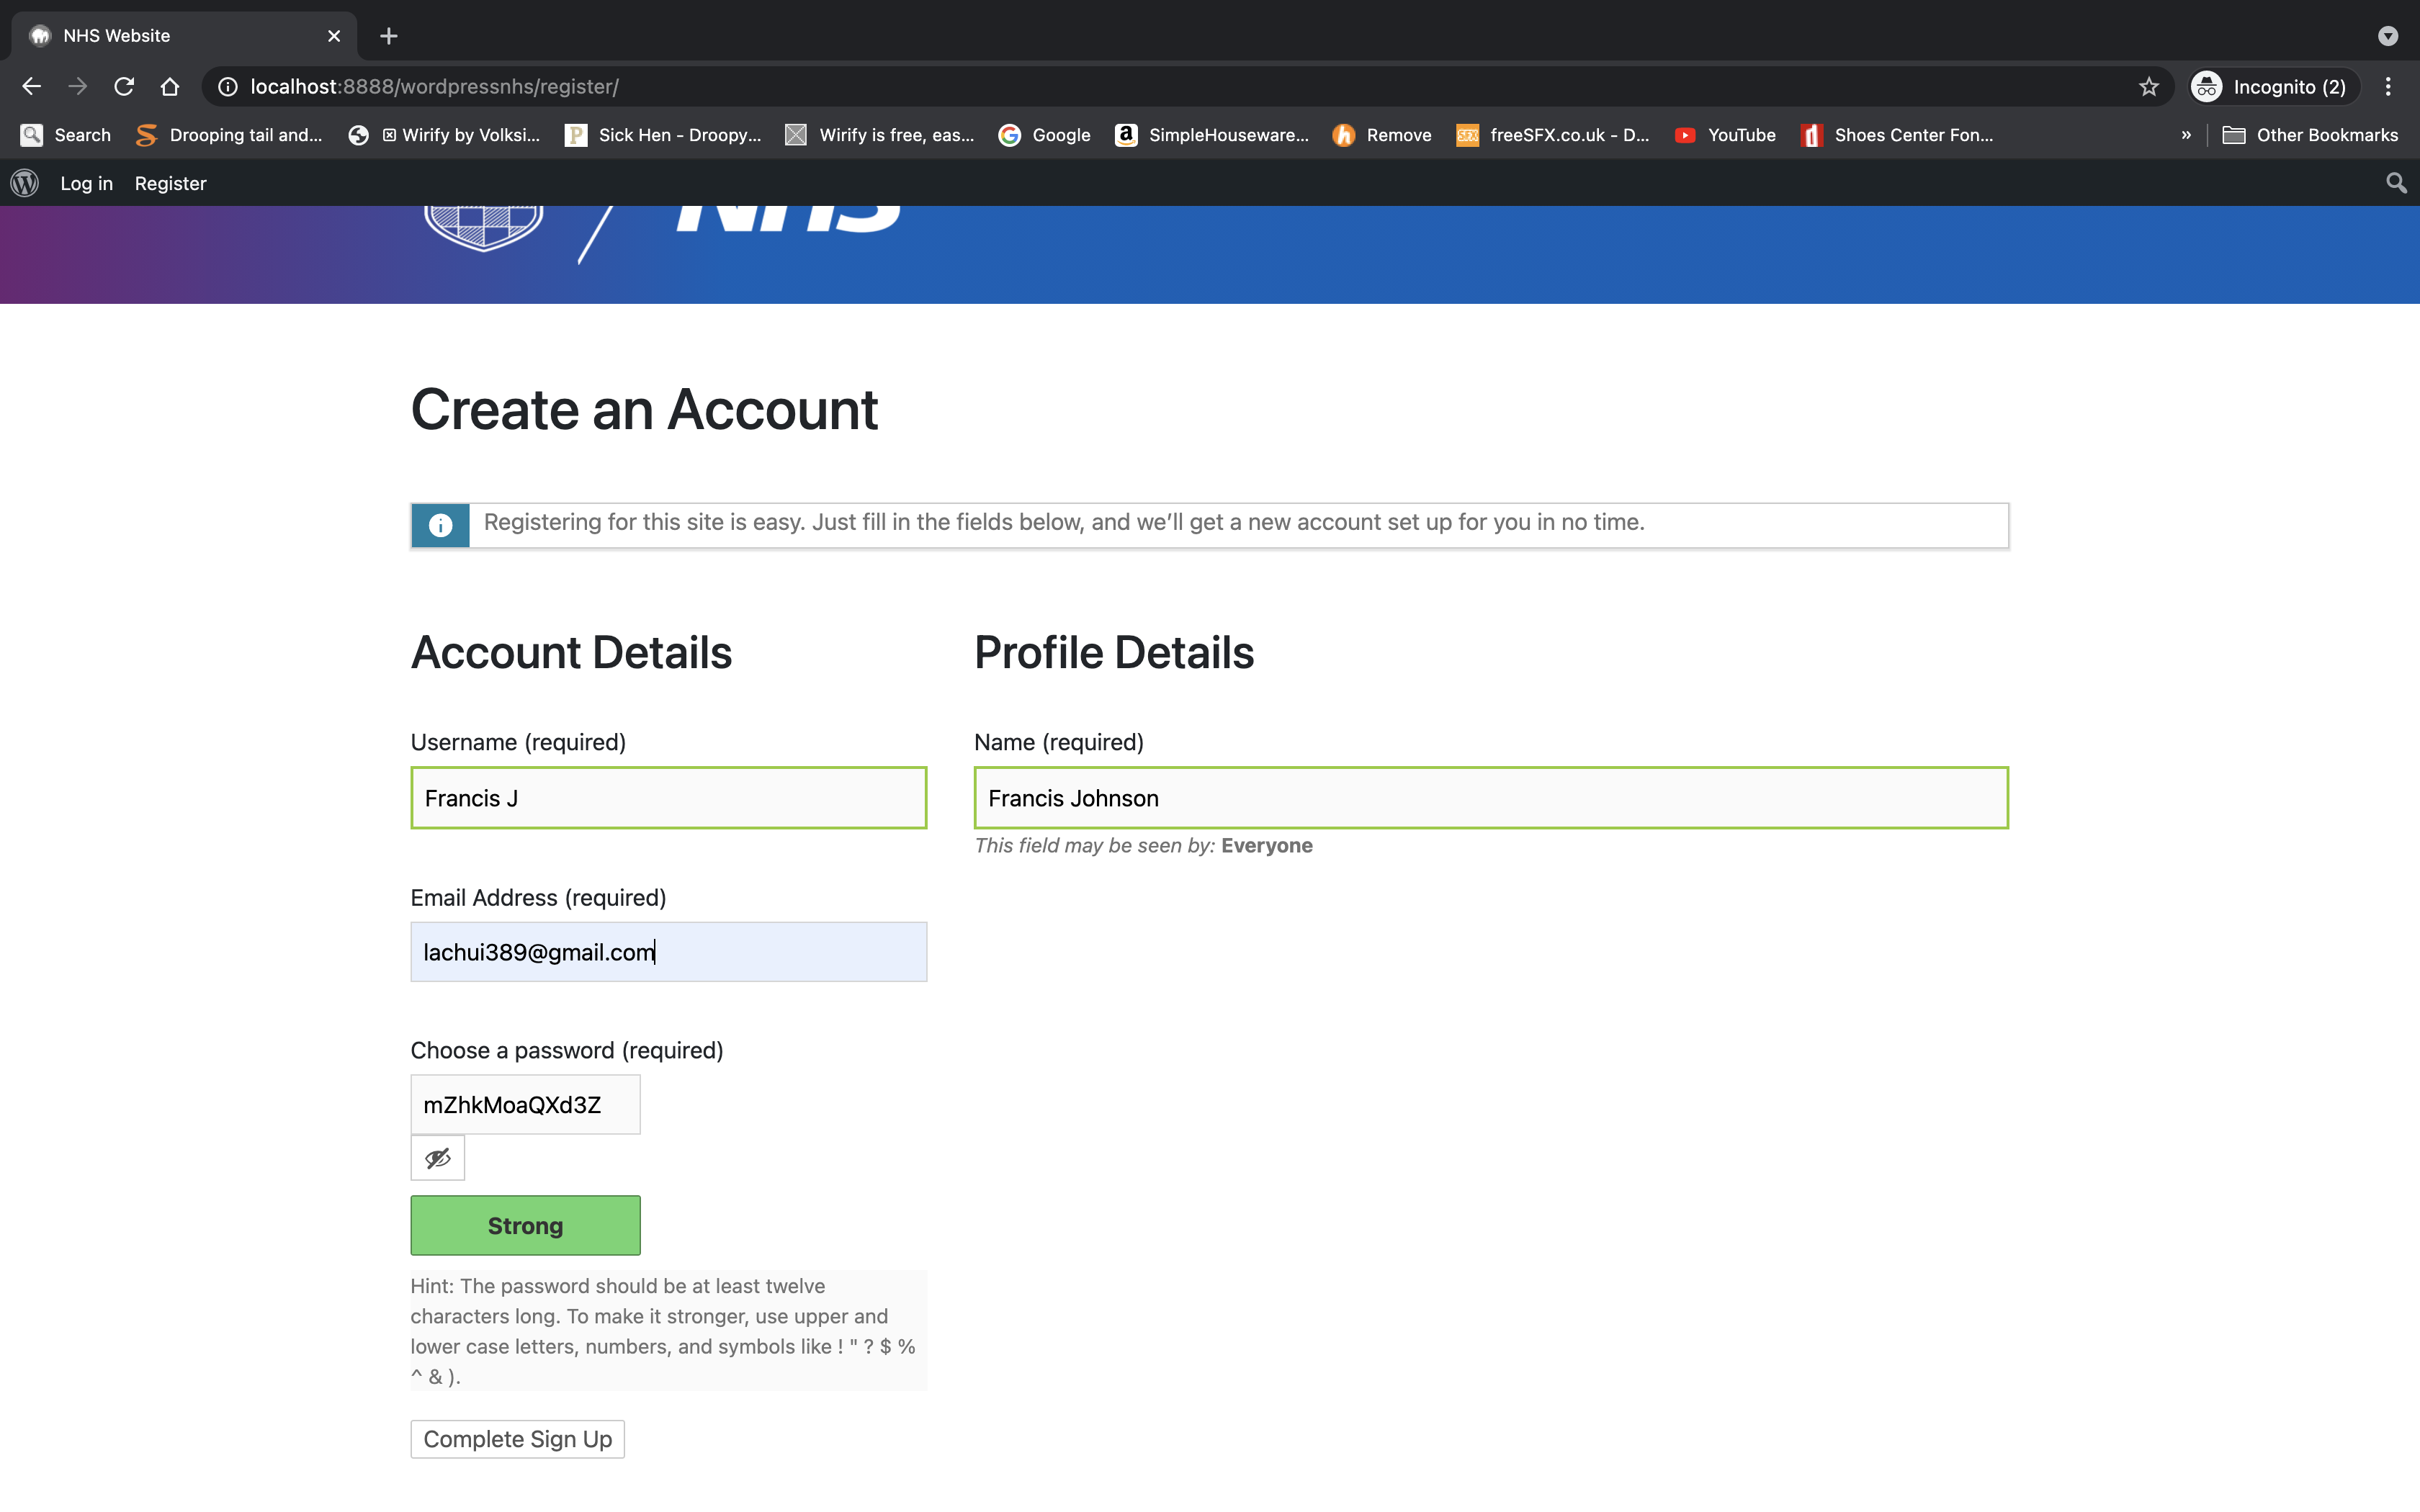
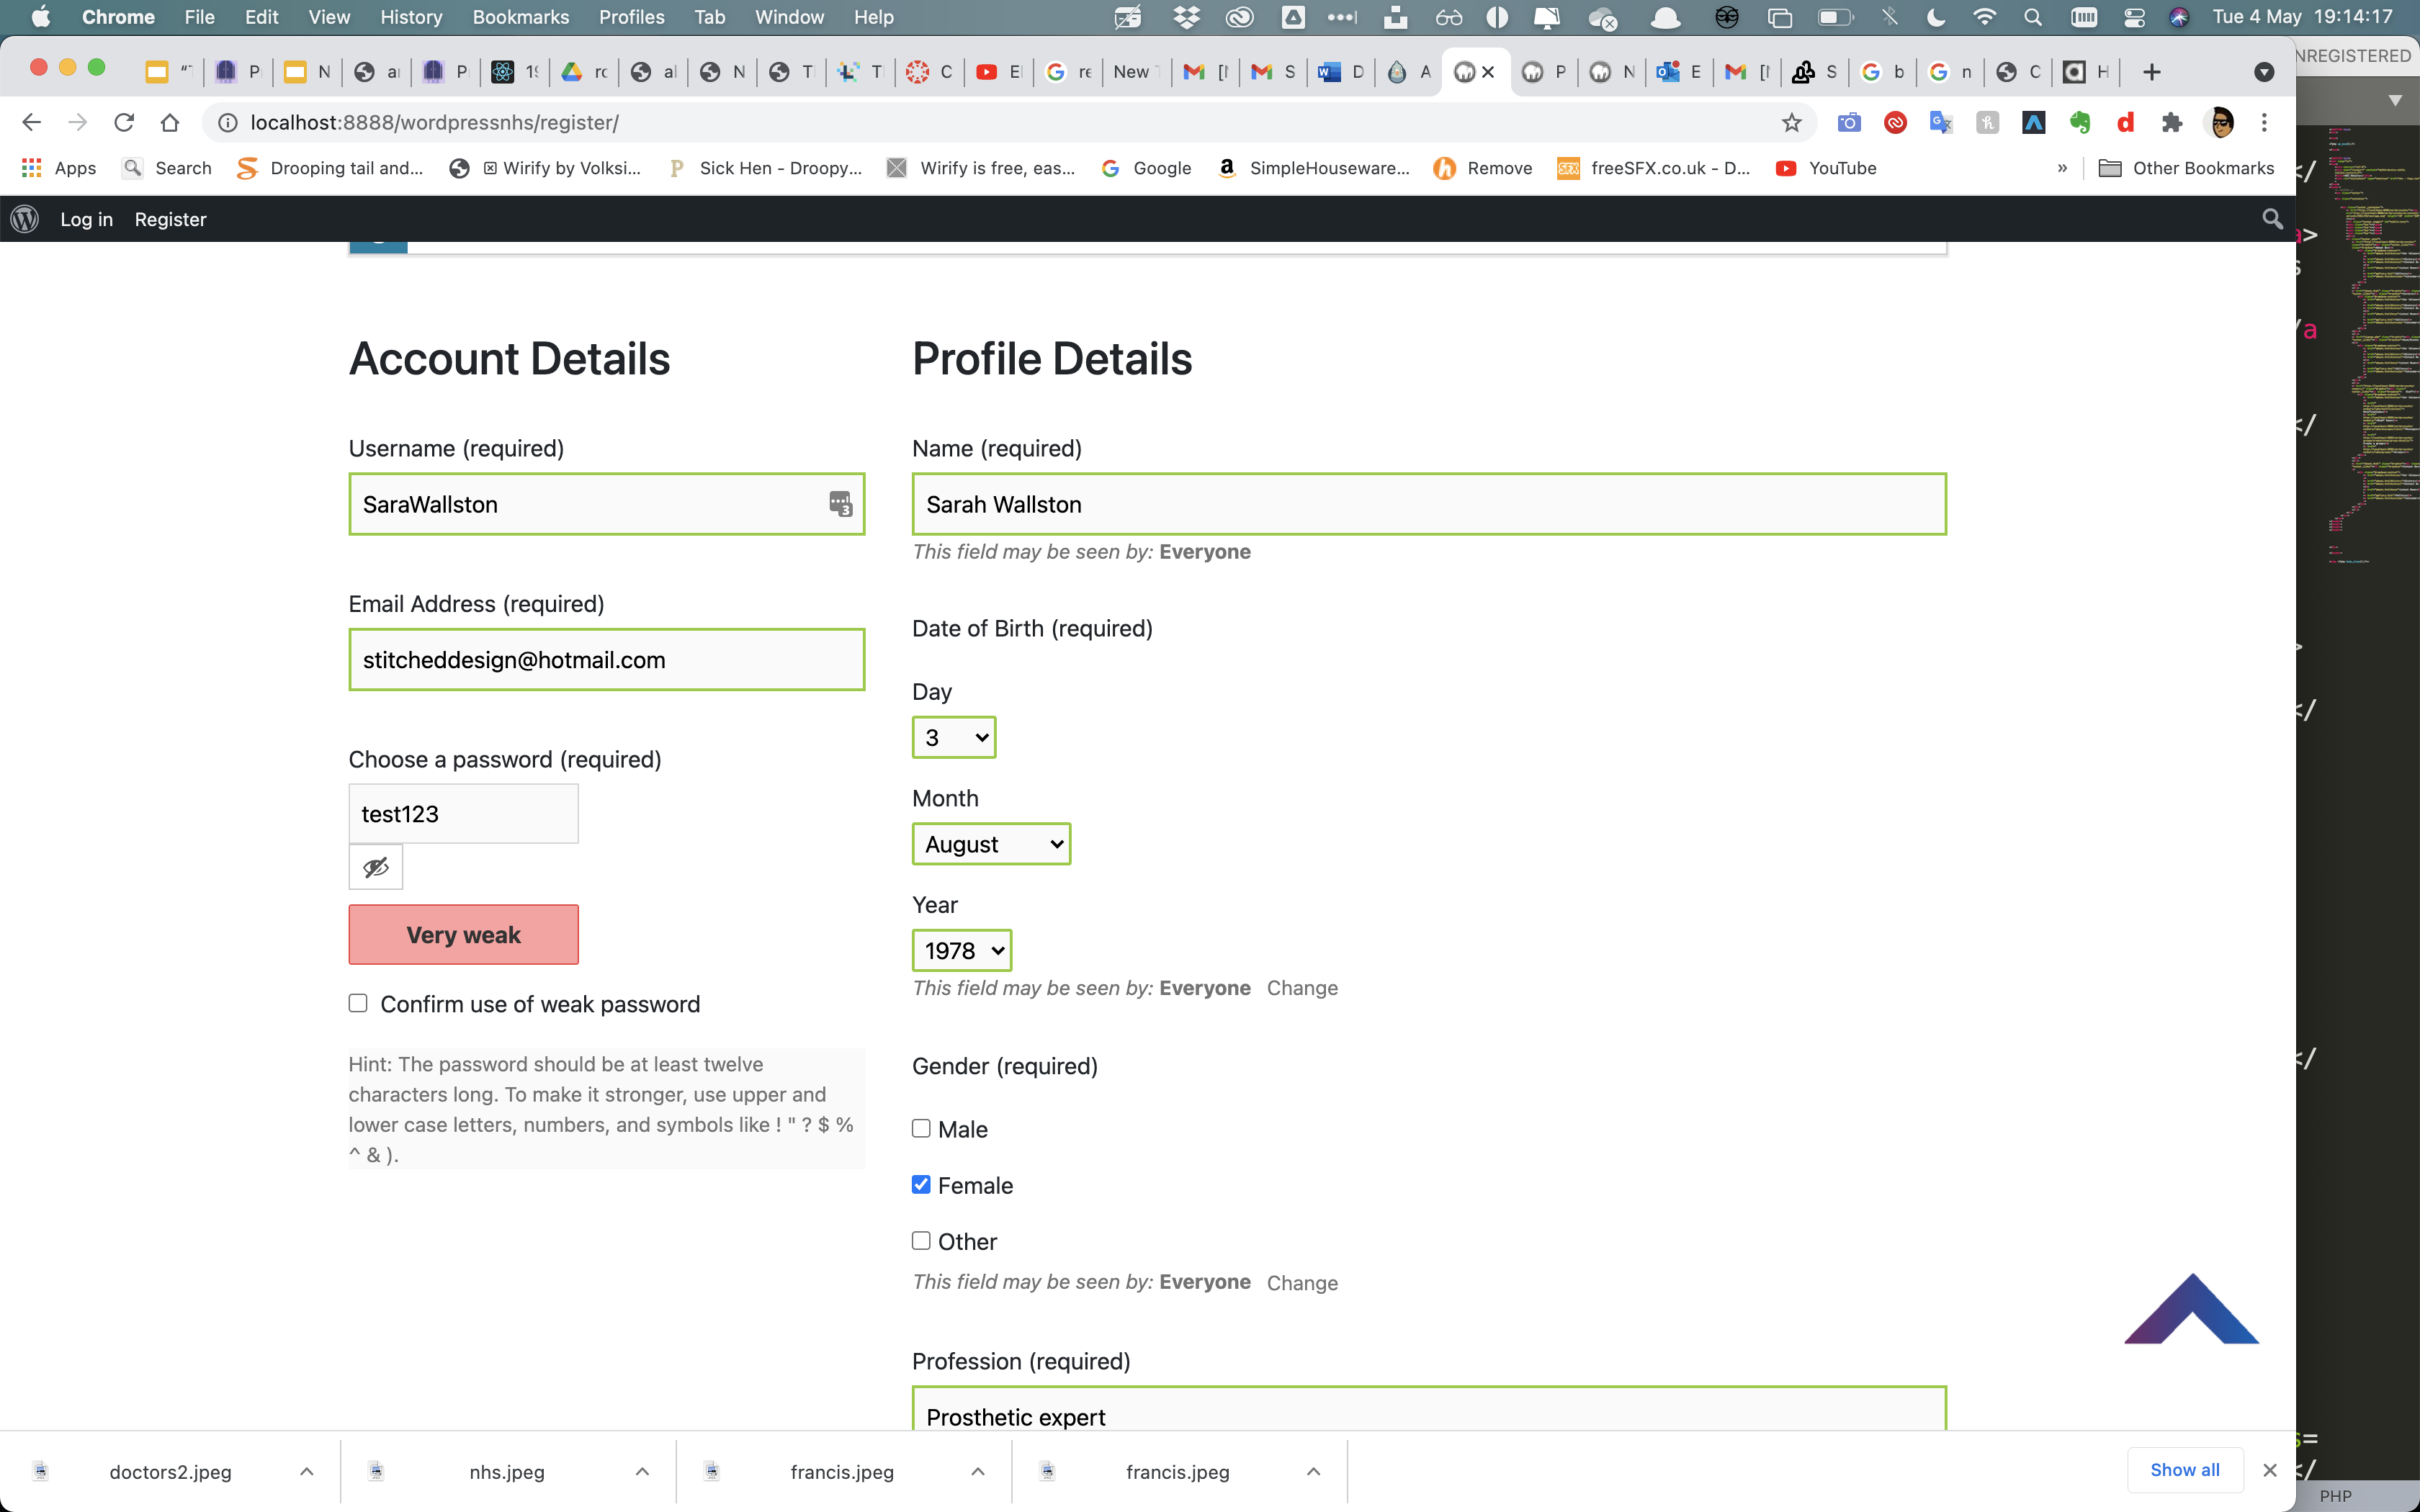
The next step was to create an account using this email verification system. I entered in my username name and email address in order to create an account. I also had to choose a password that was secure enough to use, the site recommends a numerical and letter base password that is very hard to crack/ decode into due to the numbers and letters involved, but people can simply use their own passwords if needs be. The green bars around the input fields are indicating that the username has not been used before in the database which is a good indication for the user signing up.
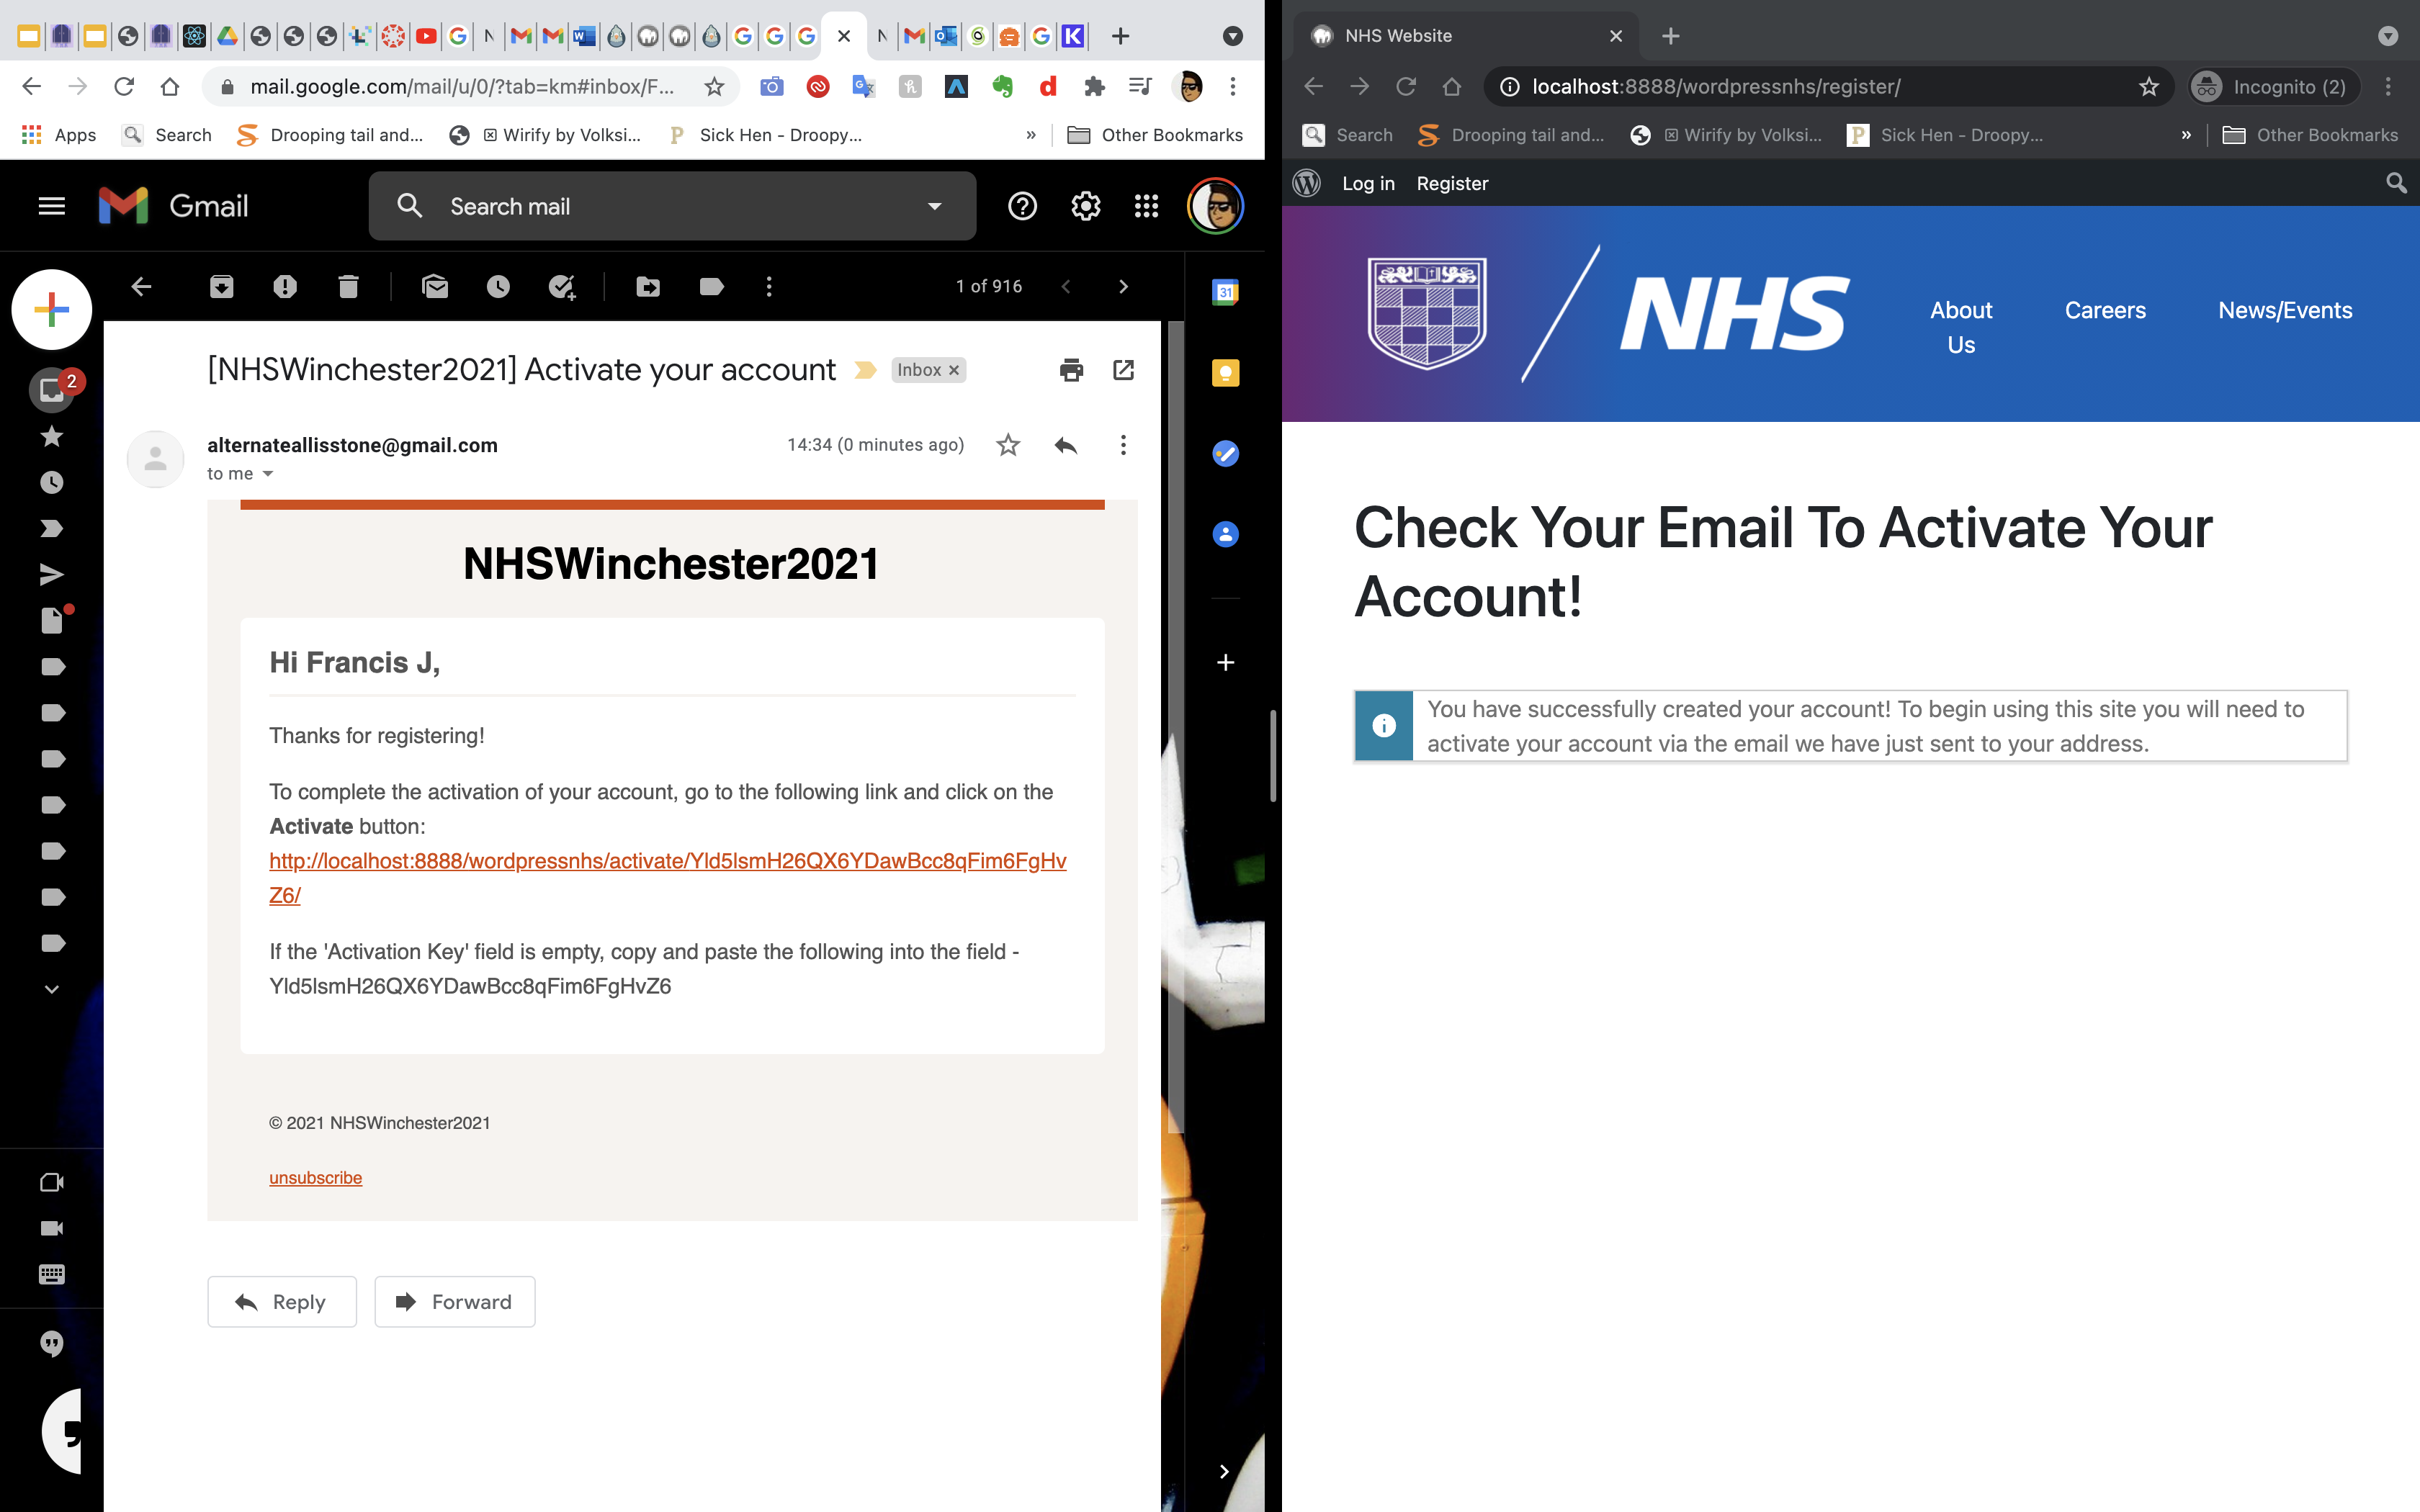
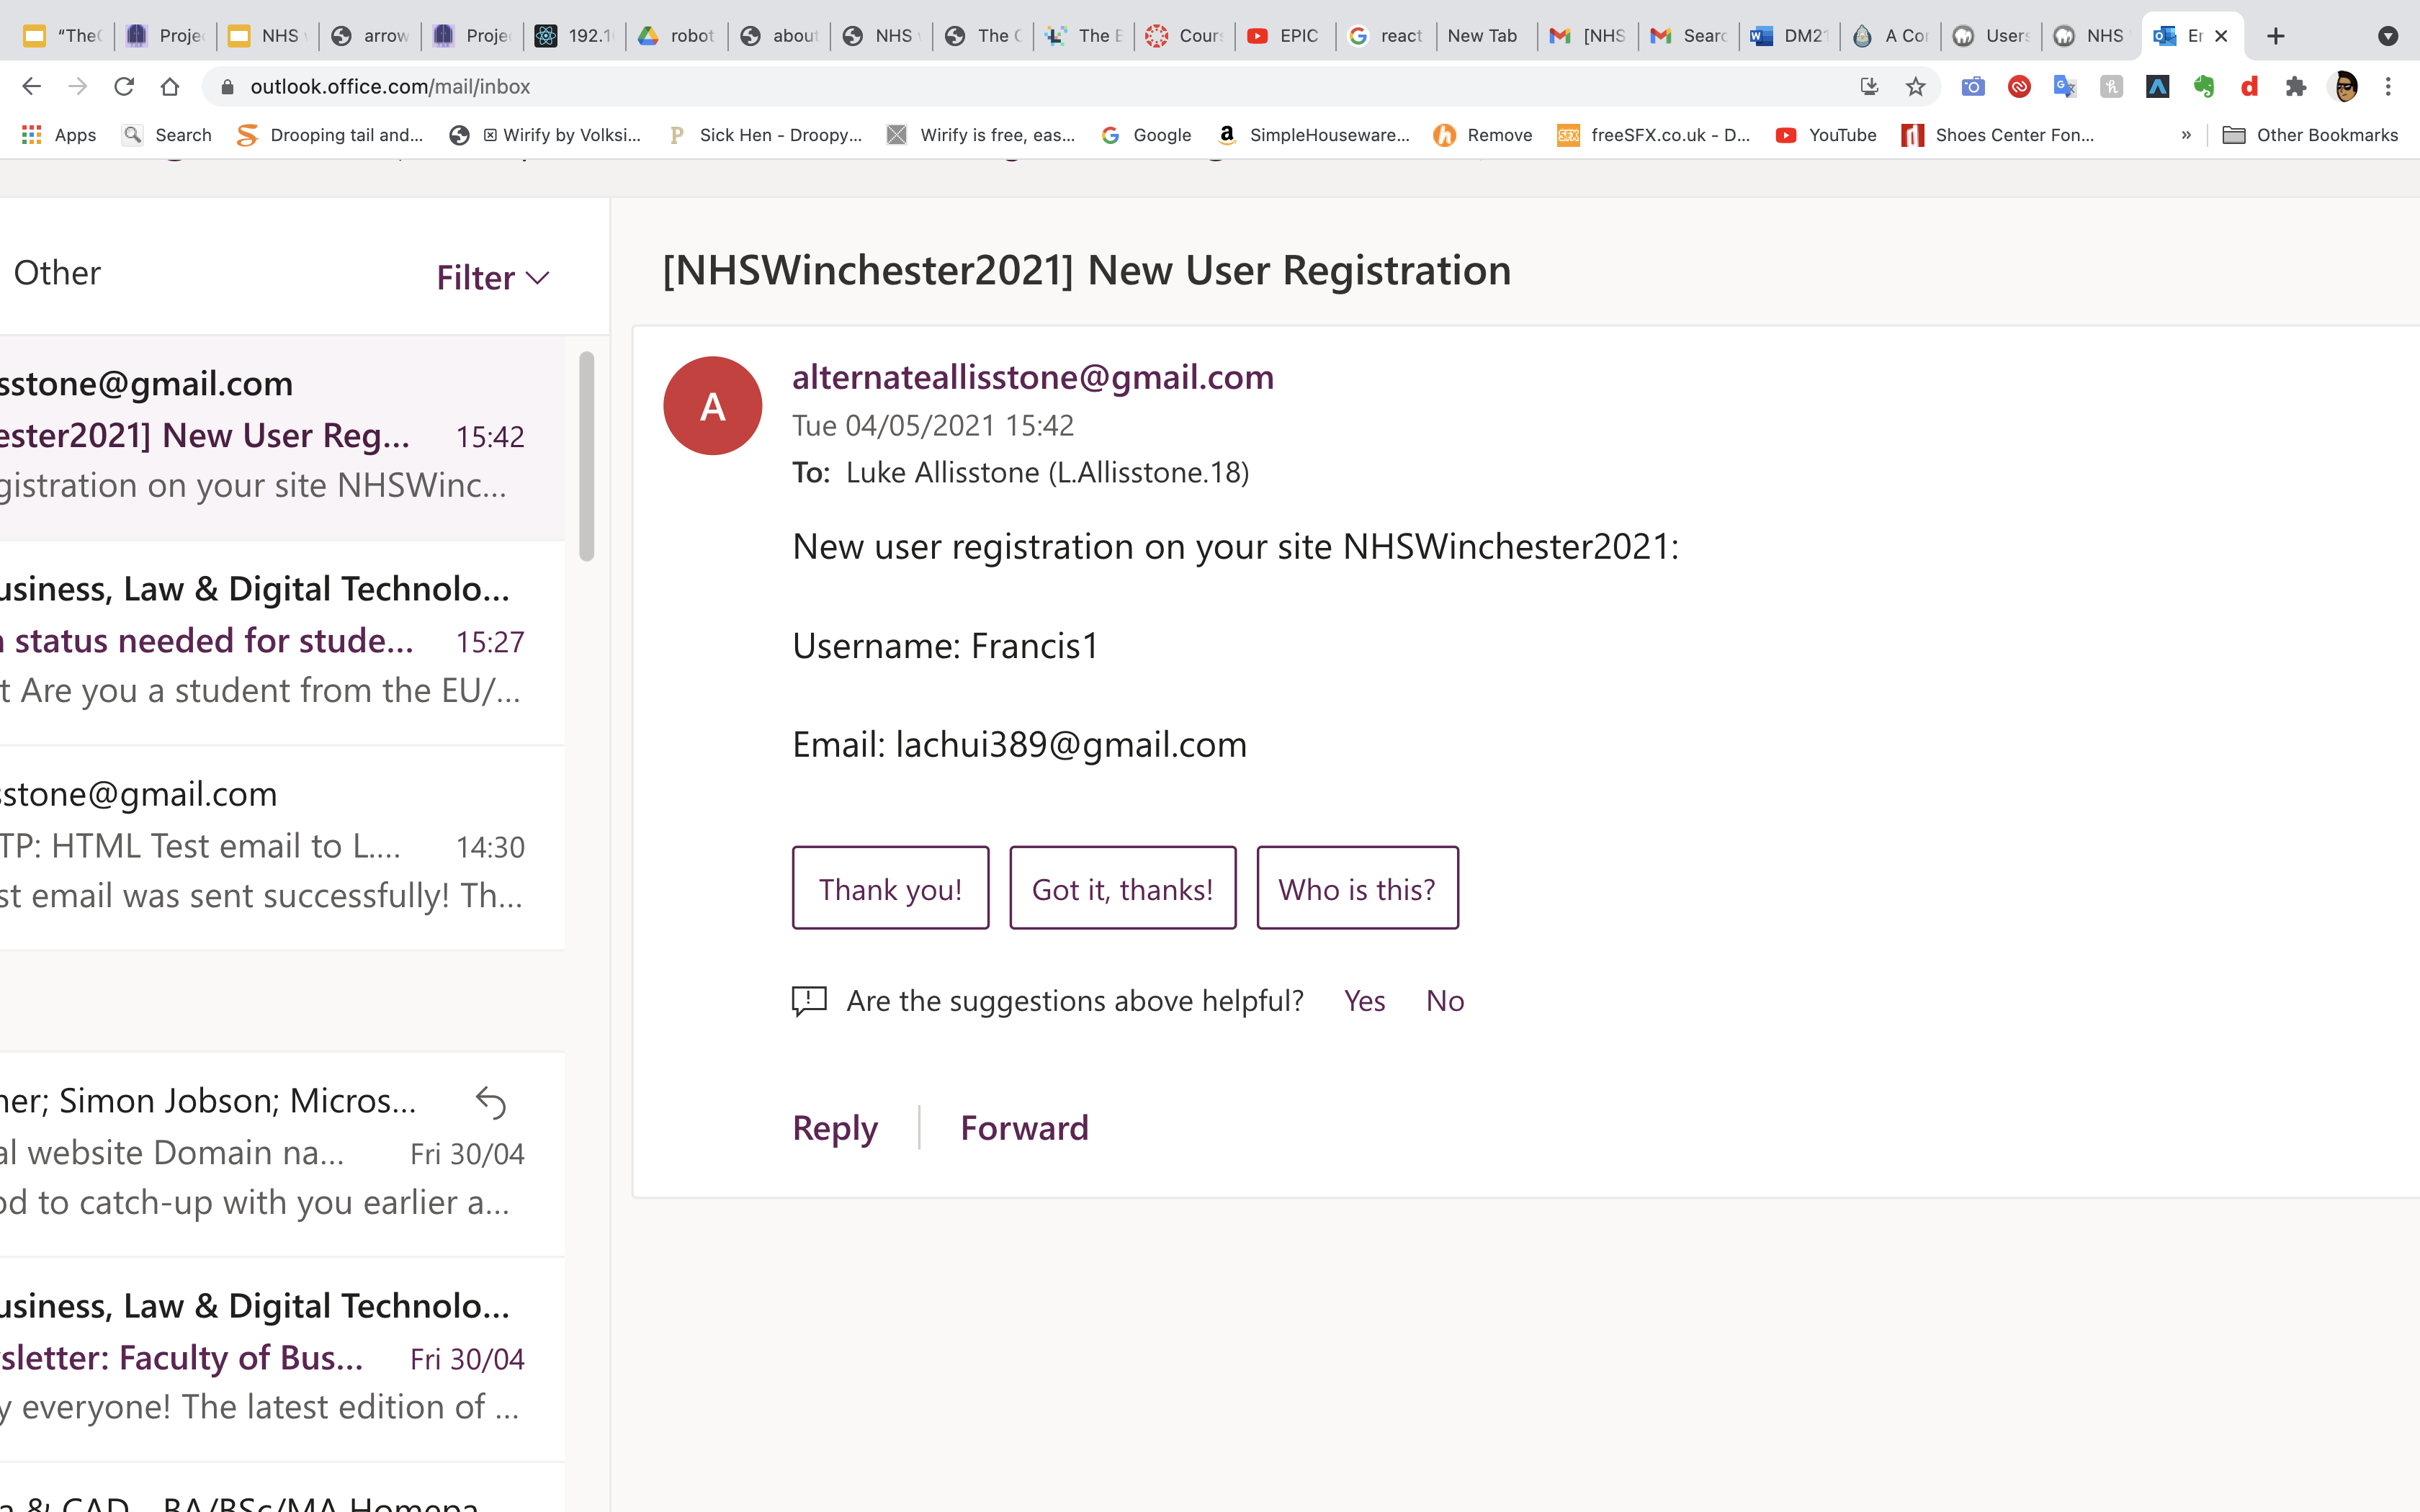
After completing the signup I then received an email within 10 seconds notify me that activation email had been sent to the address I asked it to be sent to. As you can see the email arrived with the name of the person and a thank you message attached, with a link to go into the website to enable the activation process to occur. Also at the bottom of the email there is the code supplied in case the link does not work.

After clicking on the link, it then took me to the activate your account page on the website, where I pressed activate and it gave me a notification that my email had been activated and I was ready to log in to my account.

Being the admin of the site, I received an email notifying me that someone had signed up to the website, giving the username and email. This is good to know as it lets me understand who is signing up to the website and gives me control if I do not recognise any emails or usernames for example.
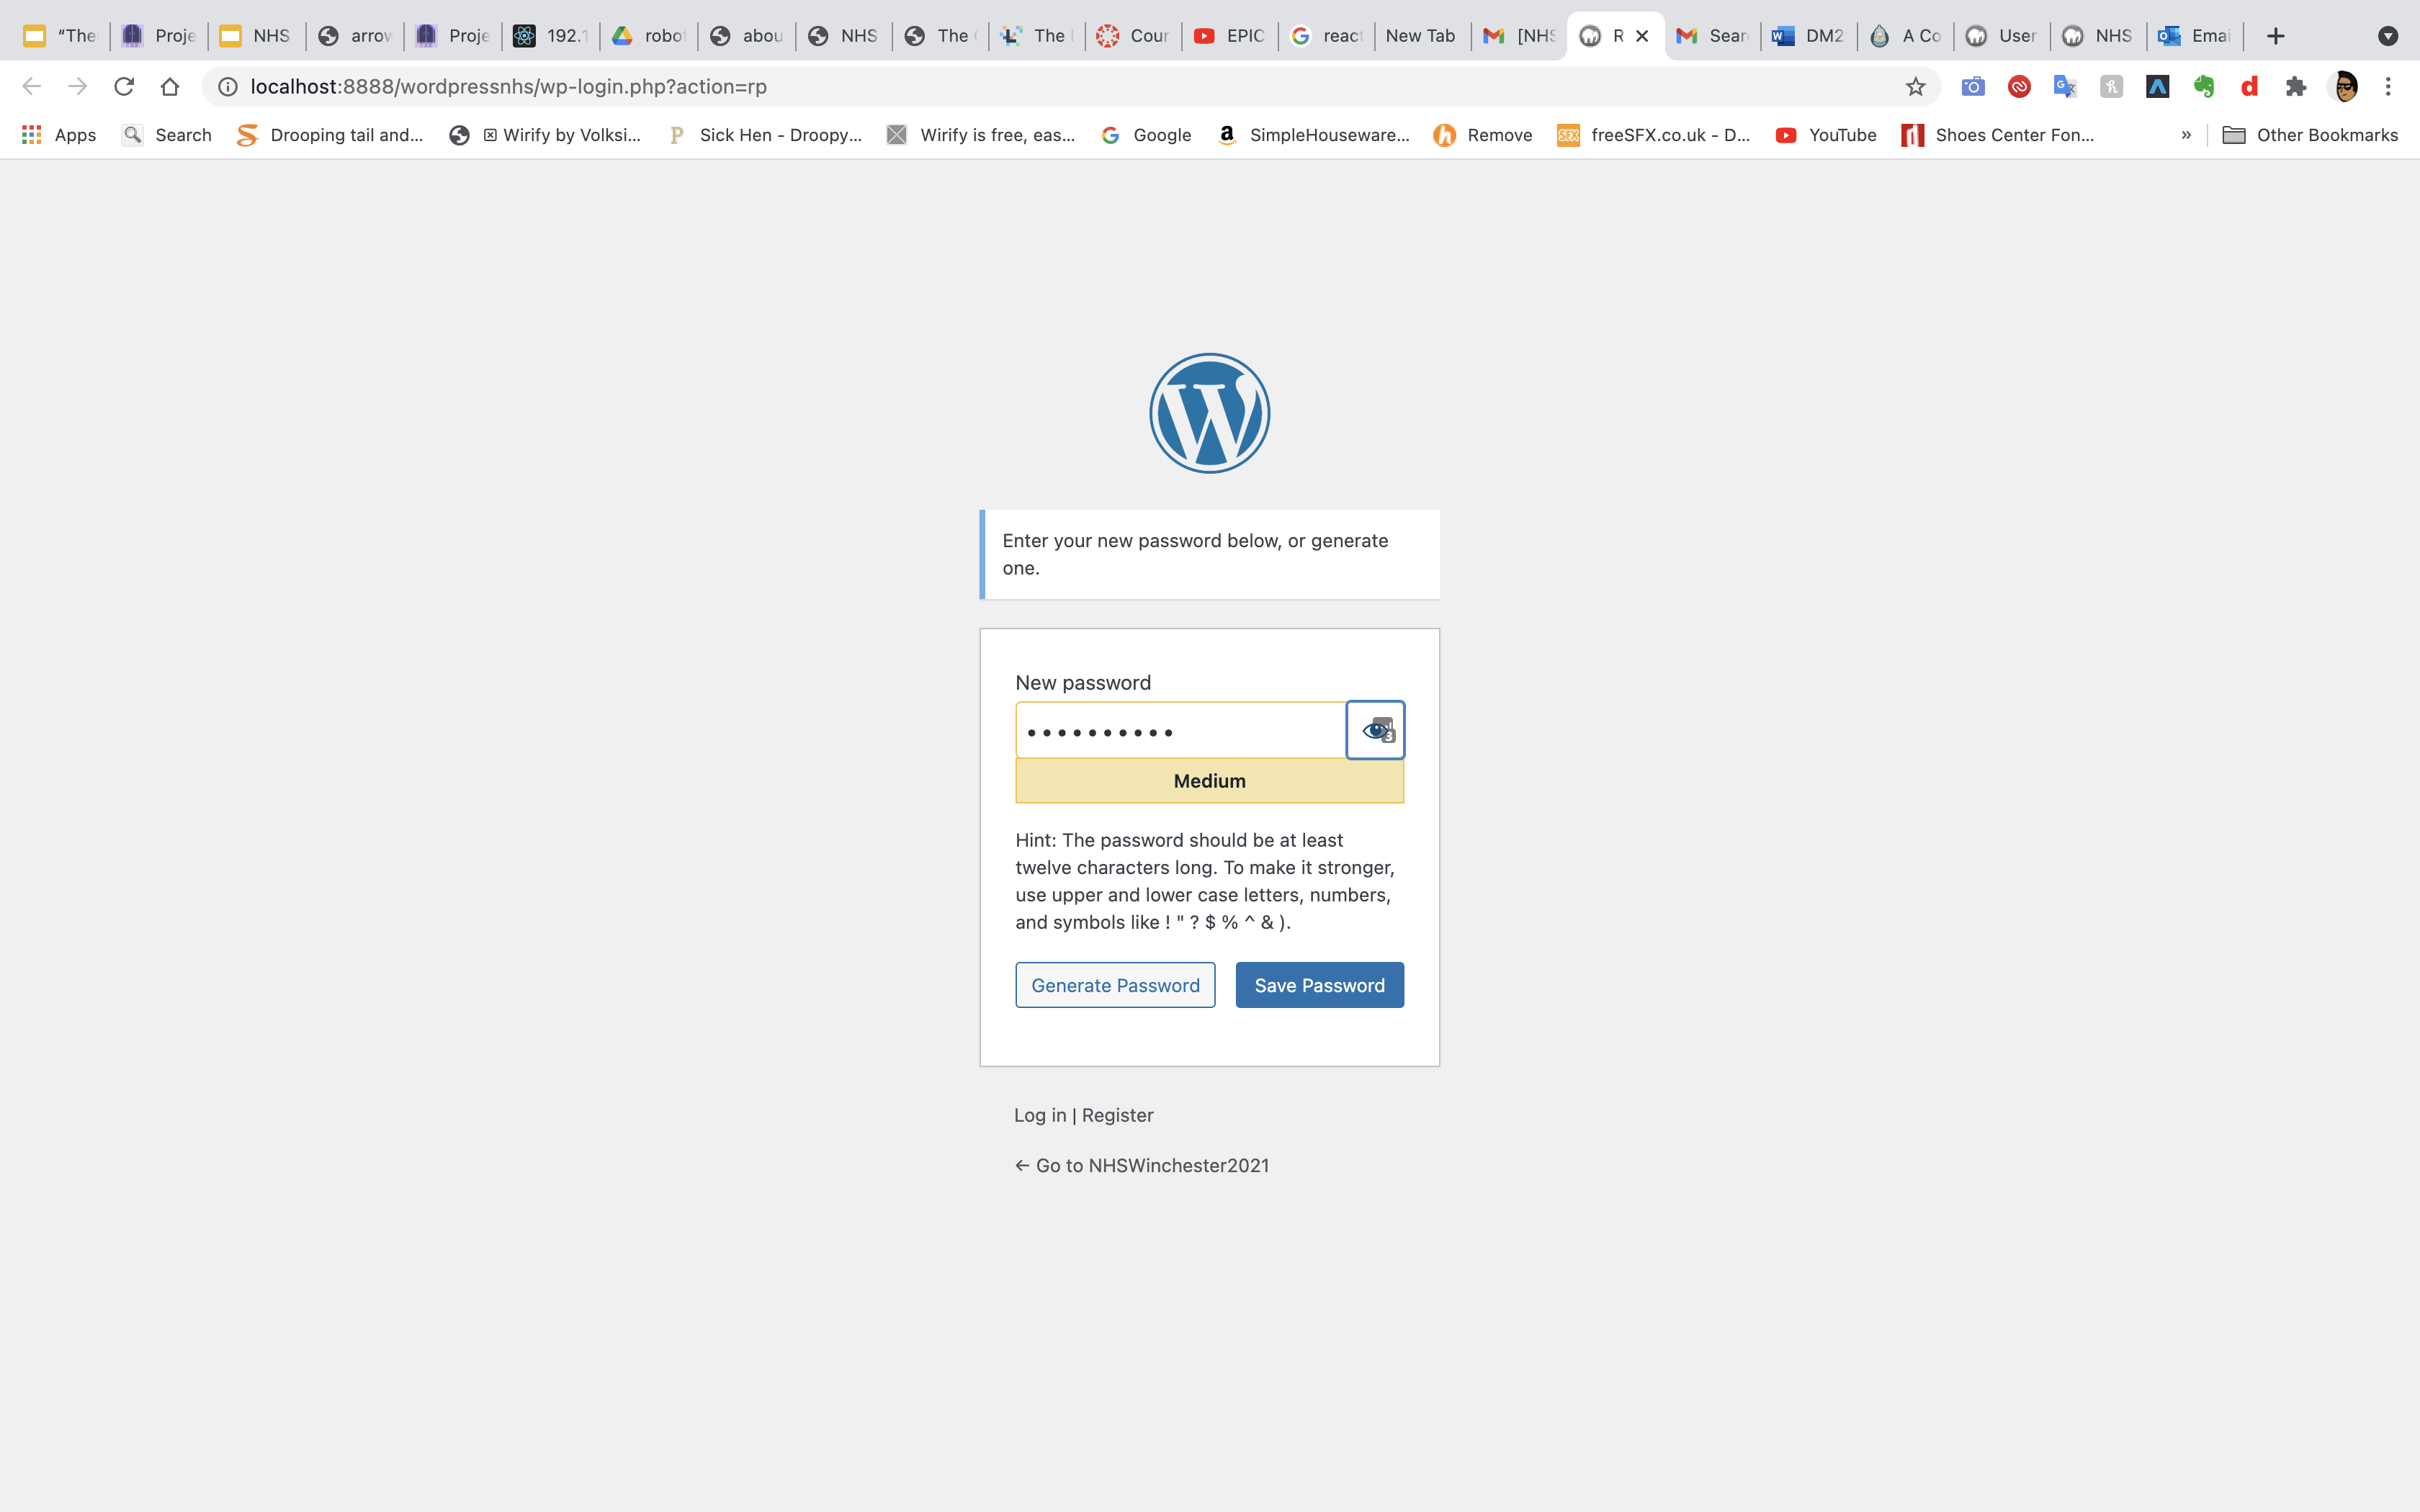
Another great feature of the site, is its ability to do email password resets which is a great security bonus for the user. Whenever someone wants to reset the password, they have to do so via the email link sent to them.
Once the link had been clicked the WordPress site asks for a new password to be entered.
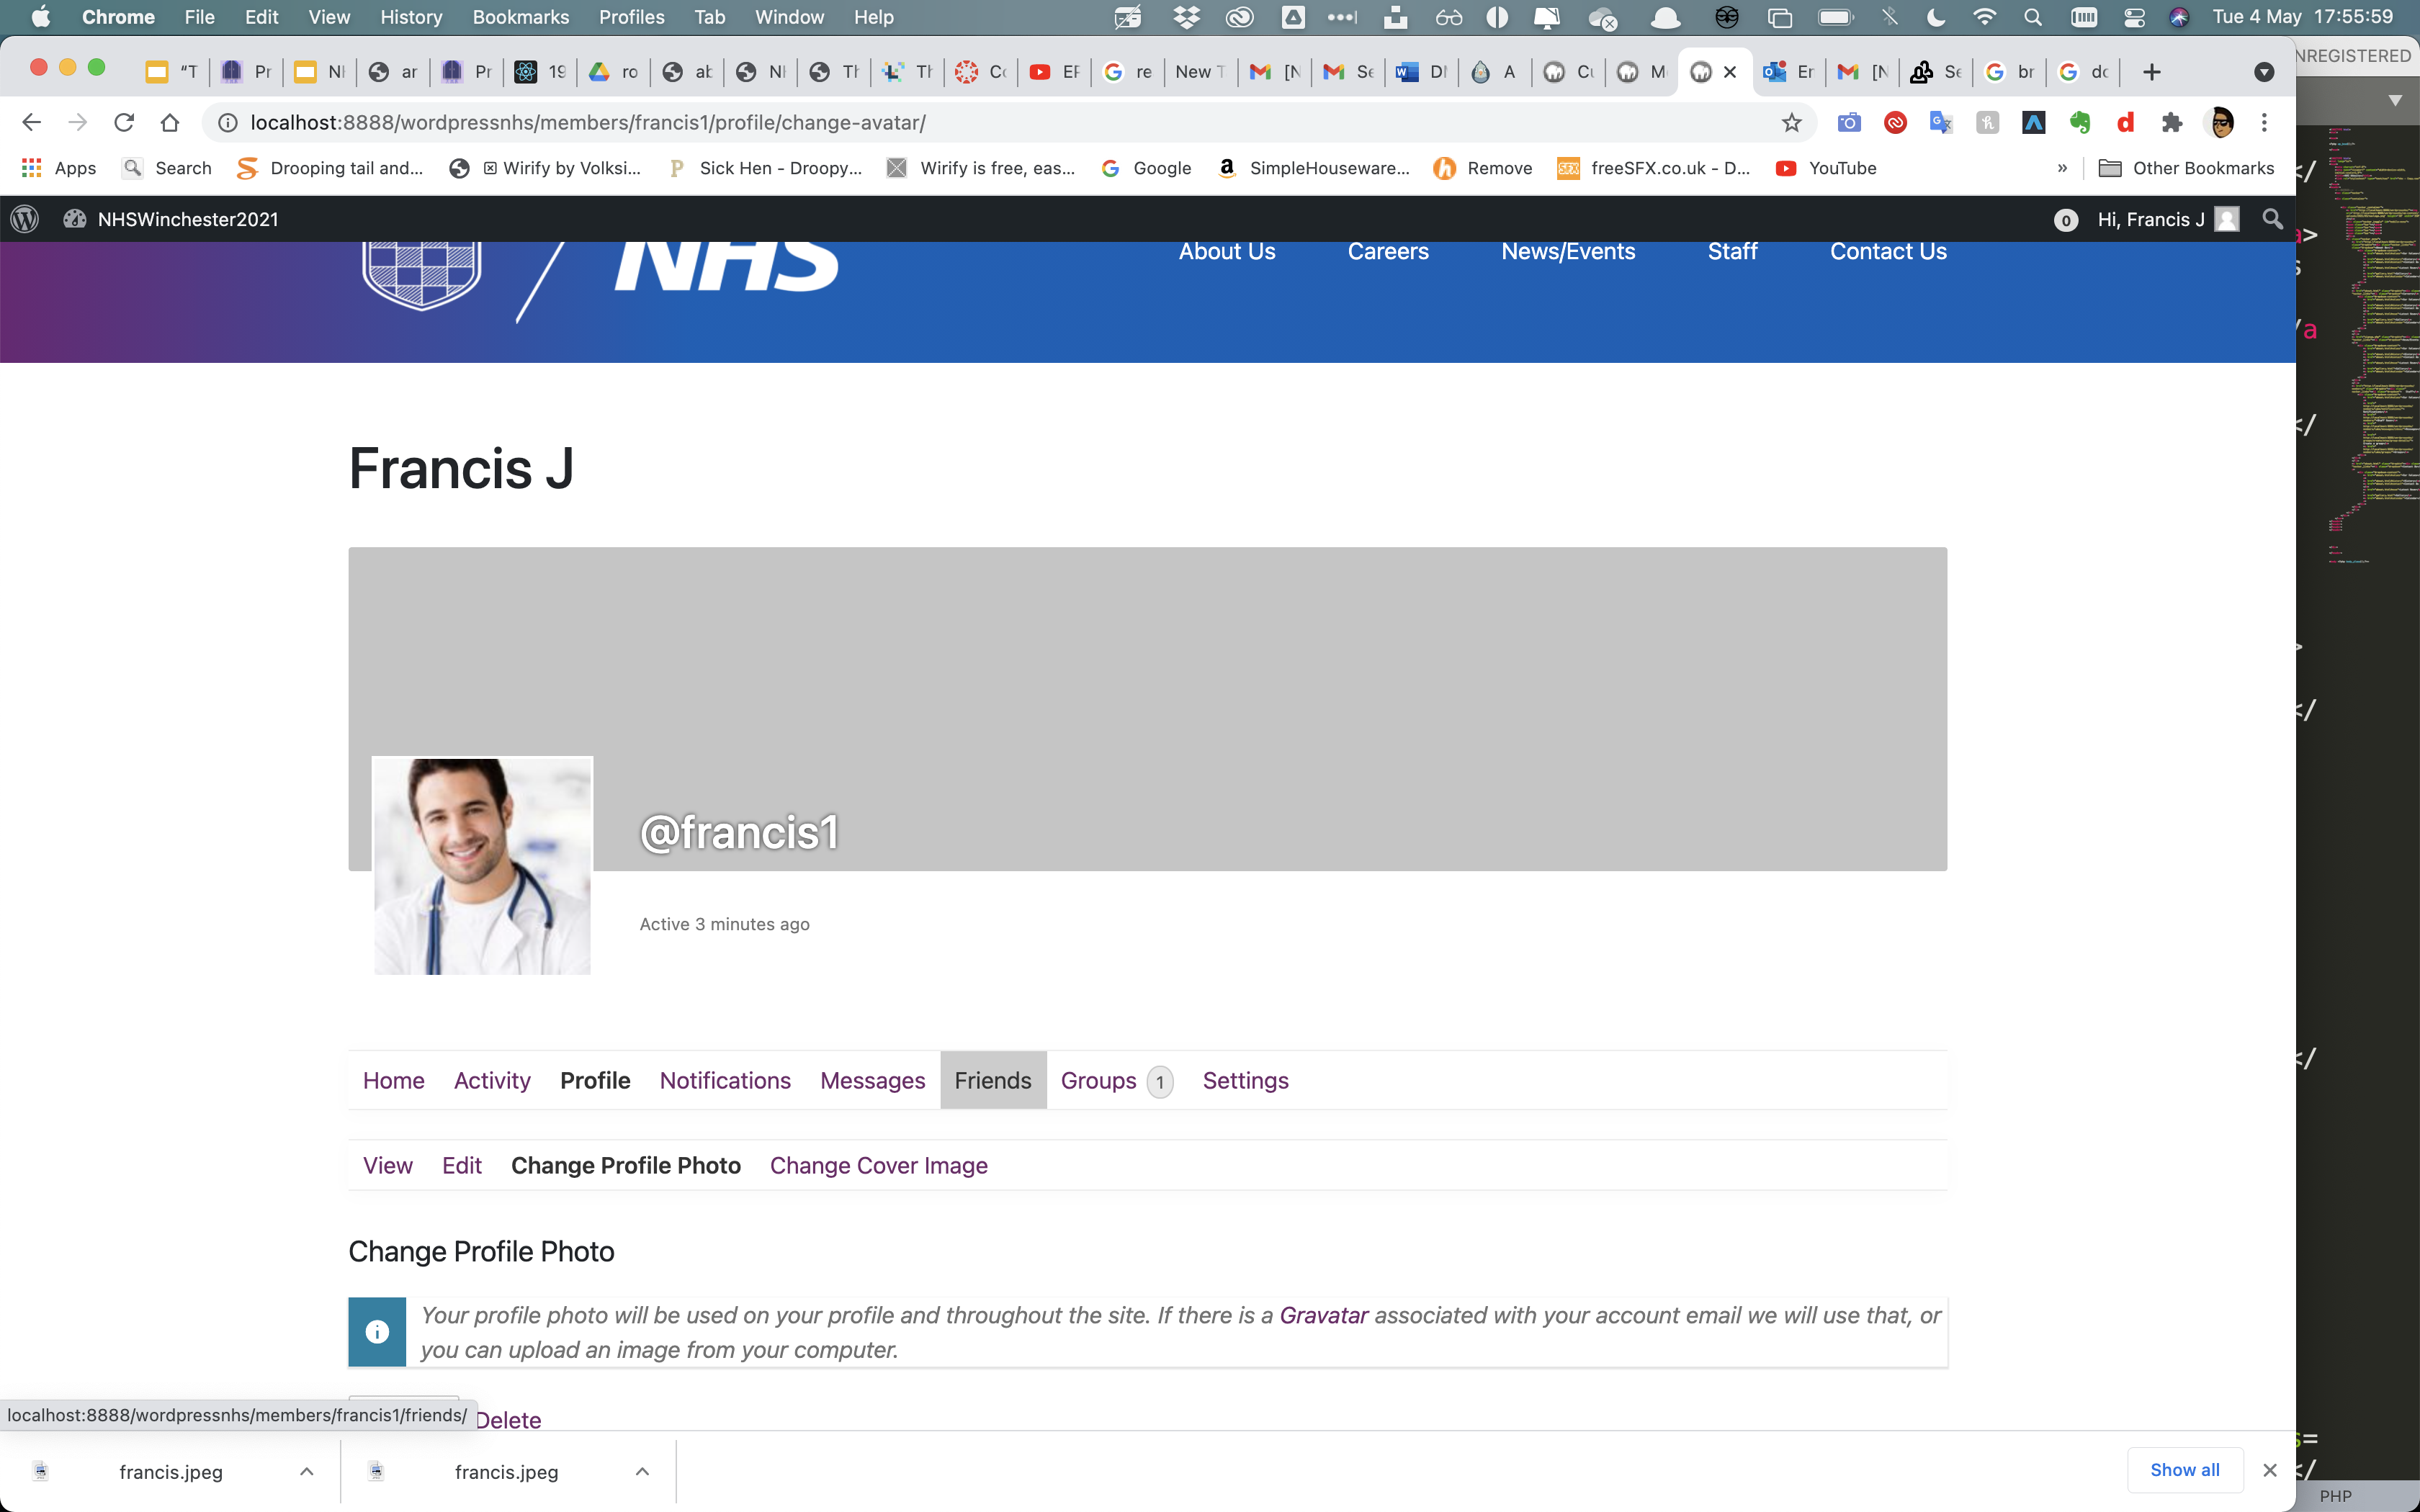
I then added a profile picture for the account I made named Francis in order to highlight the ability to customise each profile.
Section 10- Client Feedback
After the inital site changes, we asked for a client meeting, where we presented the first functional version of the website
Our client was really impressed with what we had come up with so far as a first iteration of the webstie's functions.
After reviewing the site, he gave us some changes to implement before our next meeting, being:
Add more infomation on the homepage for the history of the universty
Users can create groups for their individual. departments and areas of the NHS.
Groups can be a mixture of private and public.
Staff to have bios and infomation to their profile, added when signing up where people can find out what department they are in.
Section 11- Client Feedback implementations

One of the immediate changes that our client wanted was to have some basic information on the front page of the HHFT/University NHS relationship. They are also in process of building up infomation for the front page.
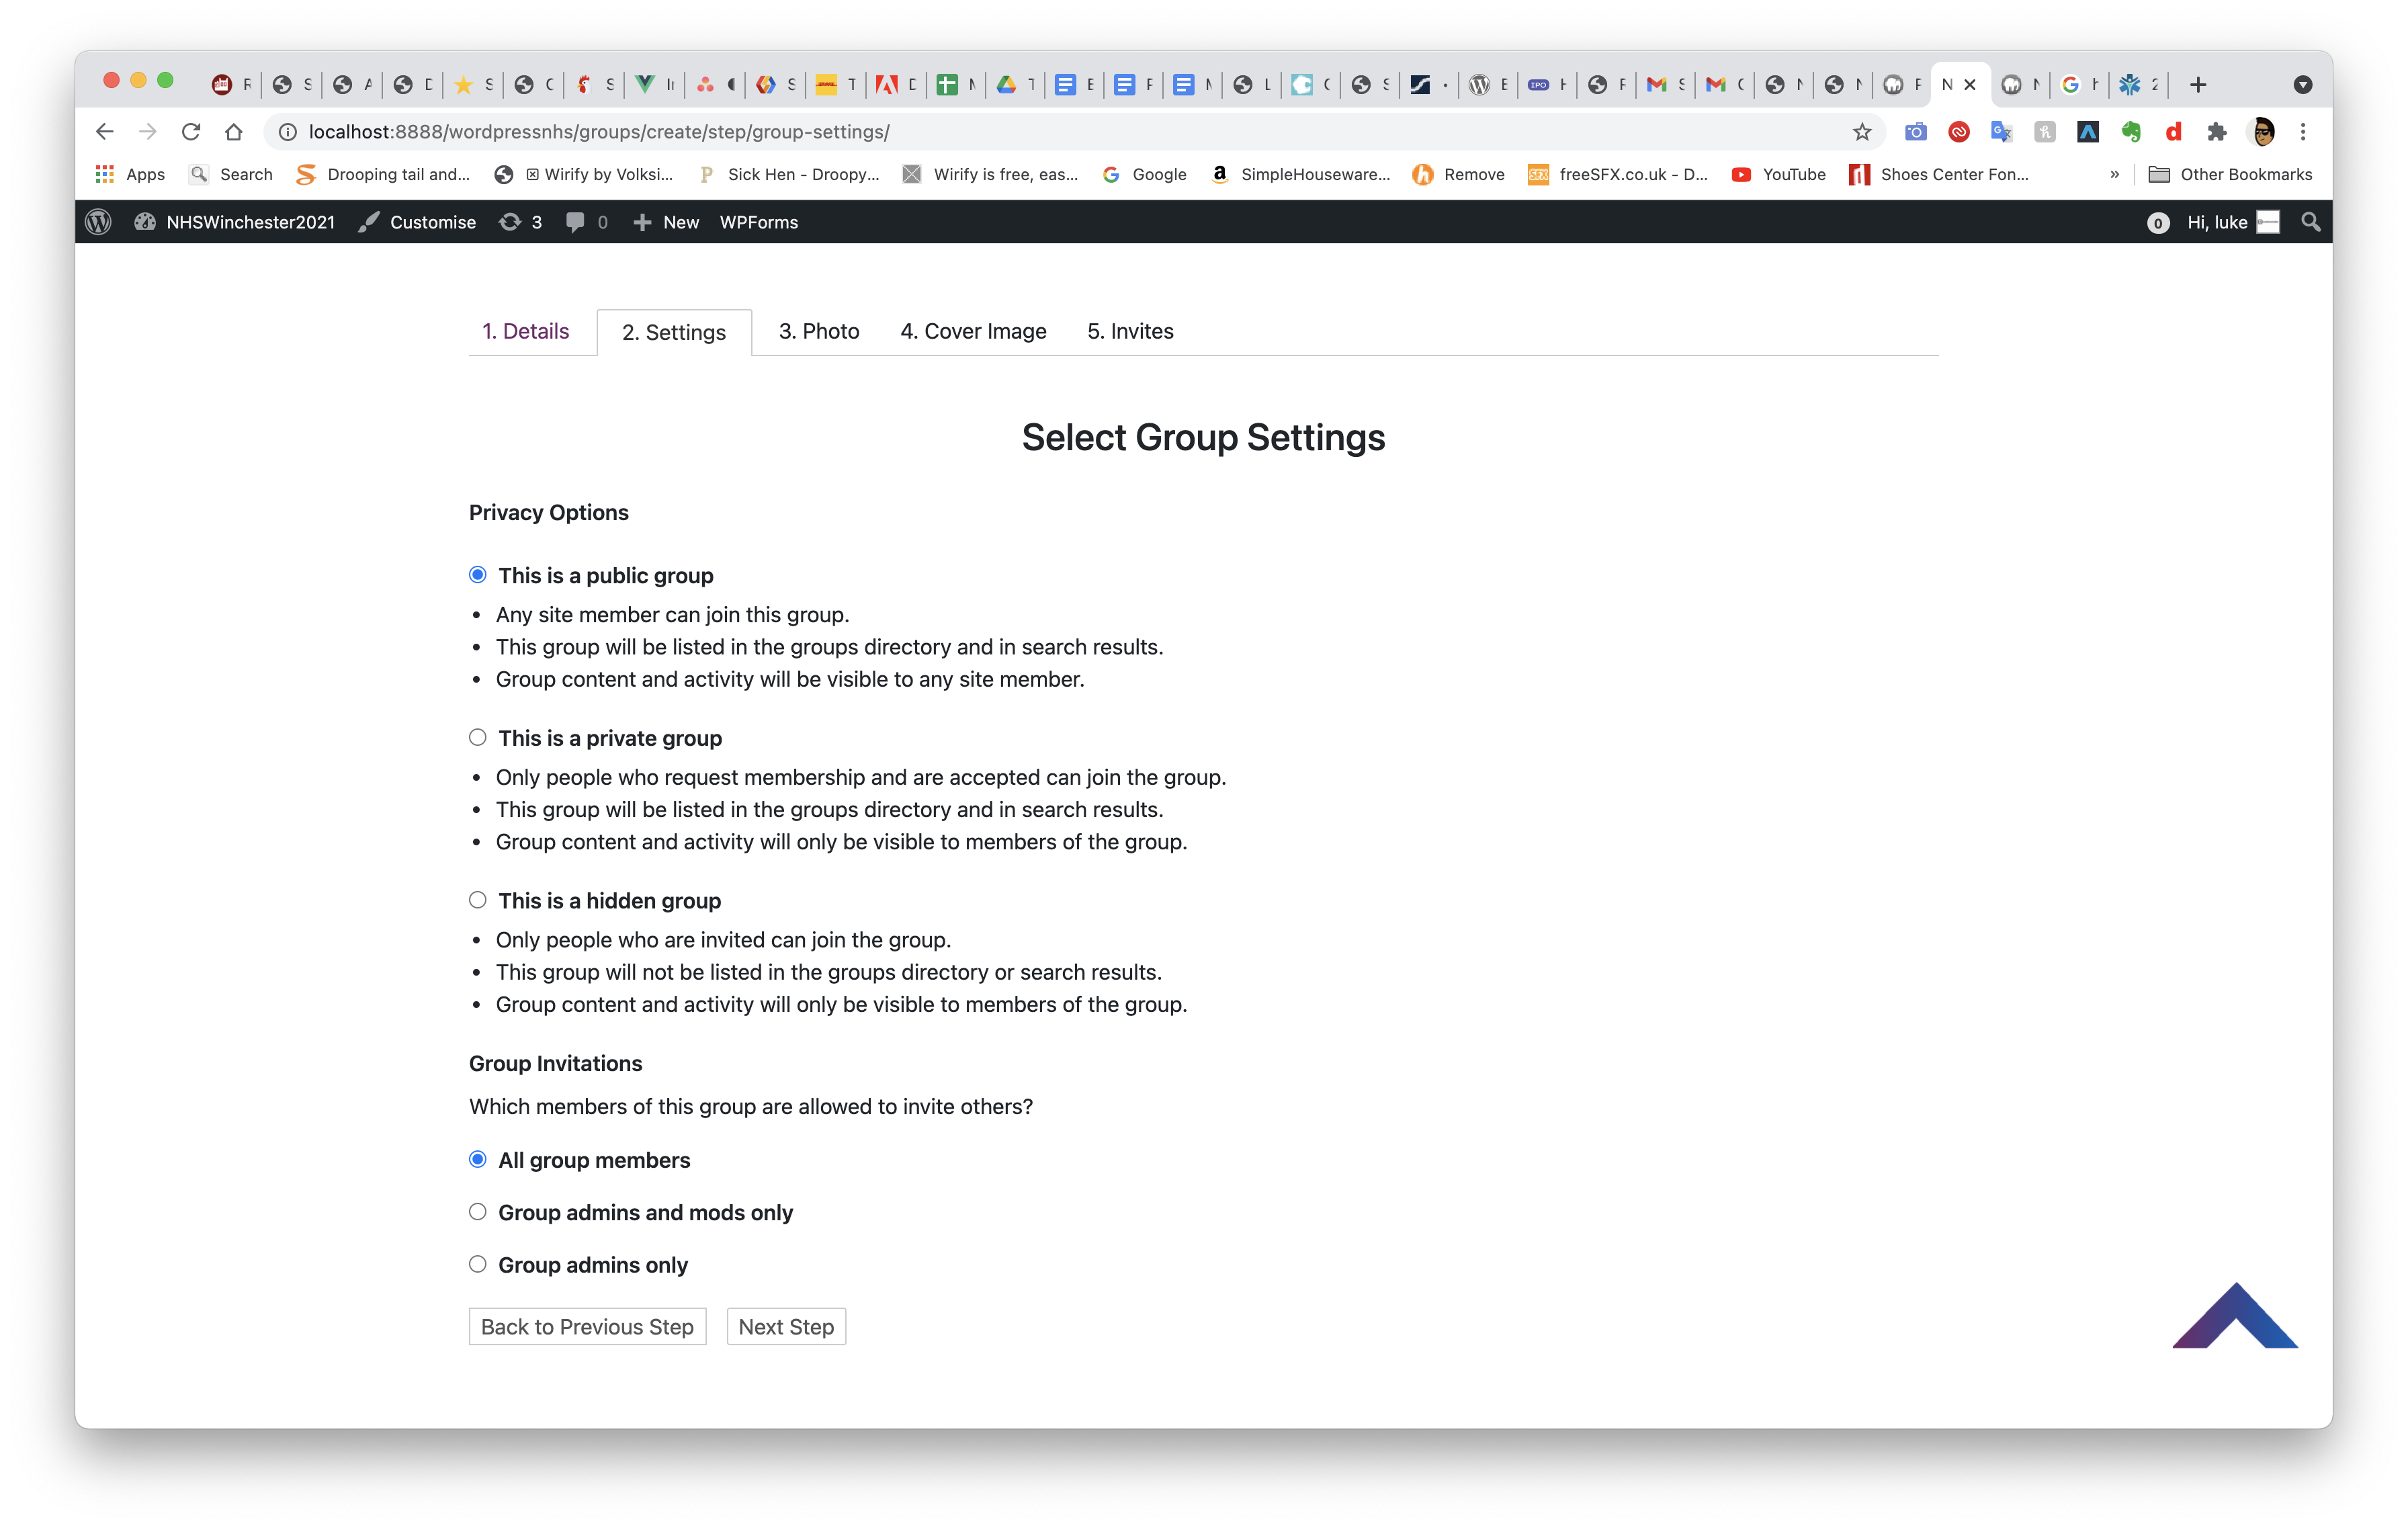
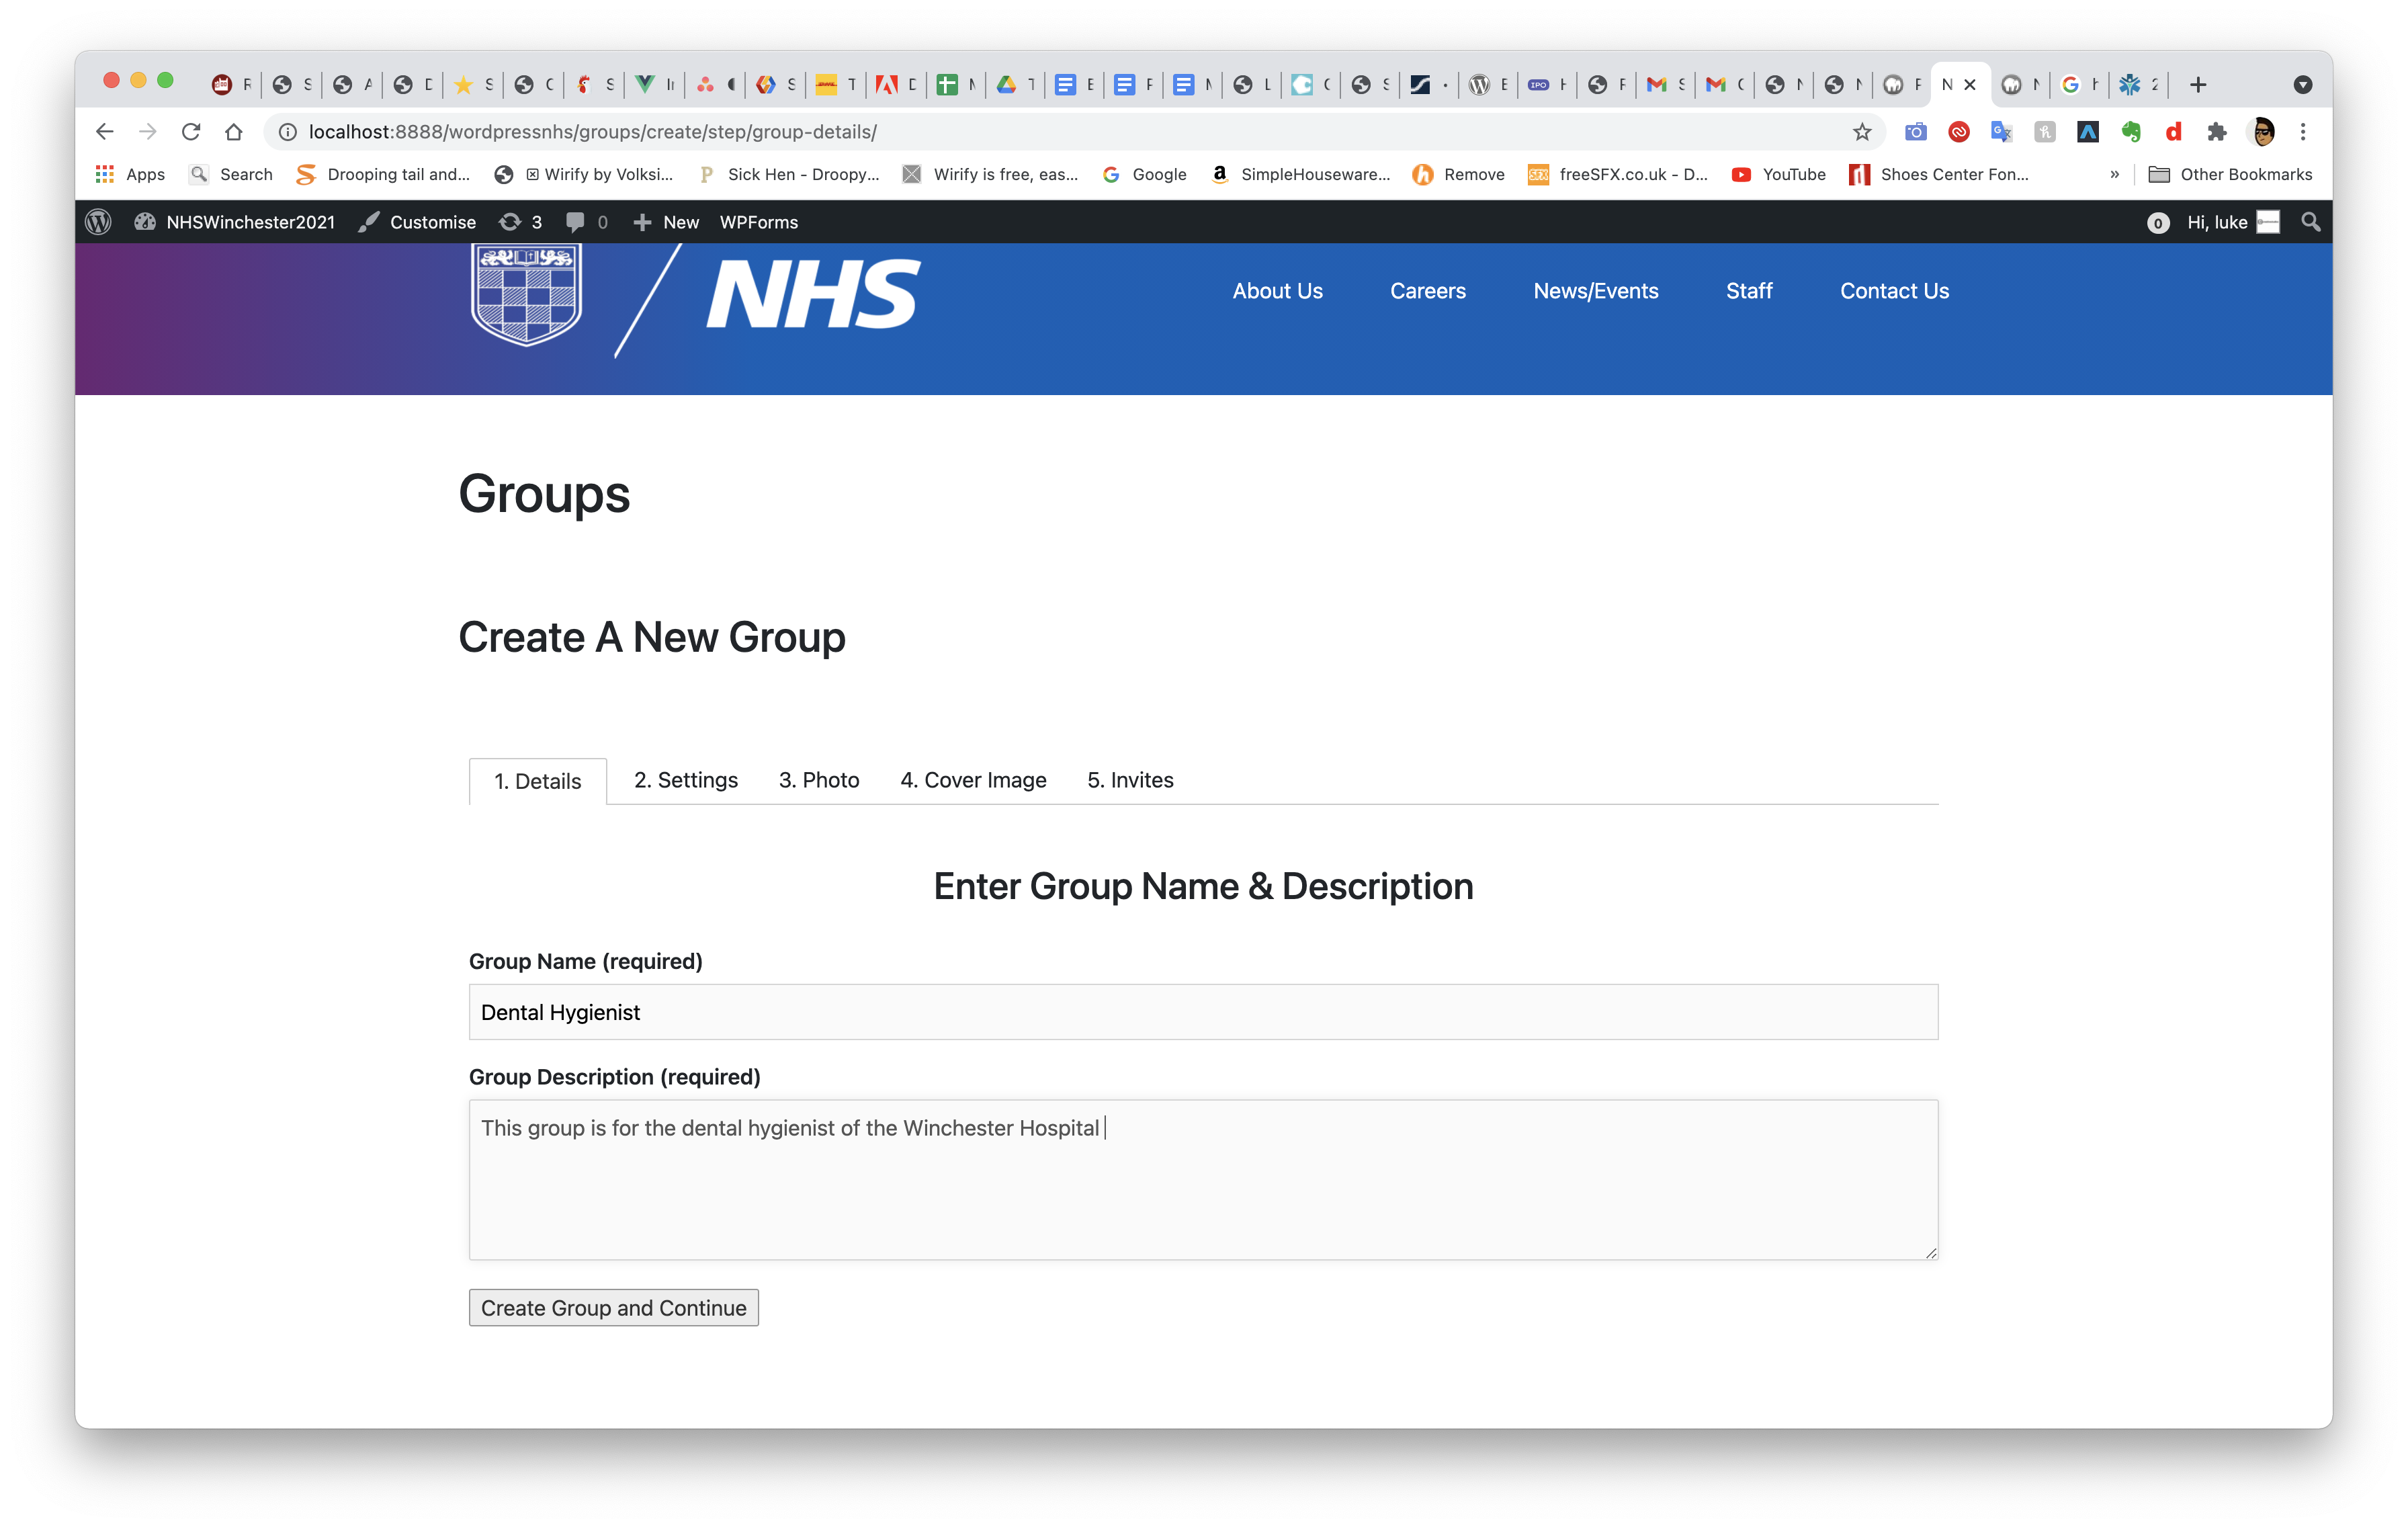
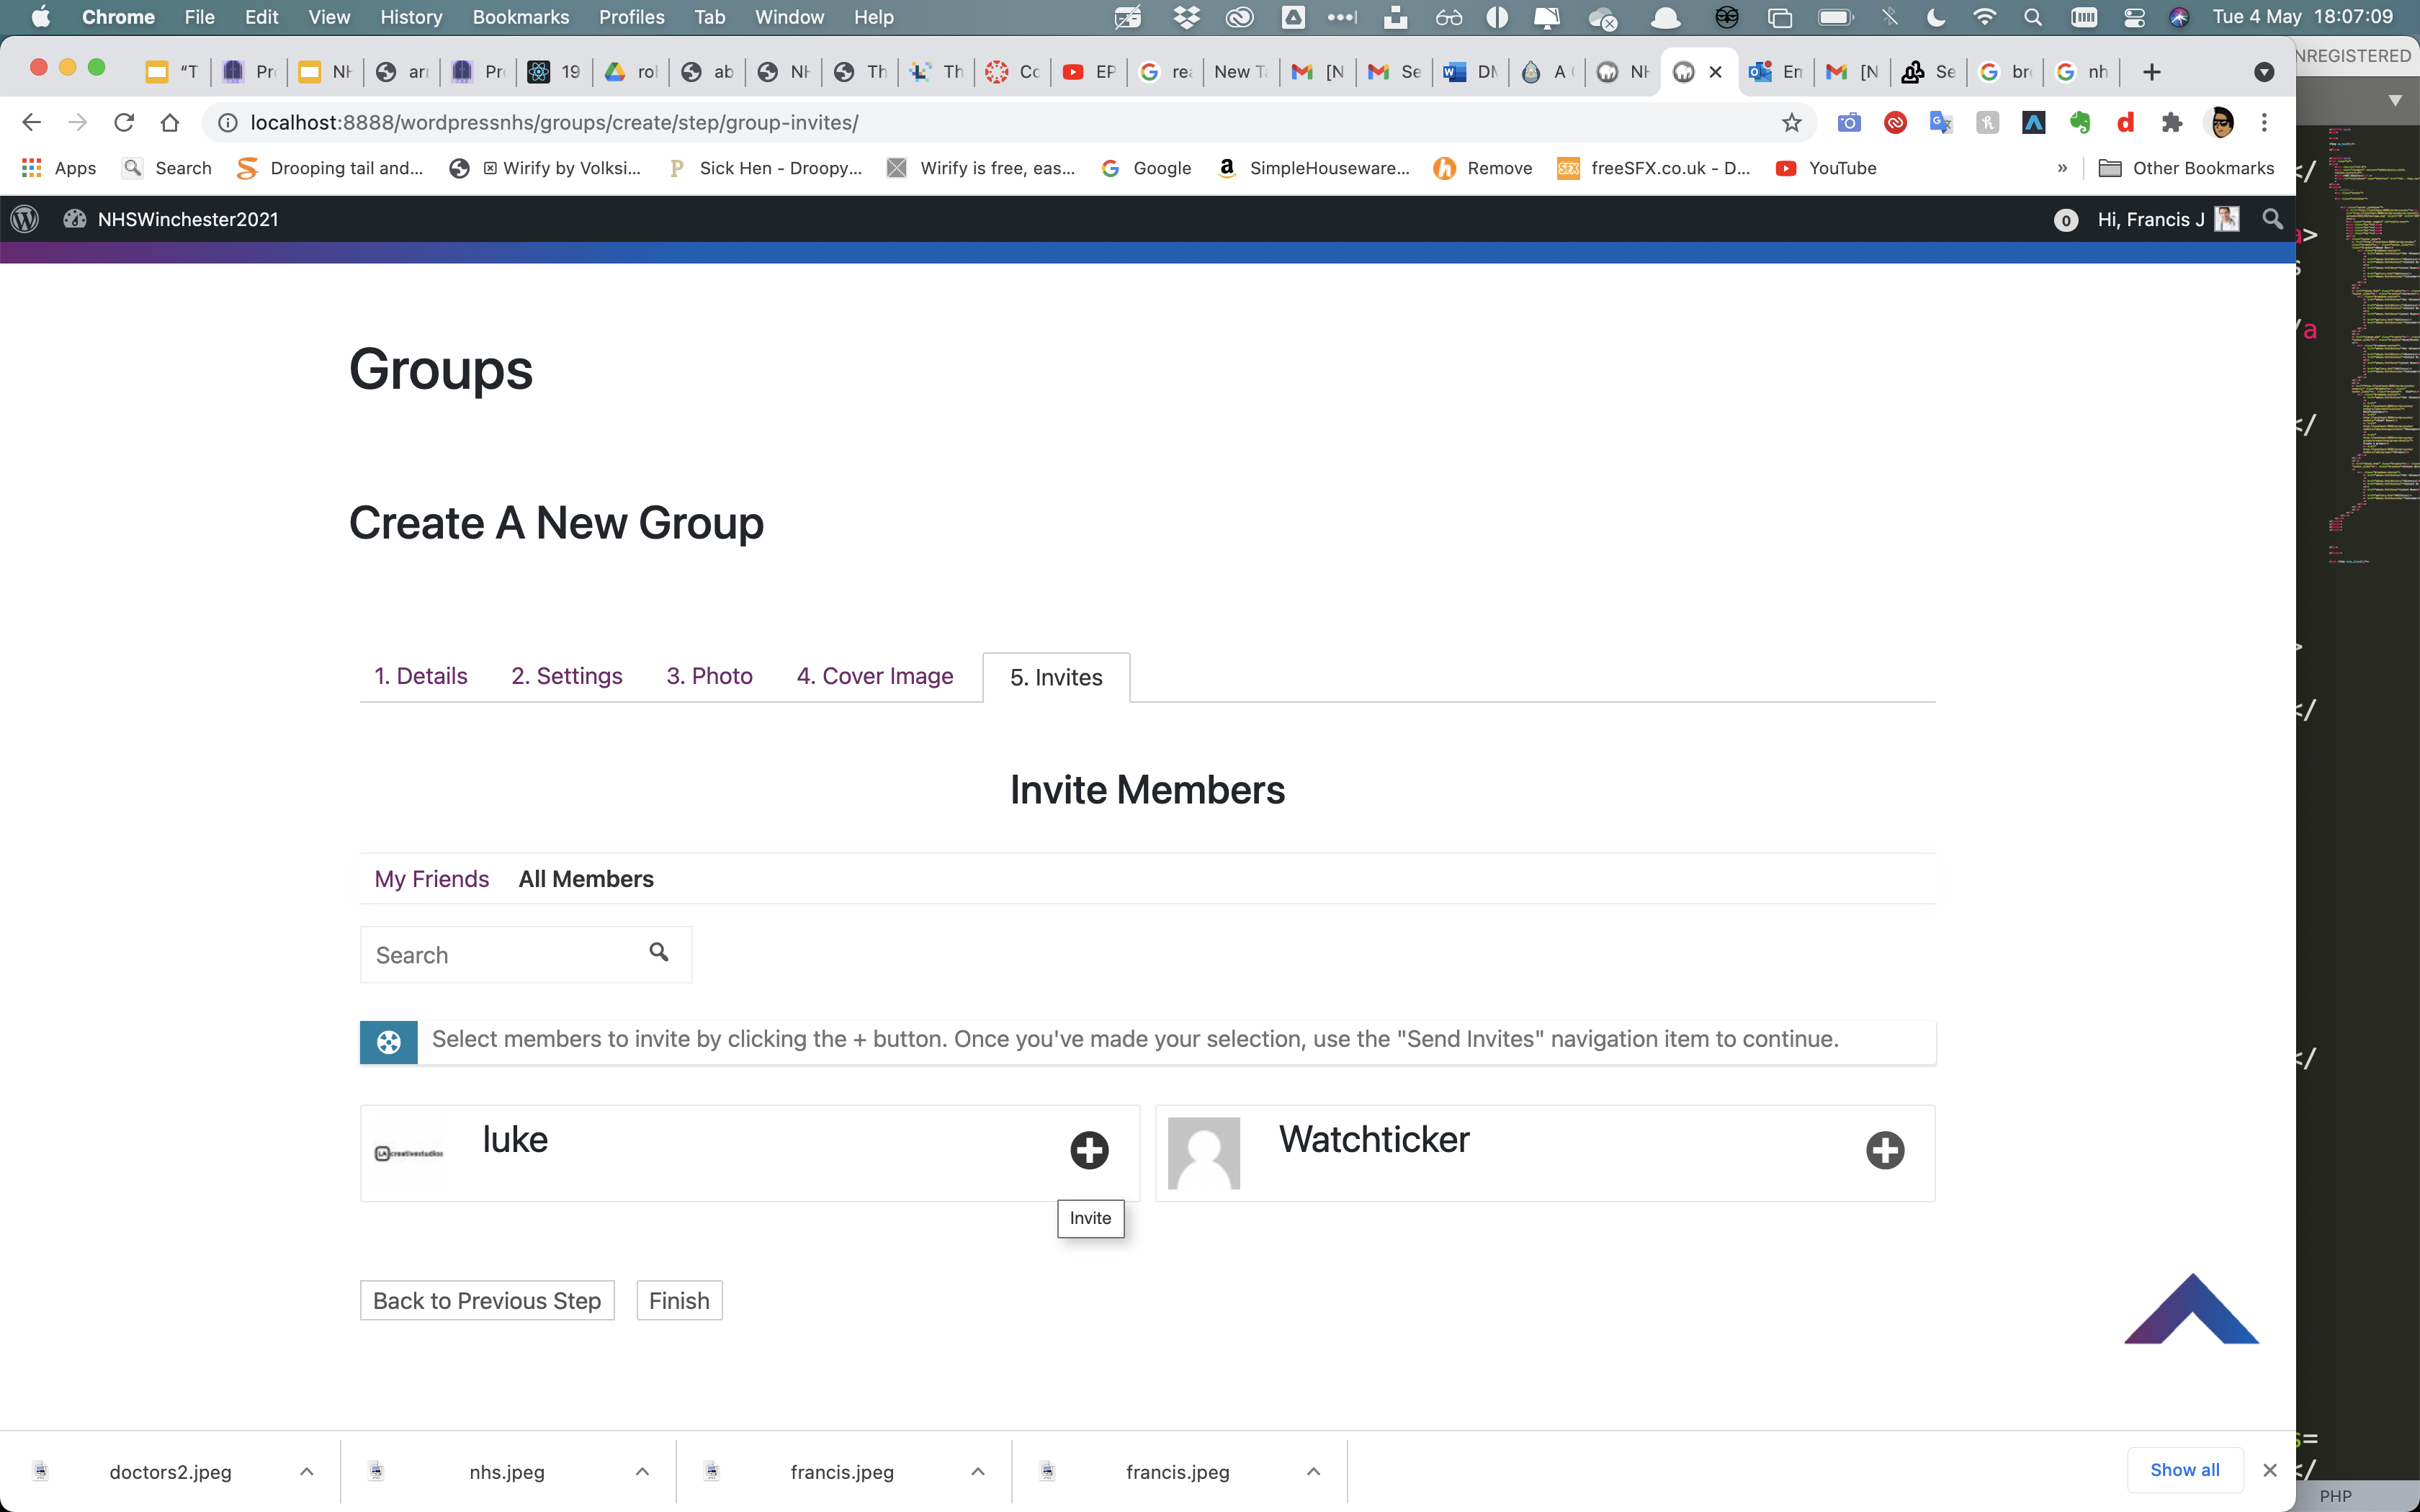
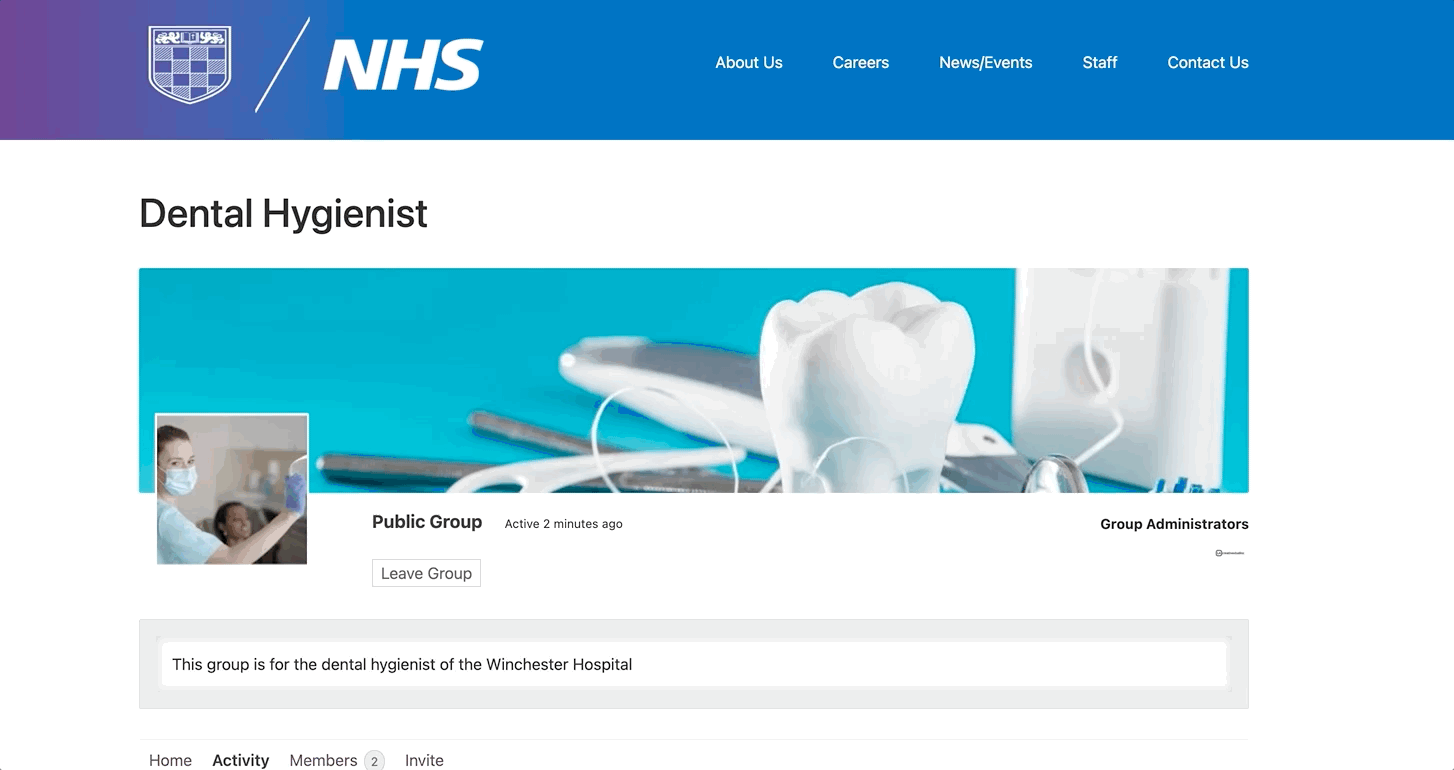
The key change that the client wanted was the ability for members to make their own groups. This was something that I felt was very crucial to implement and make it possible for for the user to do so. I therefore created a group called, 'Dental Hygienists' to allow for staff who work in that specfic area within the NHS to be part of this group.
I then enabled the group to be made a public, to allow for all users to join. On the other hand the group settings allow for private and hidden groups to be created with a selection of either admins or all group members to be added. This is a great addition for the staff as it means that certain individuals can have their own groups that may be up in a higher positions such as accounting or management, that require the group to be private unless invited.
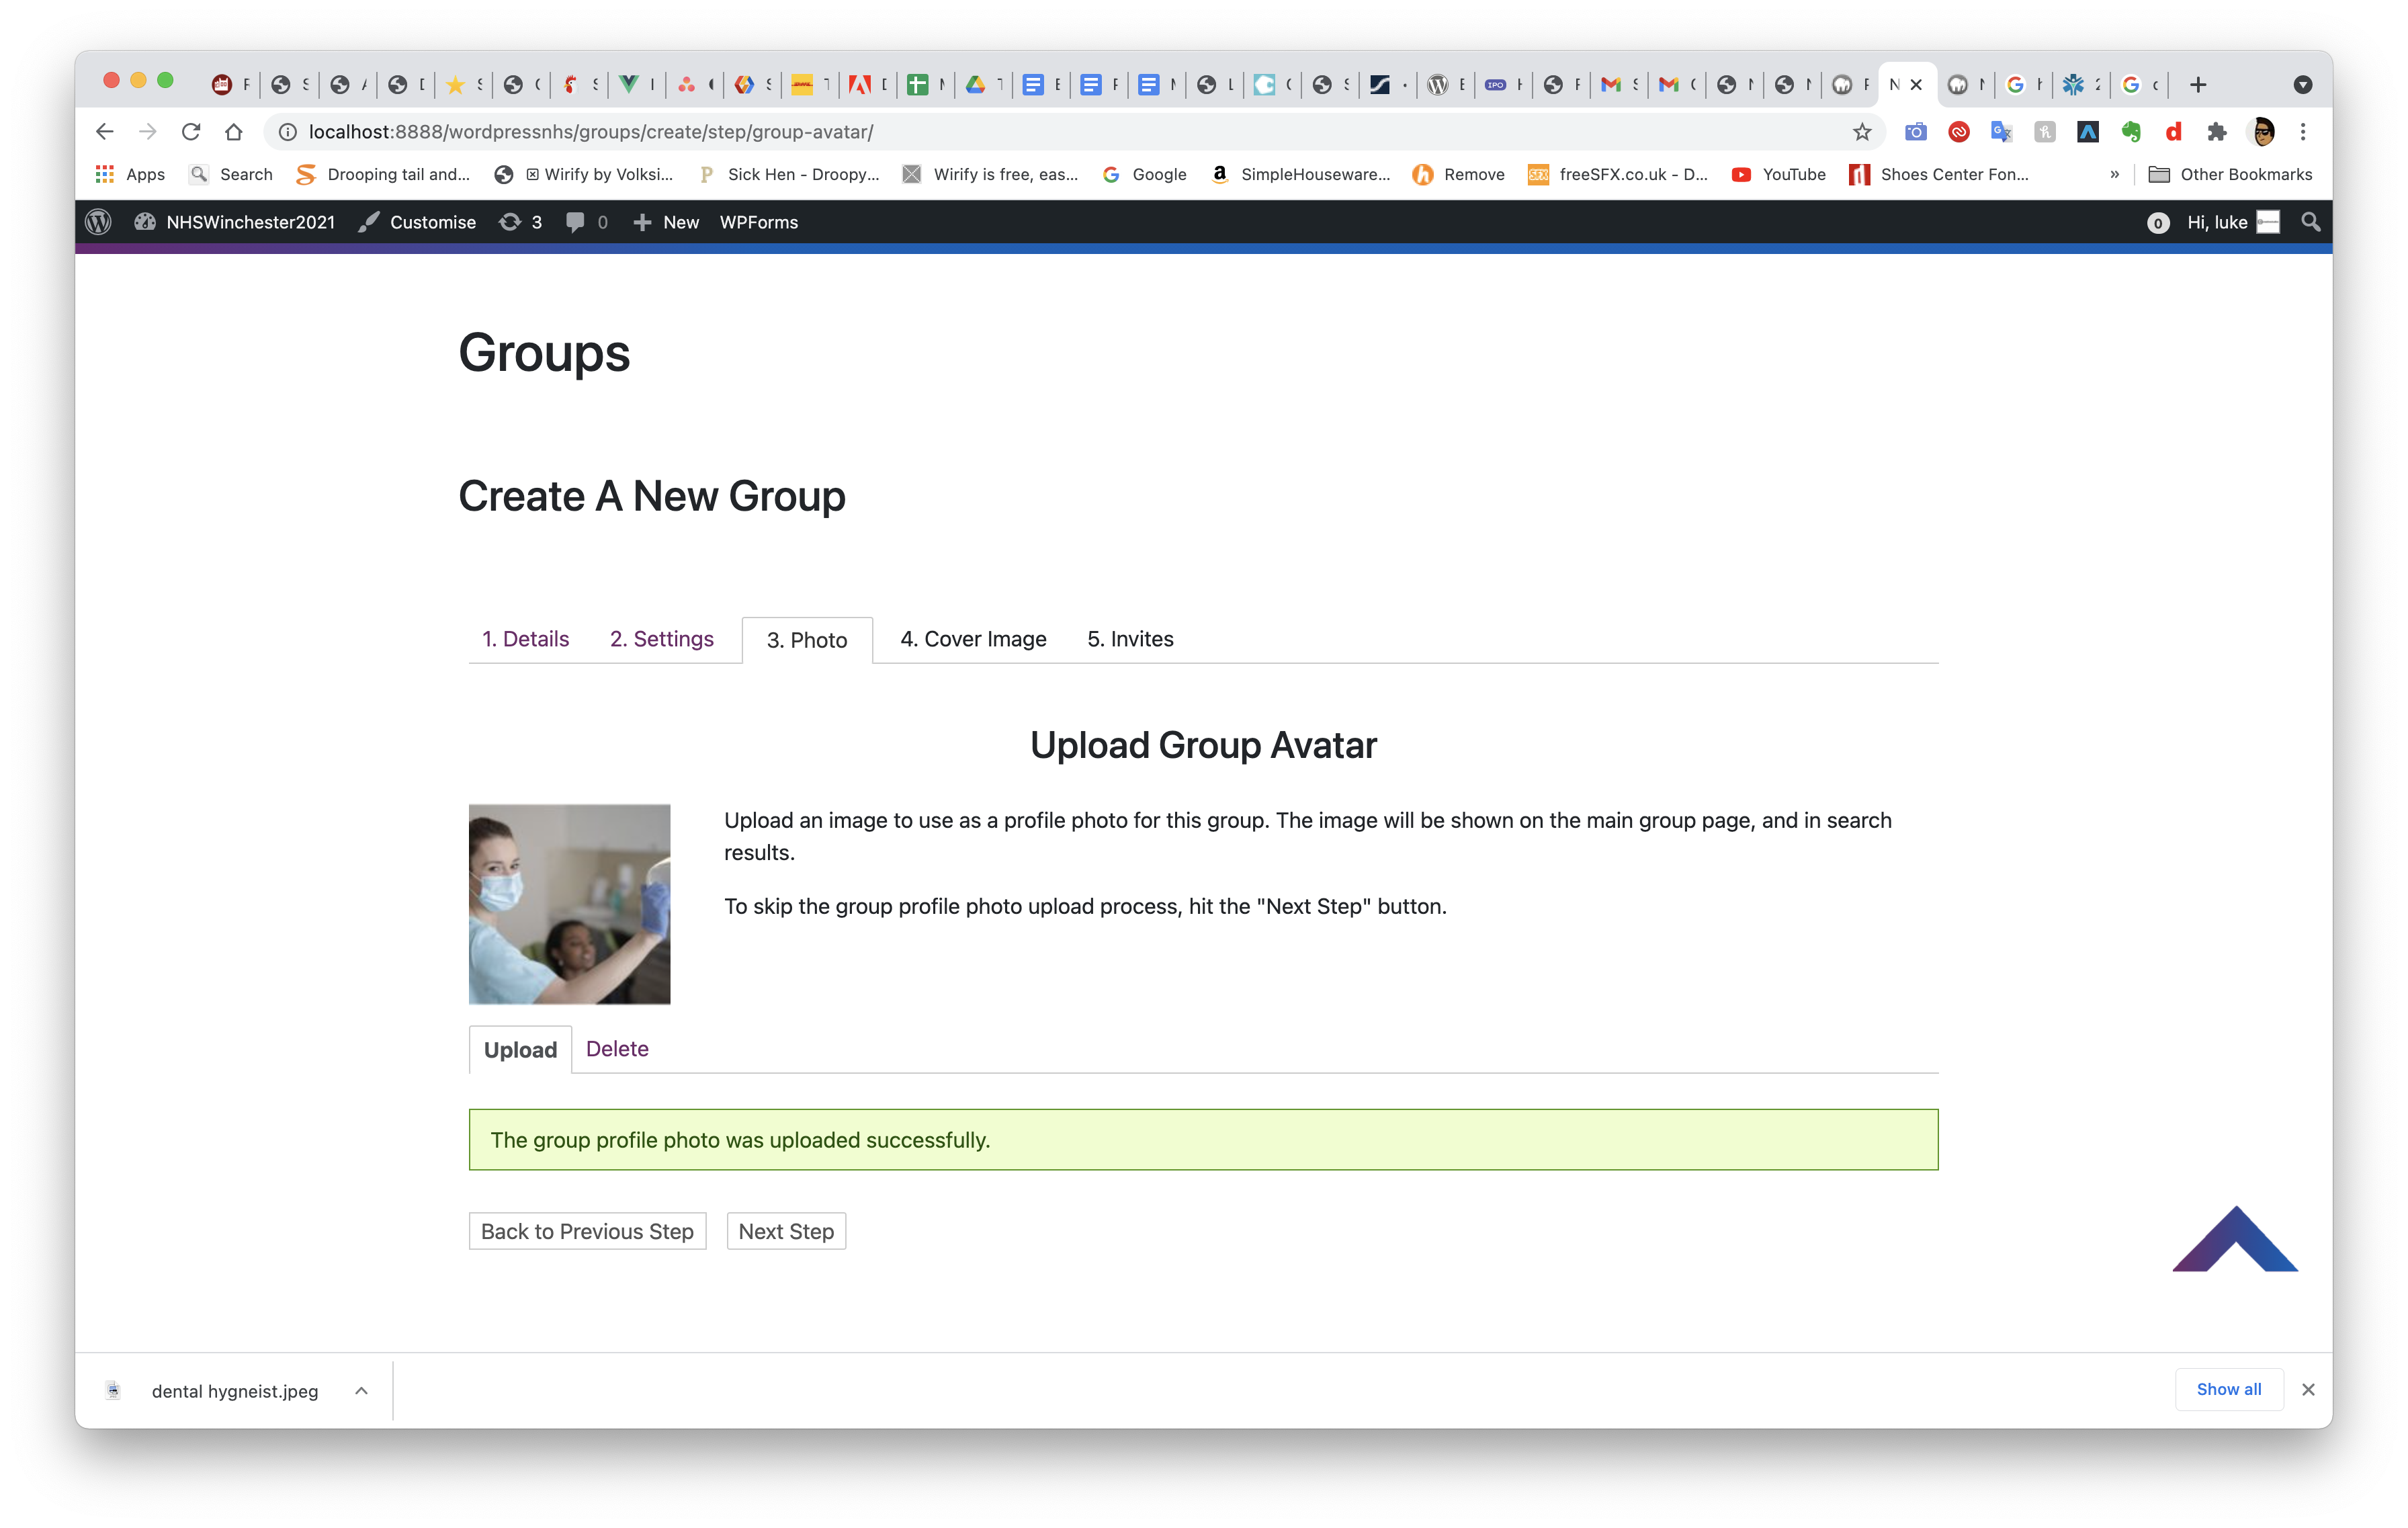
Next I added in a group avatar of a NHS dental work are operating on a patient. This is a clear indication that this is a group for a dental practitioners.
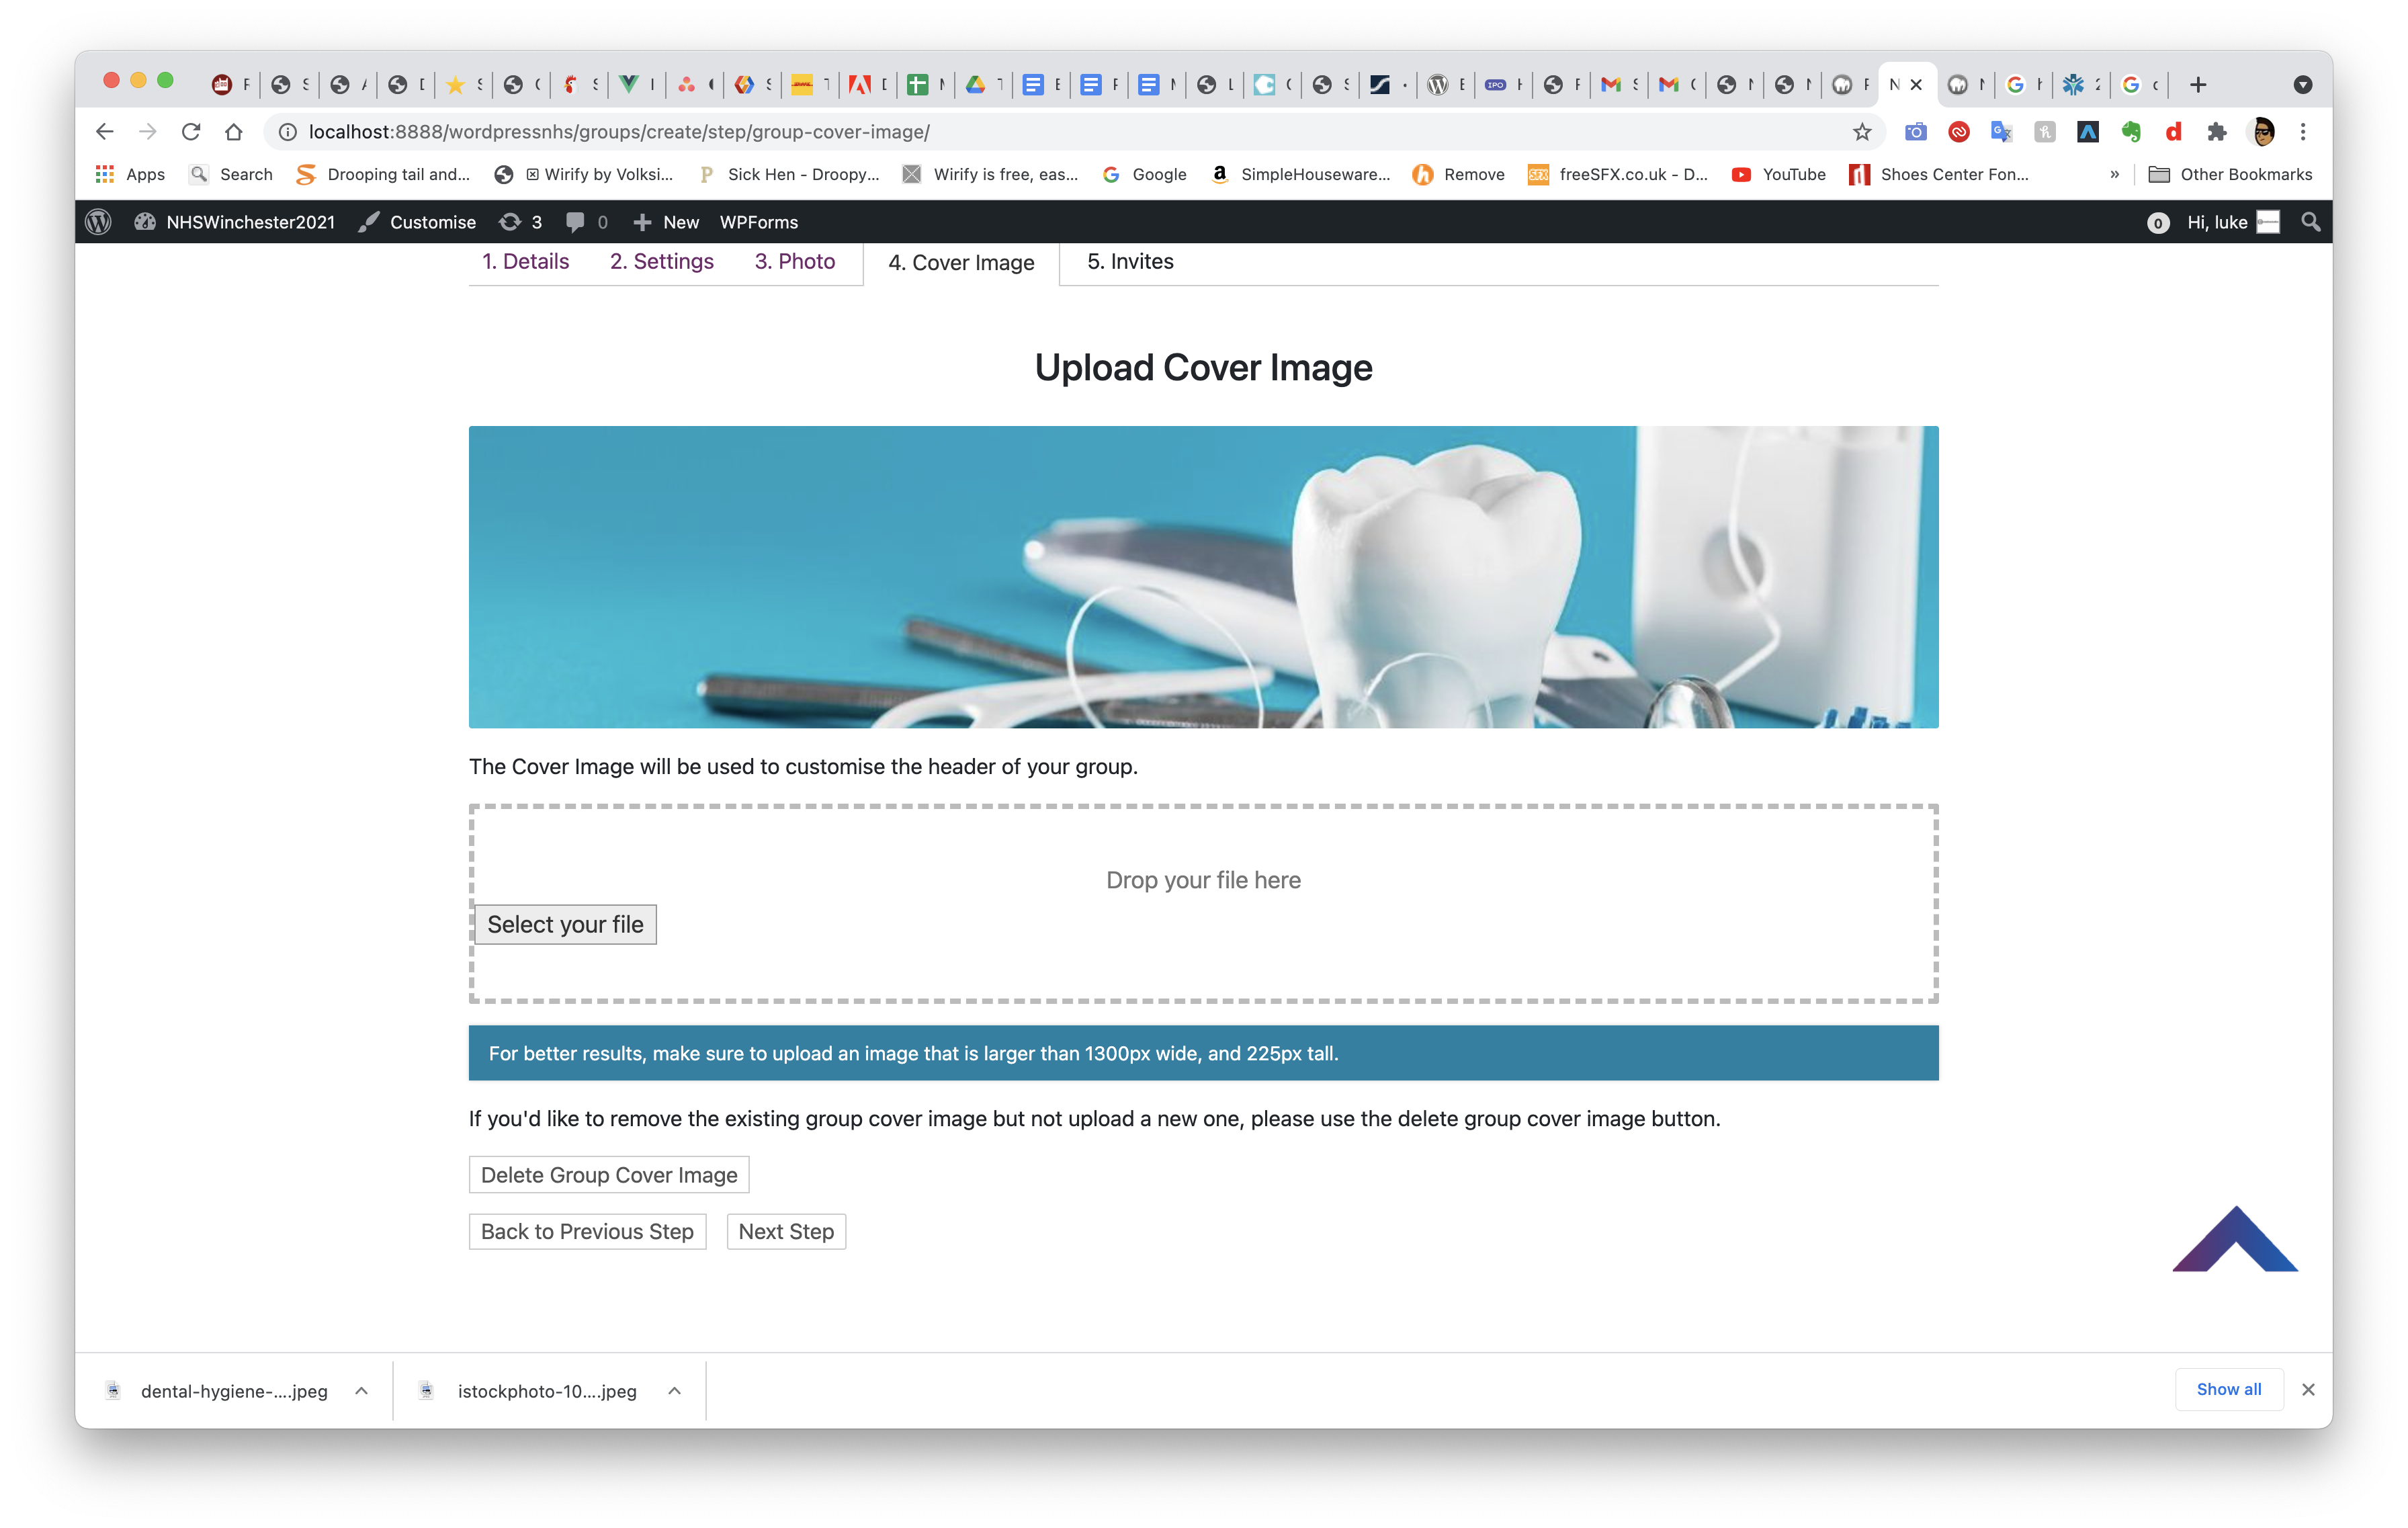
I also added in a cover image of images of a typical dental hygenist's toolsets and a tooth. These images can be taken down and replaced by the admin who made the group.
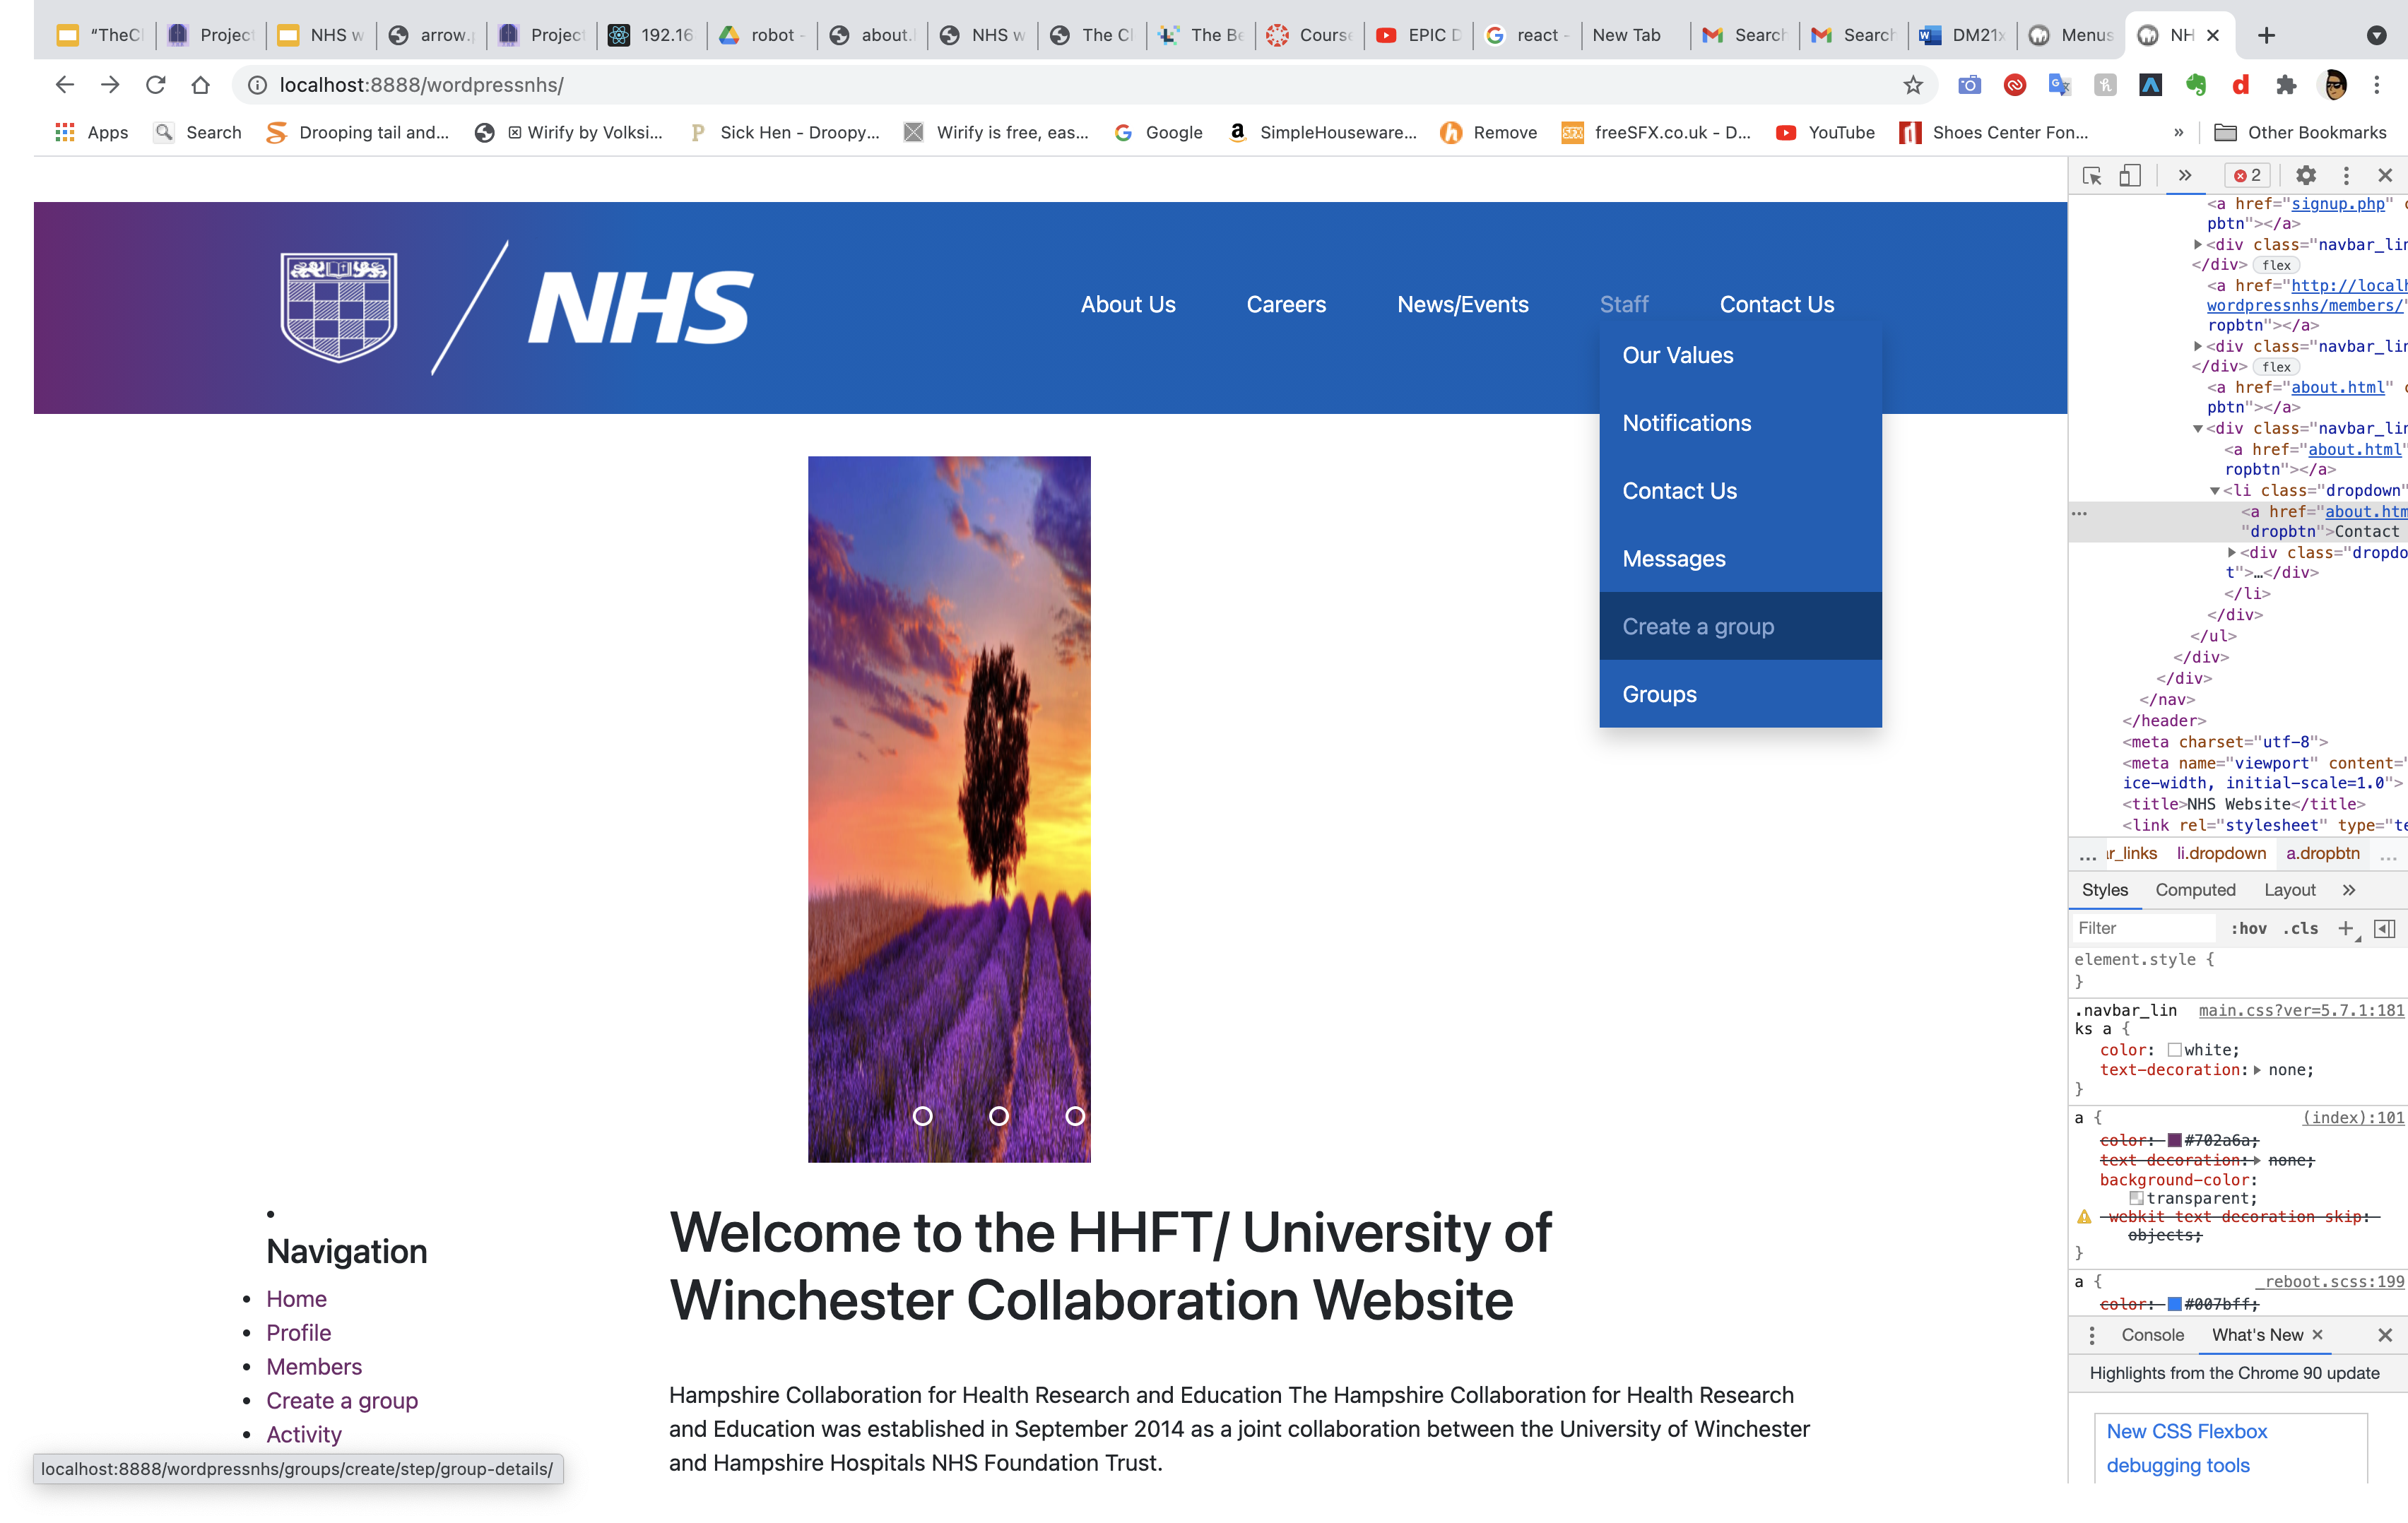
Next i added the ability to create a group from the drop down staff menu.

After adding the details of the group, it then has the ability to invite people to the group who are either your friends or members. This allows for users to directly invite people who may be their colleagues at work. That invitaion will appear in their notifications tab.
Within the group people can share updates about the work, as well as replying to those comments and ability to search comments,. This allows for regular updates from all members notifying the staff about a potential issue announcement or genuine consensus check on staff.
This highlights the ability to go into the members tab and to add a user as a friend (in this case logged in as 'Francis') where I then went into their groups and found that they were part of the dental hygienist group and there then joined the group. This enables mutual friends to view each other's profile and join groups that they are in as well.
I then added a profile picture for the account I made named Francis in order to highlight the ability to customise each profile.
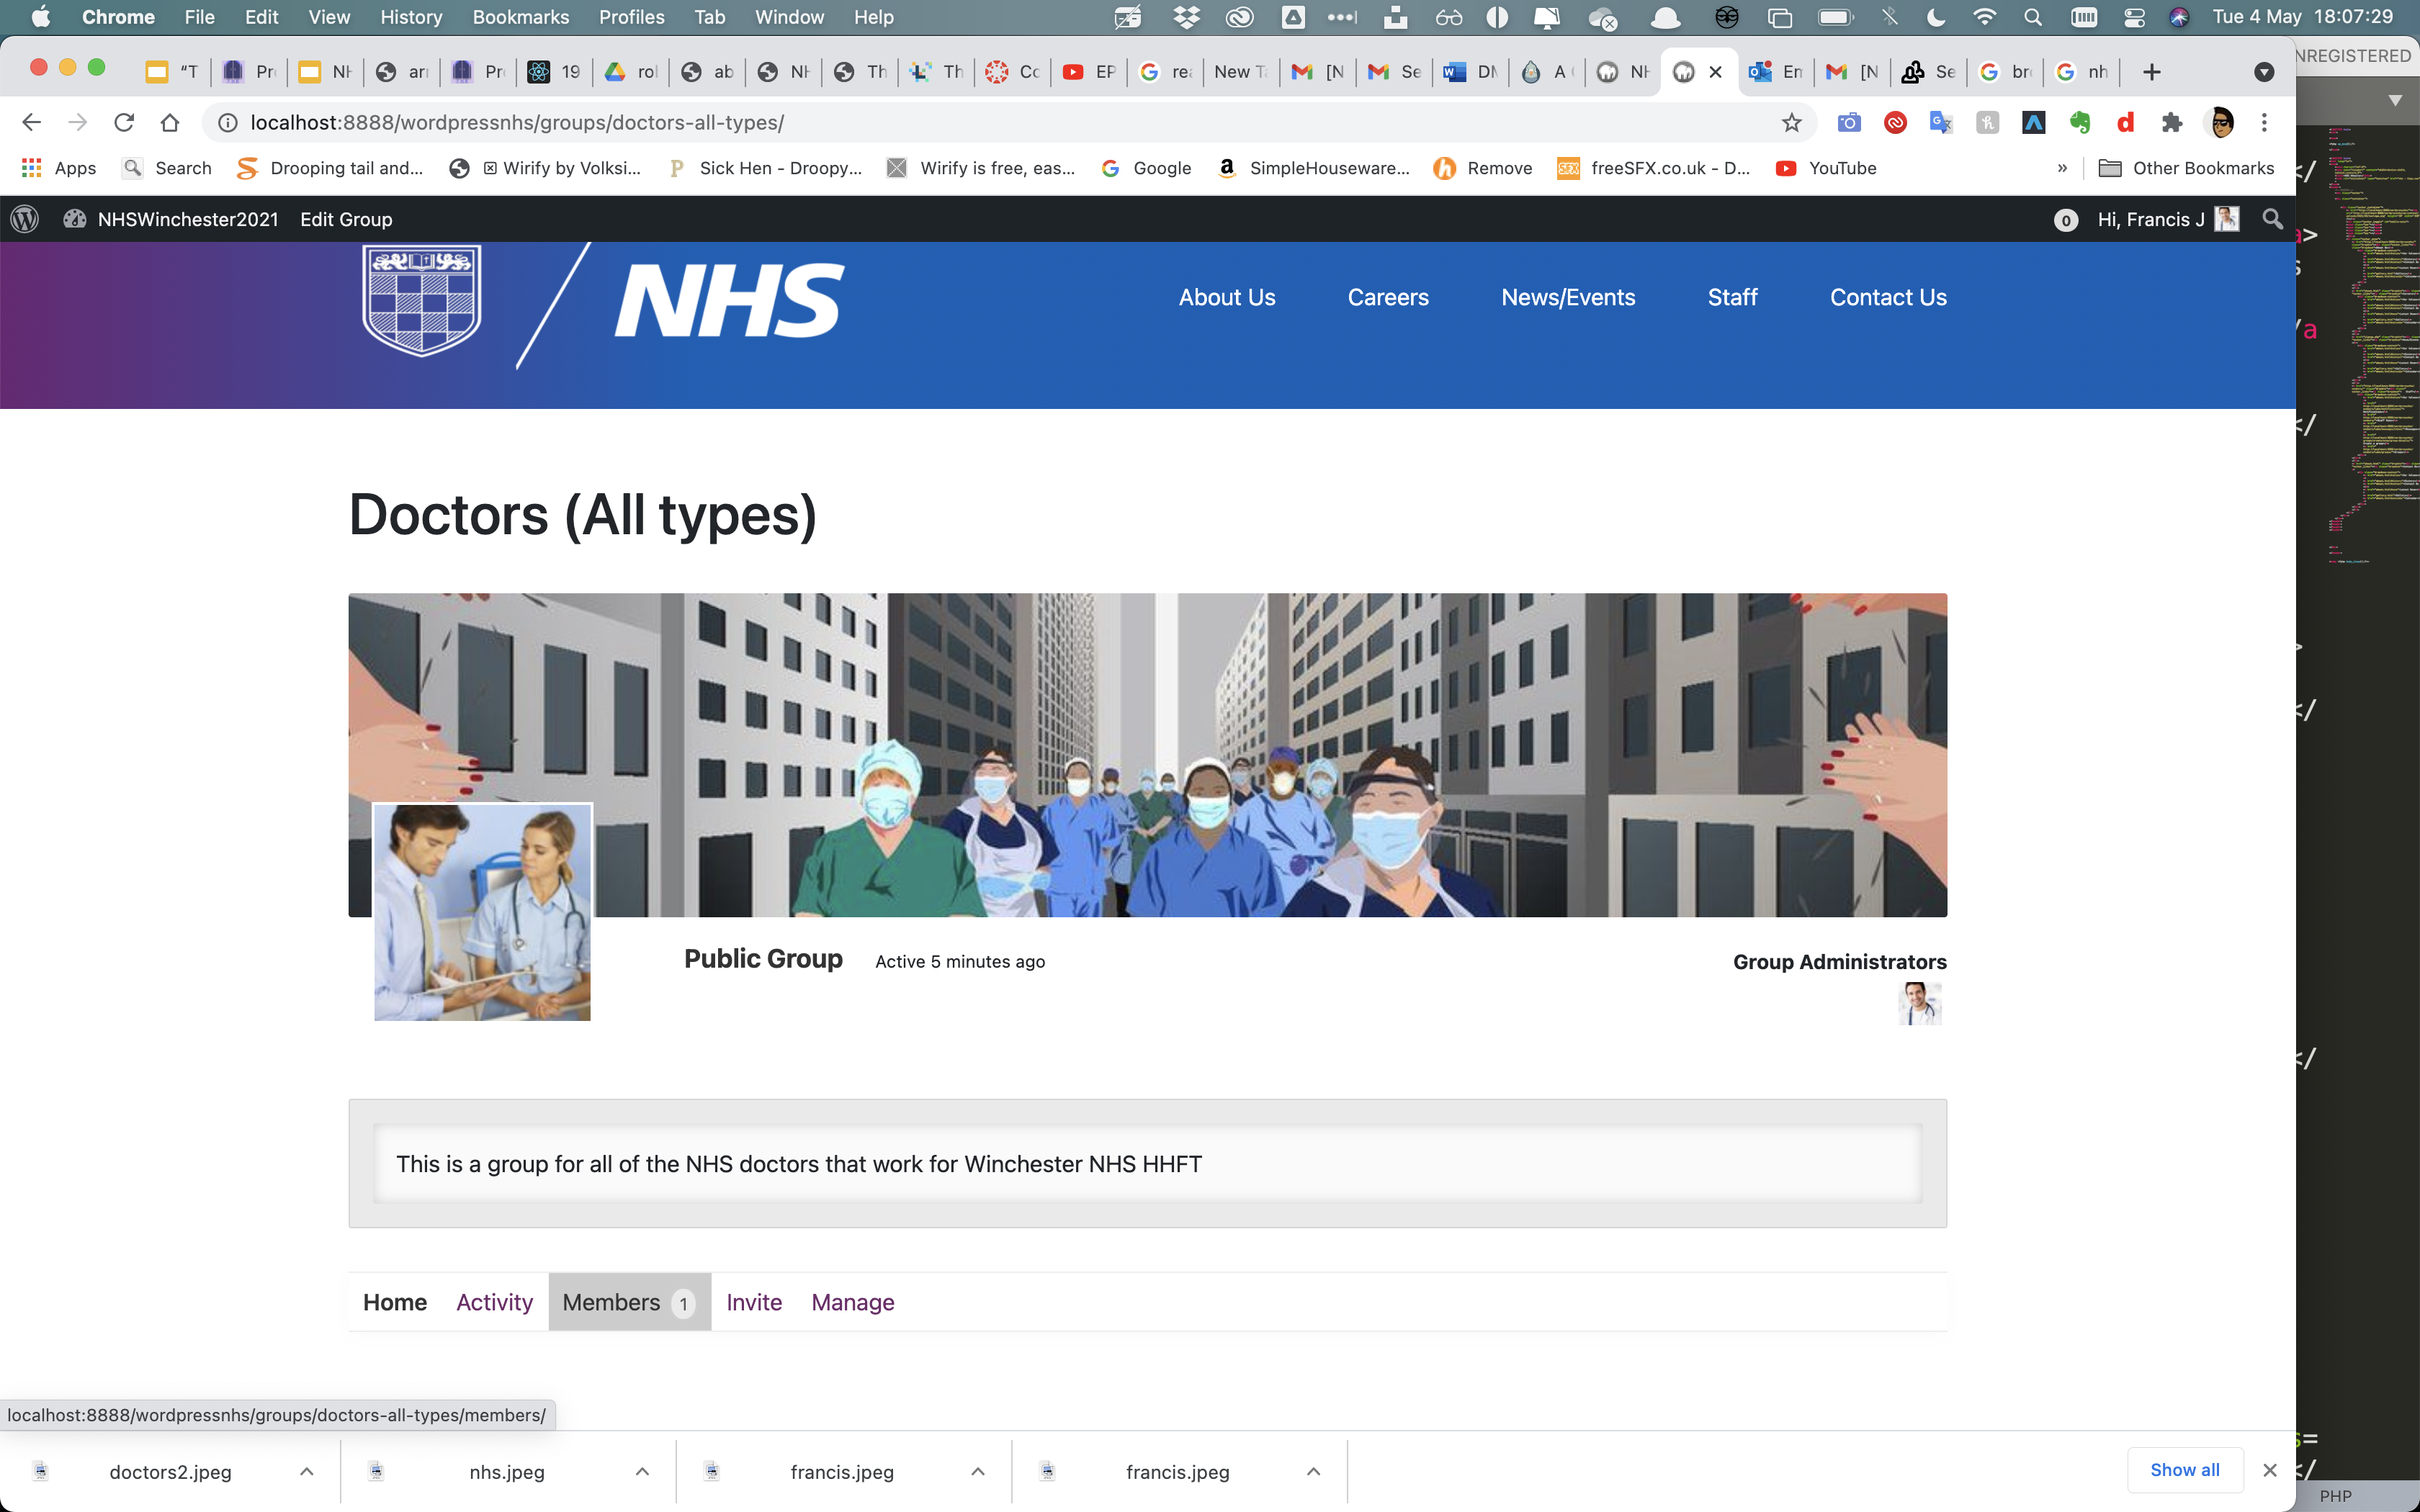
I then made a final group for all of the NHS doctors aimed at being a general information point for all staff.
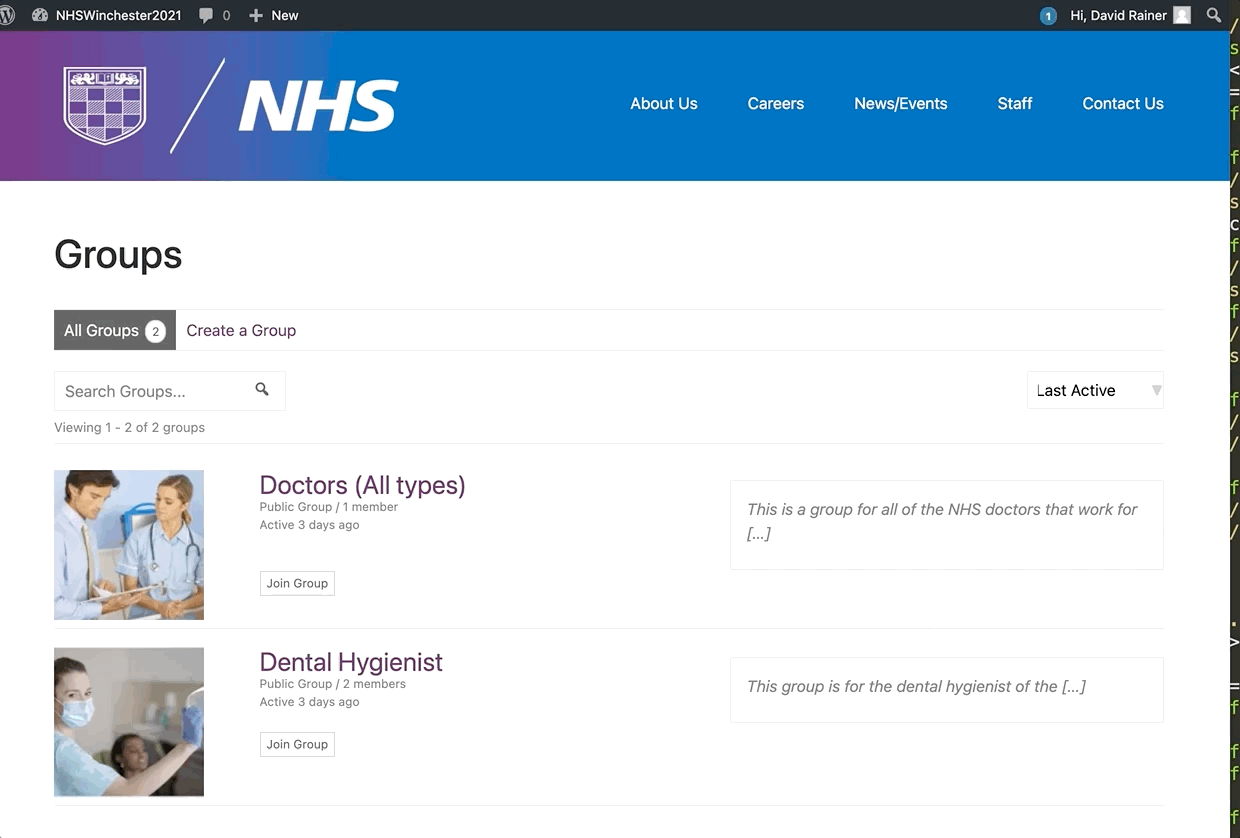
Finally I added the ability for all groups to be reviewed where they can search for a group and then manually join that group and view who is part of that group. On the groups menus it contains a small bio giving information on who is the group is for and what it is about.
Section 11.5- Client Feedback implementations, Bios
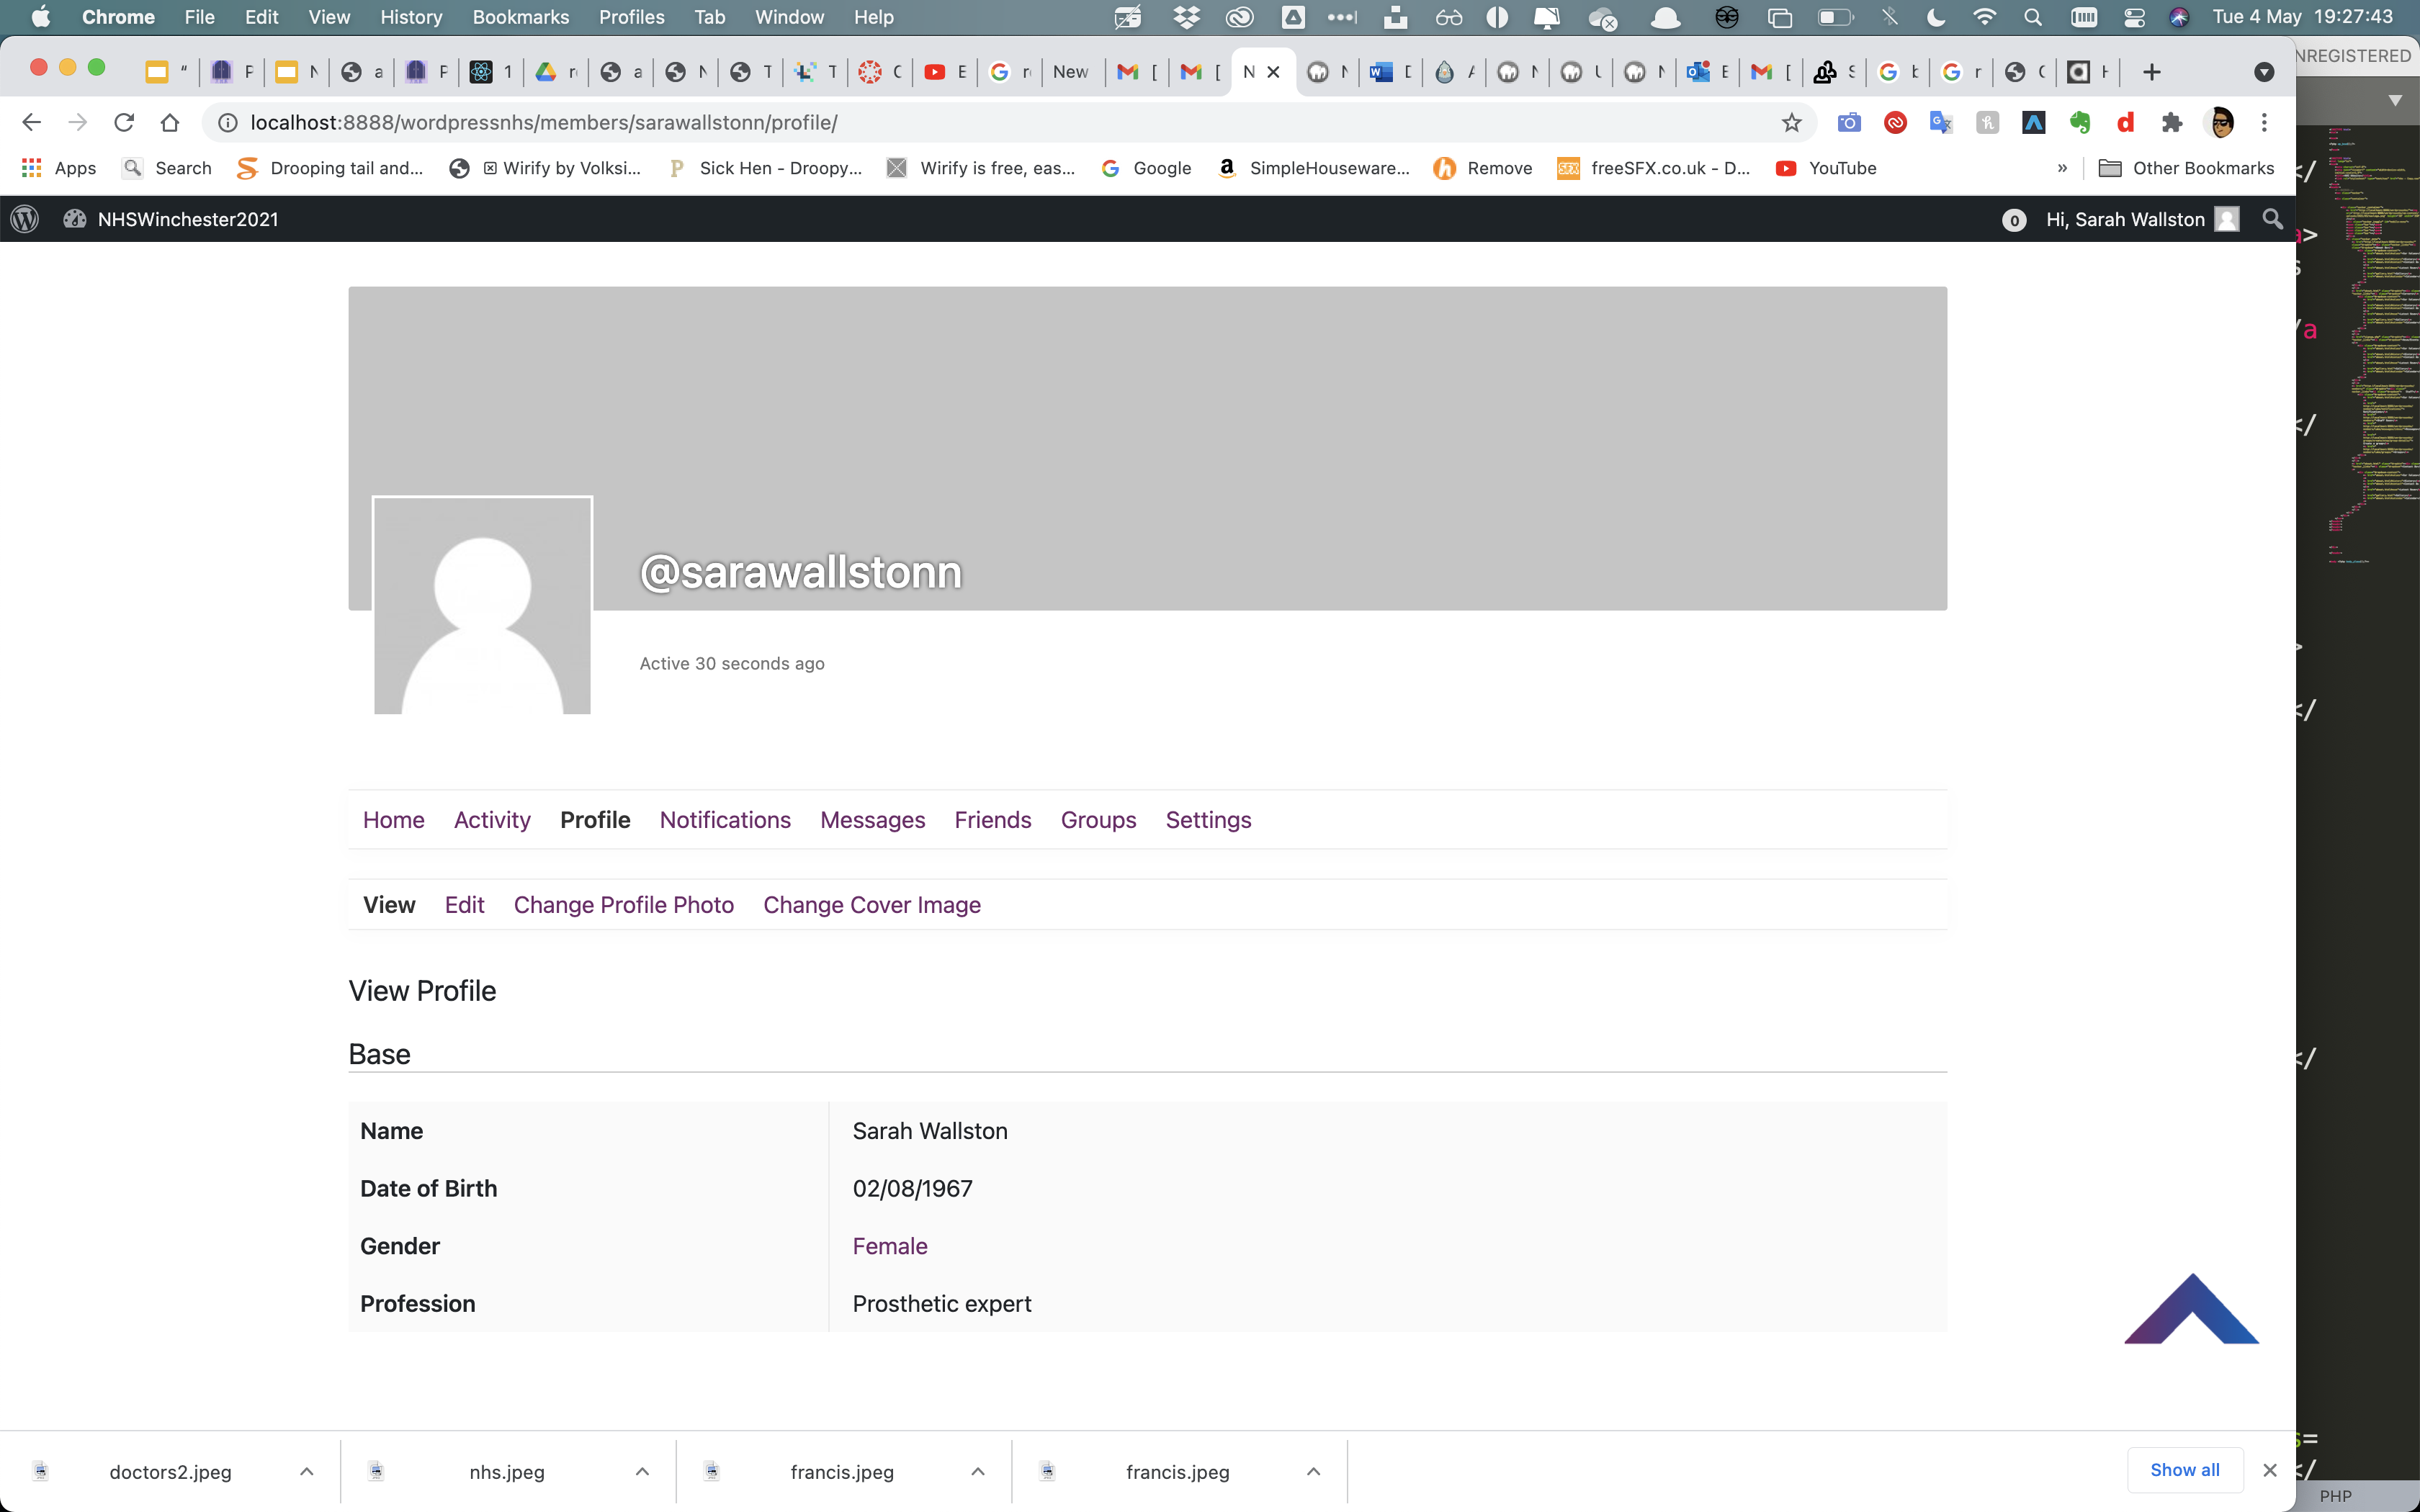
The final change that the client wanted, was the ability for bio's to be added to each profile. This was crucial in the ability for other staff to know who was who and what their role was and is within the NHS.
therefore I made it compulsory for users to talk about the date of birth, agenda and their profession within the NHS during the signup process. This eliminates possibility that someone decides not to enter that information.
When reviewing Sarah's profile and you can see that the key information is there for all to see.
Section 12- Handover document:
Documentation
Section 13- Conclusion, final thoughts and link to website
NHS Website
This project has been a huge opportunity for myself to build a functional, social and informative website for the NHS and Winchester University. As this has been something I have never done beforehand, I am extremely happy the way it turned out despite quite a few challenges along the way. I've learnt a huge amount on PHP and the ability that it brings when developing websites, as this was an area that I was very sceptical and unconfident in starting beforehand as I had no prior knowledge in how to build such a big application for one of the biggest companies/ National treasures in the UK, the NHS. I believe that I have met the client brief and what the client requested when starting the project, as well as additional functionality is that the client asked for at the review stage of the project. Thankyou.